I did it! DIY glue ons after farrier trims

I took SO much toe off the horse just to get here! I even glued the shoes and then rasped a teeny bit more toe off to keep them from sticking out so far. I see now that I could’ve probably taken more, but we’ve been very conservative with him so far. Next trim will be more aggressive (but certainly nothing crazy).

Honestly, if these stay on through a hurricane, I’ll be psyched. They have already made a huge difference in his comfort, with the added bonus of one less thing for me and my BO to take on and off every day! That’s worth the learning curve and the hassle for me. Now, if I had a fabulous farrier here every 4 weeks and no hoof problems, I might be singing a different tune.

On another note - I think he’s still landing a teeny bit toe first. Nothing like he was, but a bit. He’s got some funk going on in the feet that I am getting after to start, and increasing the breakover should help as well. :crossed_fingers:t3::crossed_fingers:t3:

3 Likes

Well, we have a casualty :joy:. The first shoe - objectively a poorer application than the second - got tossed today. A bit of tearing on one cuff but the glue came entirely off the wall… application issues I think.

I’ll reapply when my tips come in. This does give me a chance to do an oxine soak or two though!

3 Likes

The highs are high and the lows are low. :sweat_smile:

1 Like

Does anyone have success with glue on actually staying on???

Haha this was application error. To be fair, multiple sets of nail on shoes lasted the same amount of time (a matter of days). At least this was only ONE shoe - and the difference in glue color between the shoes tells me I didn’t get the first one (my first EVER) set properly.

I know several posters here have had success, as well as a handful of people IRL. My horses are currently weathering a tropical storm following weeks of nonstop rain, and very few shoes are staying on anything that doesn’t live in a stall 24-7.

1 Like

I guess it must be the glue? I know using shoe goo to keep my shoes together lasts just fine until I venture too much into wet morning grass.

Nail ons aren’t lasting either, is what I’m saying. It’s been so wet here, and my horses live out.

This is almost guaranteed to be me not curing the glue correctly, as I said. That, plus the mud, just let him pop the shoe off easy peasy. I also had double bell boots on the other foot but only one on this foot because the second one broke.

IME watching others IRL - glue ons will stay BETTER in wet conditions, if you use the right glue and cure it properly. Since these have a cuff vs 6 measly nails, there’s a lot more to hold the shoe on and hold up against the natural swell/shrink cycle of hooves that see nature outside the stall and arena.

TBD though! It’s a learning curve - and what works for one person in one climate and management situation won’t necessarily work for someone else. Just like anything!

1 Like

Oh. I have been experiencing this with nail ons in 1 horse suddenly due to( finally) no drought conditions after 2 years where the shoes stayed on beautifully when we had massive drought . I am using hoof sealant ATM ( 2x week) and it seems to have done the trick( so far).

How do you cure glue on a shoe?

1 Like

Curing depends on the glue. I think I put too much glue on and didn’t wrap it down well, and may not have scuffed the foot up quite enough. It just didn’t bond to the foot perfectly, and came off cleanly still stuck to the shoe with nothing on the hoof :joy:

Sealant wouldn’t be a bad idea, some people use a thin layer of superglue to seal.

1 Like

You guys have my admiration for even trying it. I lack the patience and skills to even try!!

Hope it gets better for you with time and experience. At least 1 shoe is still on.

1 Like

Was the glue still a bit sticky in spots, and/or could you smell the chemical smell a bit? If I had to guess, you didn’t purge enough glue to get both parts mixing evenly. I like to dispense a bit (it feels like a lot, but it’s still less than what’s wasted if I don’t get it mixed right at all LOL) onto a paper towel or cup before I put the tip on to make sure both the glue and the activator are dispensing. Once I see both (the cream-ish glue and the white-ish activator) I screw on the tip. The glue will come out kind of greenish (to my eye).

When I have issues with equilox, it’s almost always the first shoe and it’s almost always because I was too rushed or too cheap to expel glue first!

2 Likes

Huh - it never turned greenish! But definitely had a chemical smell and was still sticky on the first foot. I expelled a little, but not enough apparently!

Also, how tf do I get this glue off the cuffs to reuse the shoe?? :sob: Is grinding it off the only way? I ordered a second set of shoes so I don’t have to do this when I reset, but they were out of stock everywhere so idk when they’re coming in. I got basically nowhere with sandpaper, and there’s so much glue on the cuffs I think the Dremel will take a lifetime. I’m eyeing the angle grinder now, but I don’t want to grind off the little teeth that give space for the glue…
I’ve never tried this with this particular glue, but keep in mind that you can get a million different heads for the dremel. I have used a dremel to cut through metal before so I’m sure it’s up to tackle glue if you get the right head. For such a small area I’d be wary of using the angle grinder.

1 Like

Good points! I’ll try the Dremel first, I have a rasp bit and some different sanding ones.

Removing the glue is terrrrrible. I used a combo of shears, the Dremel with carbide burr attachment, and foul language. In your case where the glue stayed on the cuff, I’d probably just Dremel out the holes and smooth the glue since Equilox bonds to itself well.

2 Likes

This is probably what I’d try, too. Full disclosure, I haven’t really tried reusing the cuff shoes yet. I have a bunch of them sitting around waiting for me to have the mental fortitude to clean them up! I’ve heard very good things about the carbide tips from Amazon.

Make sure to wear a respirator!!

1 Like

I’ve had luck drilling out the holes and sanding everything down - I was able to peel some of the glue off entirely.

Side note - how much glue am I supposed to be expelling to prime it? Is it really supposed to be green? I’m still experimenting but I’ve not had it go green at all. I did realize one side of the nozzle was clogged and that probably contributed to the loss of the shoe. I cleaned it out and squeezed like… an eighth cup out? It never went green, just kinda grey. It dries creamy/yellow.

FWIW - night and day difference in his comfort with 4 shoes on. 10/10, in that regard!

2 Likes

I have no idea how much glue to expel. I realized I’m probably not expelling enough either. But I haaaate wasting it.

1 Like

Sorry for the confusion re: colors! Greyish could be a good descriptor, too. I’ll try to get pics when I glue again, hopefully this weekend. It does dry into a creamy color.

I just expel enough (without the tip) to see that both parts of the glue are coming out. You’ll see more of the thicker, creamish-colored portion, and a much smaller amount of the runnier, whitish activator. All told I think I might dispense 1tbsp worth or so? Could be close to an eighth of a cup on some tubes. Once I see the activator is coming out I wipe off the nozzle and apply the tips. I might dispel a small amount of glue from the tip before actually starting to glue, but just a short line.

If the glue is setting firm, you’re good. The issue I’ve run into when I haven’t adequately mixed them is that the glue never fully sets–it stays kind of sticky and runny.

1 Like

Okay yep - it definitely was a little tacky. In which case I won’t be surprised if he yanks the other one from my first round :sweat_smile:. That’s alright - it really doesn’t take long. I’m just hoping to get a full cycle out of the next application!

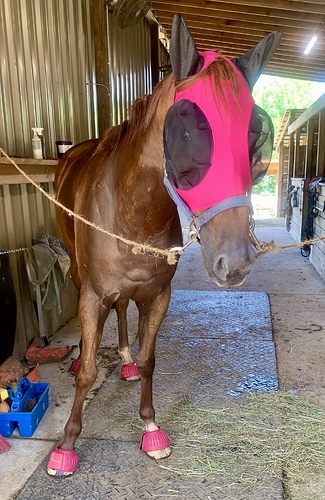
Don’t mind the mess in the aisle (bribed him with hay to stand still and was rushing to not get glue… everywhere) but here’s the man himself post shoe fix and hose off

2 Likes