My update today, is the shoes I ordered are too big by just a bit.
Stay tuned next week for further updates 

My update today, is the shoes I ordered are too big by just a bit.
Stay tuned next week for further updates
I swear that is one of the most annoying parts of doing composites… It’s rarely the right size the first time. Last time I made a shoe order I just bought three different sizes because BTDT, tired of waiting for another round of shipping.
I had that exact thought that I should have bought a few sizes and send back the incorrect ones. Oh well! Today was his gotchya day so we got to have a lovely ride instead. It was practically perfect weather, not too hot/humid!
In my case, the horse had two different sized feet so I ended up needing one of each - and I just kept the third size, because we’re also dealing with a lot of distortion so hopefully as we get that under control and the foot tightens up he will size down and need them.  It’s an expensive game to play!
I guess you could argue that it kinda worked out then!
I’m waiting to see if they have a US address to send them back to. If I have to ship them to Europe, I’m going to try and sell them on Facebook first because I’ll have to eat the shipping.
Anecdotal at this point because I’m just on the first round, but for anyone using superglue:
I went down a bit of a rabbit hole on super glue and found one that is a little thicker than the Bob Smith Industries one that everyone seems to recommend. I couldn’t really tell the difference when working with it, but we are at I think 4 weeks in now (possibly 5) and I’ve had zero need to reglue any tabs or anything. Usually I need to re-do a tab or two even if I don’t have a full retention failure. The STARBOND Thick is what I’m using. I ordered a 16 oz bottle, and a nice bonus is that it comes with several empty 2 oz bottles and extra applicator tips. The dispenser cap on the 8 oz BSI glue got really back with dried glue and was getting hard to use towards the end.
For gluing the leather pads onto the shoes, I switched to BSI IC-2000 glue, which is nearly black, and dries to more of a rubbery consistency, so it seems to be performing better with the deformation that happens with the hoof pressure on the shoe and pad. Unfortunately it only comes in small bottles, but it’s enough to do a couple sets of shoes. It seemed like with the more brittle glue, the pads weren’t staying really sealed to the shoe, so I had one migrate out the back necessitating a reset, and a couple others just collect some debris between the pad and shoe in spots where the glue failed.
It seems unlikely that I will actually need the smallest size for some time, but I’ve long since tossed the packing slip and the box so 
 if anyone happens to need a pair of size 5 easy shoe rollers, let me know. I don’t think they will fit any of my other horses.
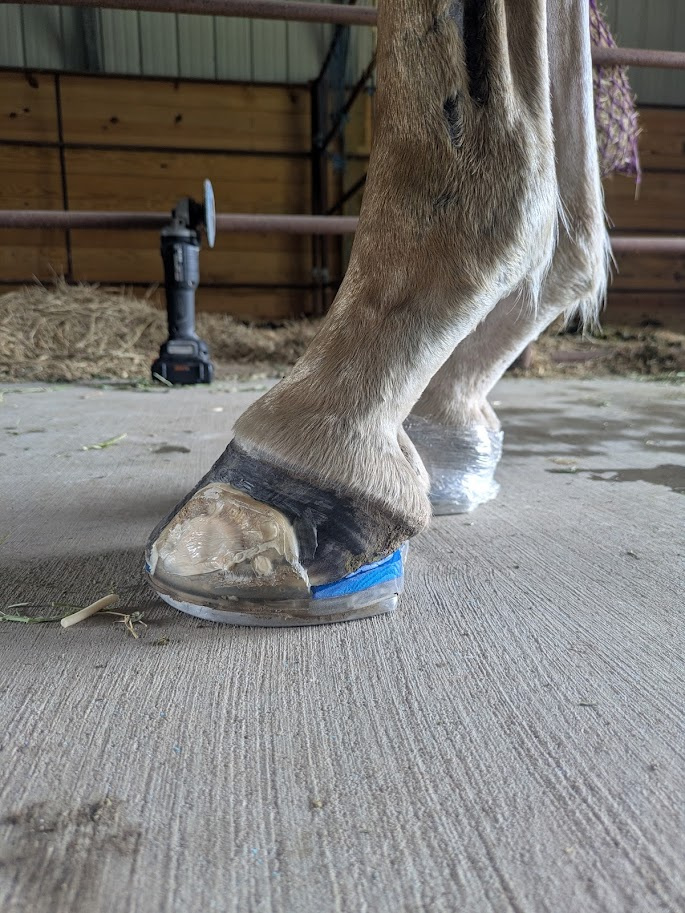
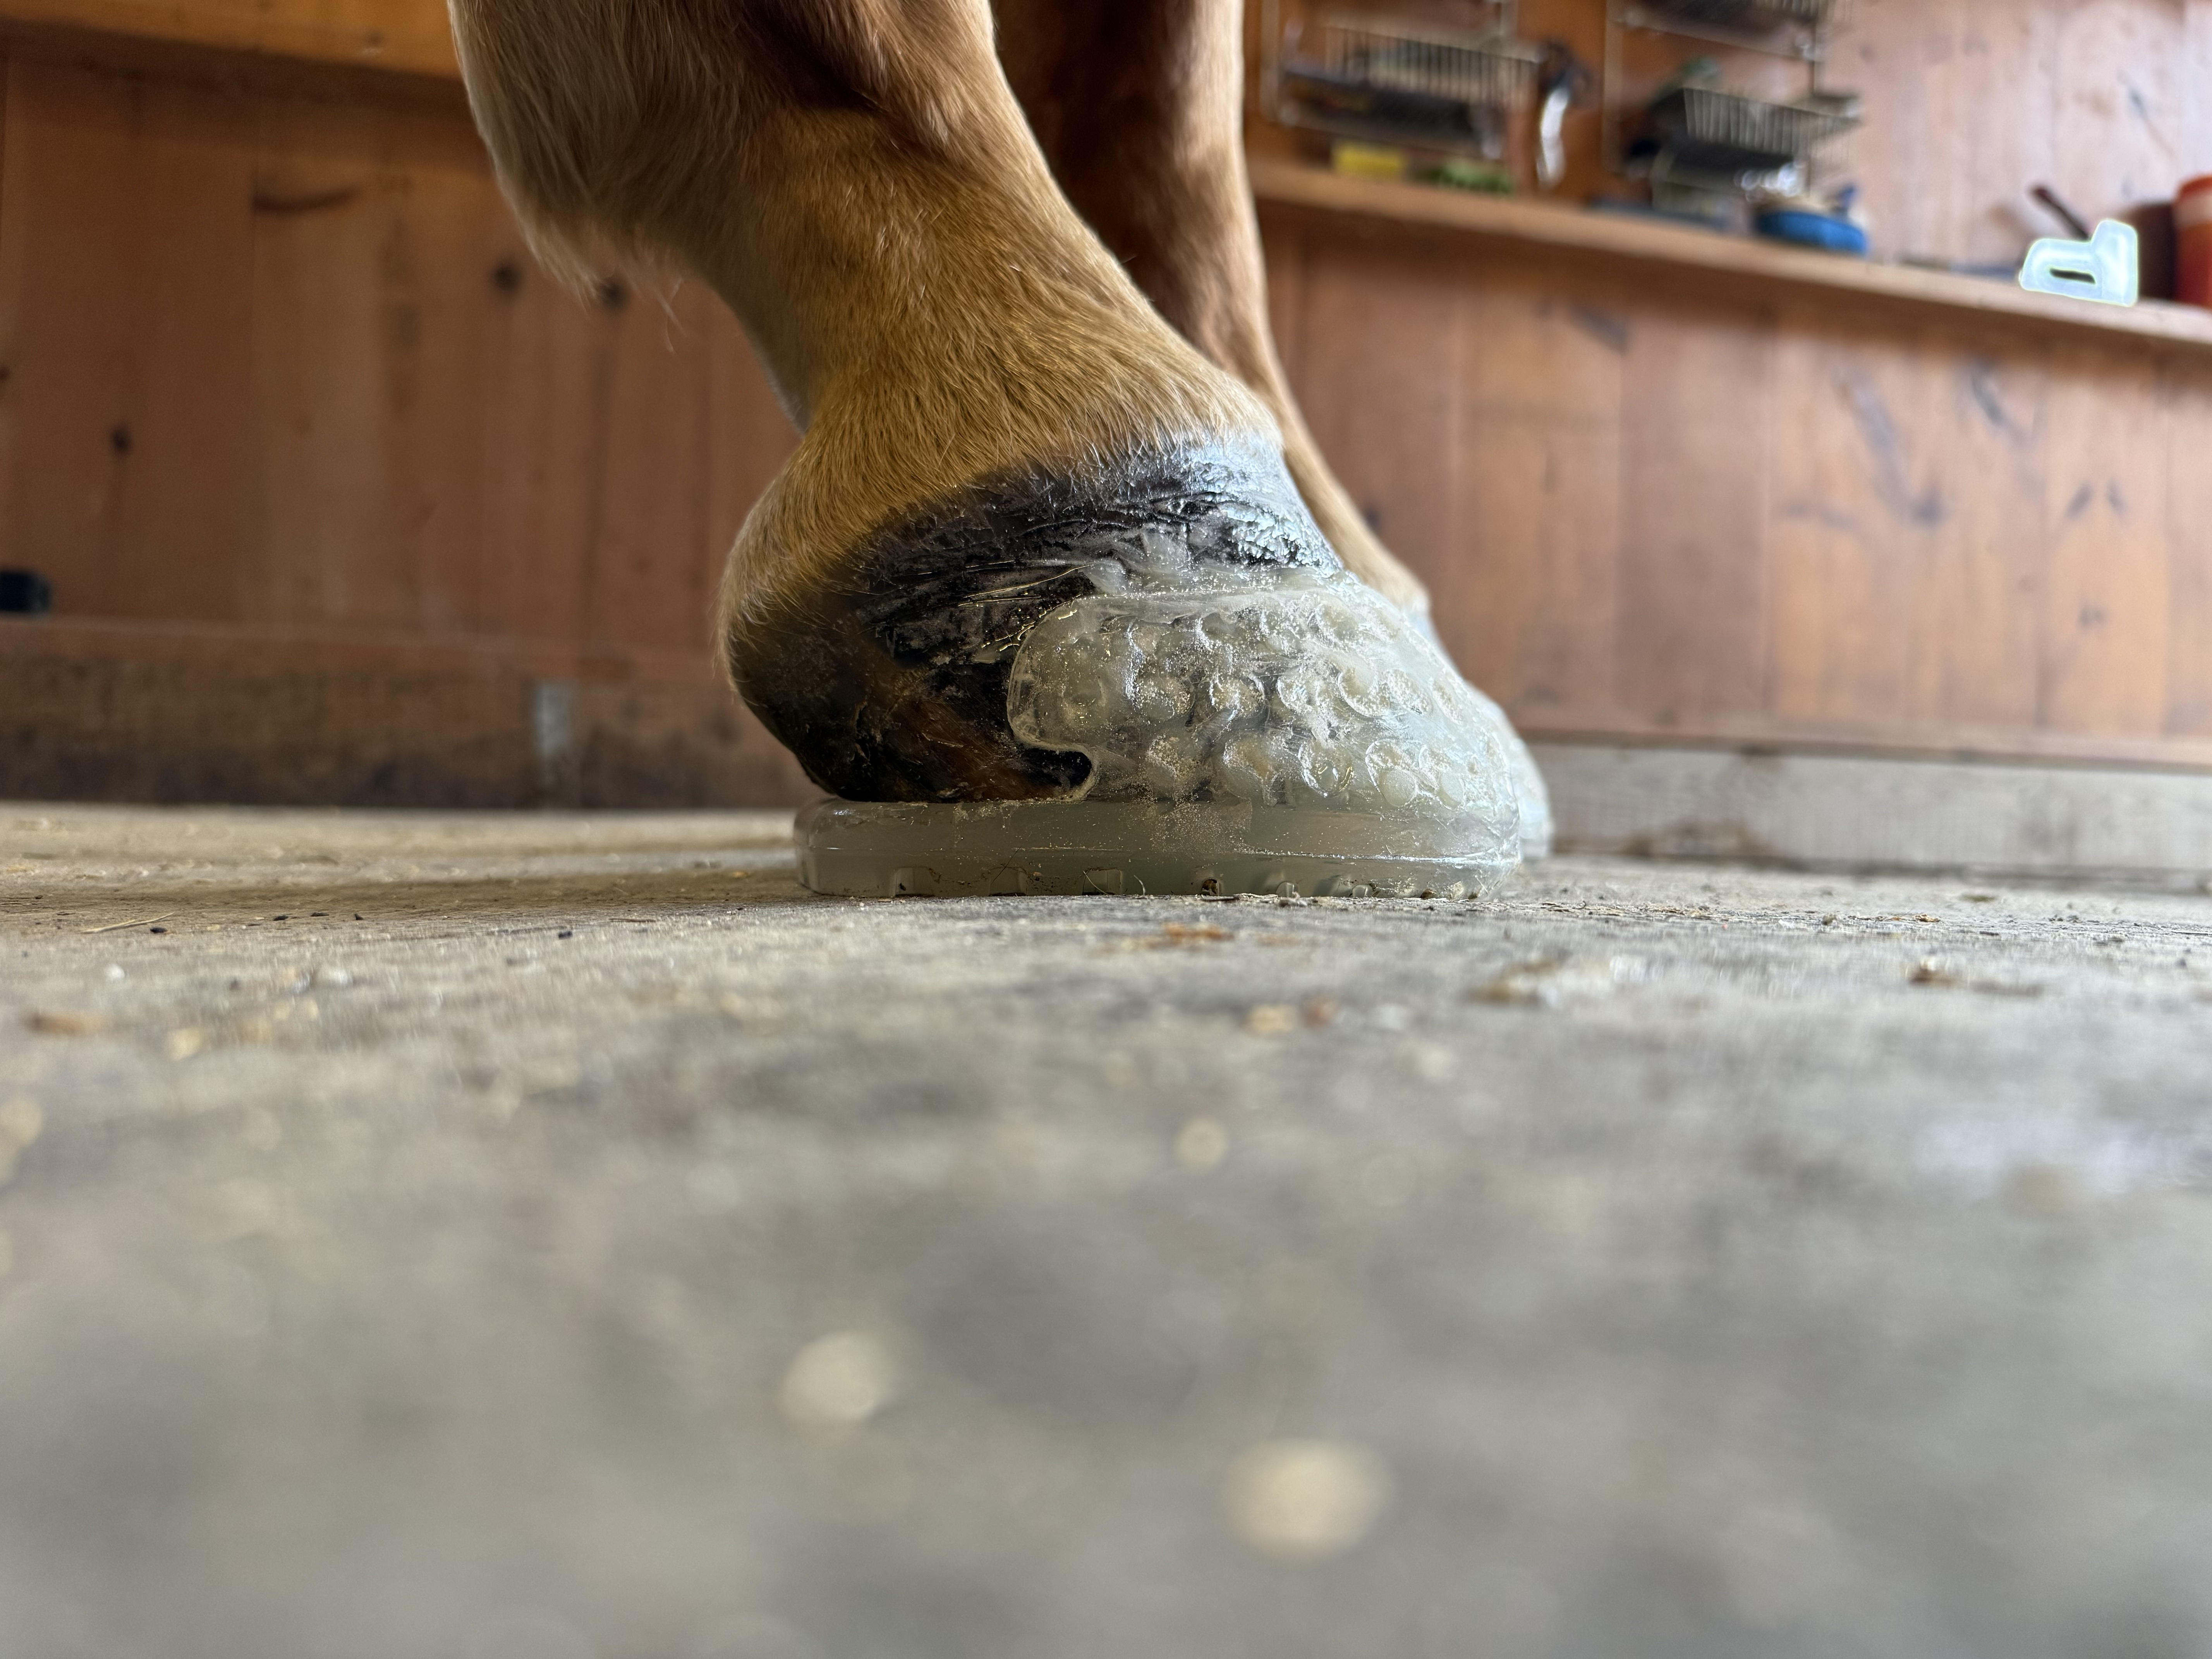
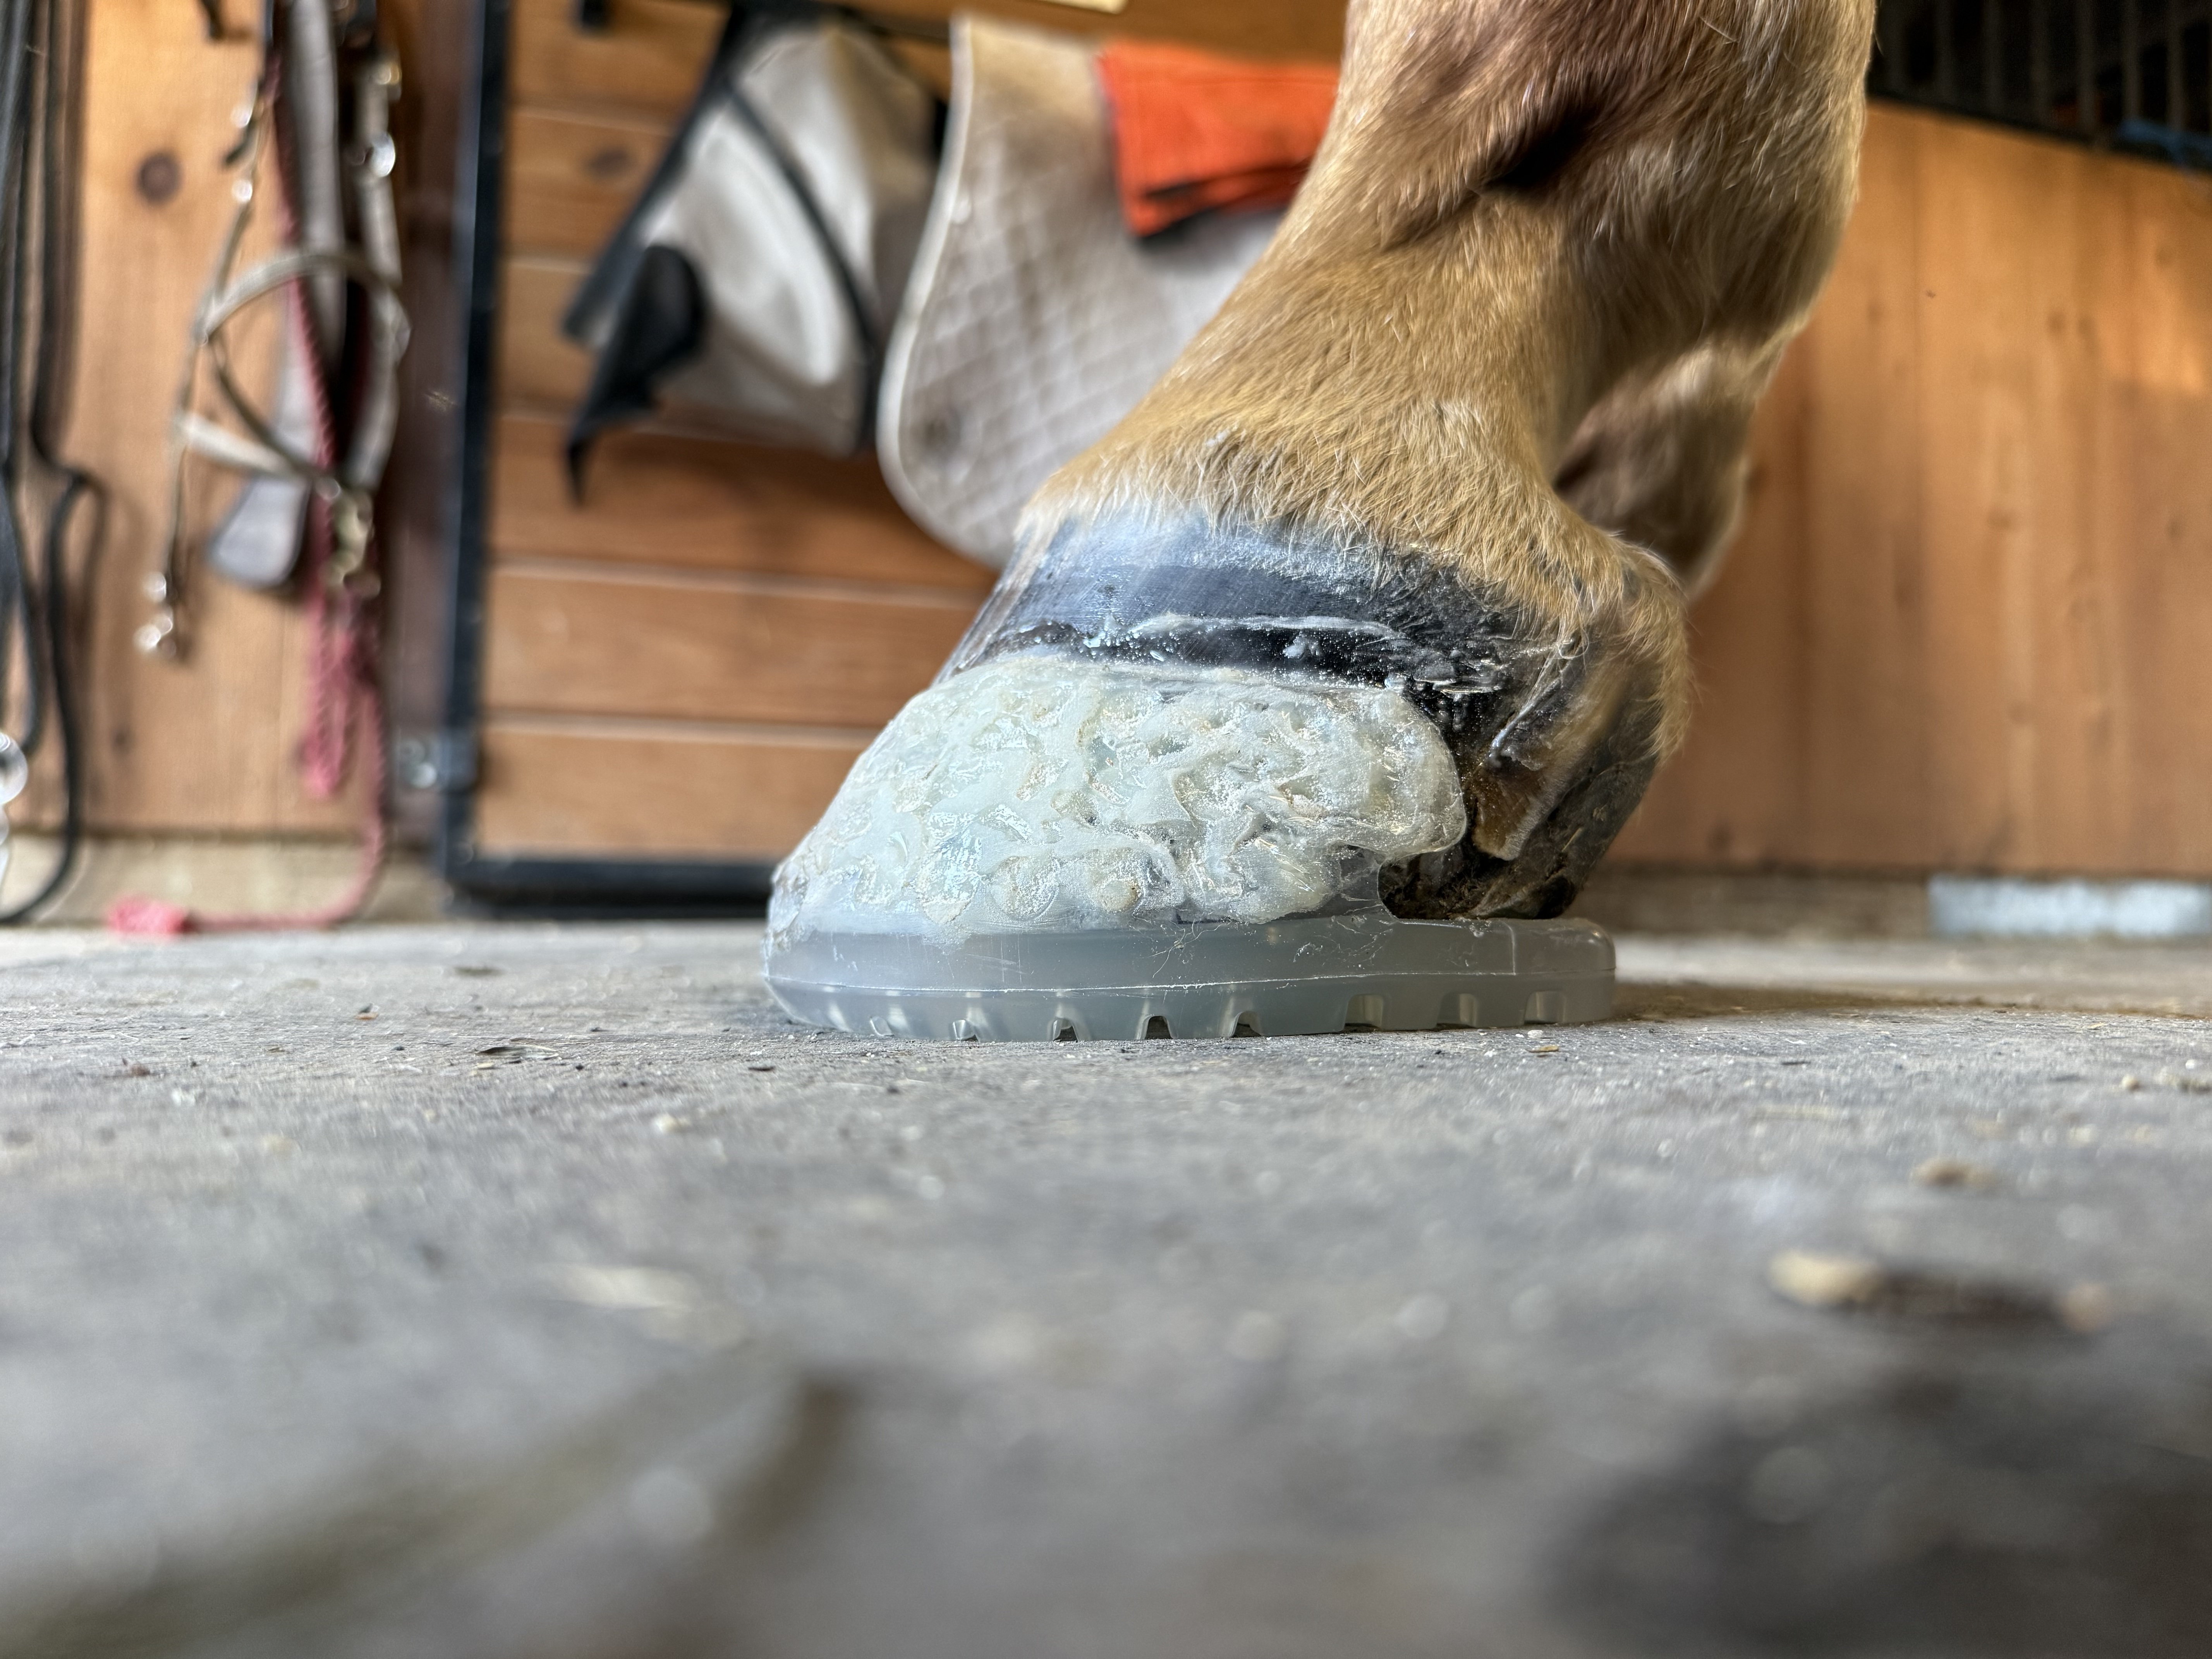
I re-set the package on my one shod horse yesterday and made a few tweaks. The finish is a bit messy but I haven’t talked myself into paying for a hoof buffy just yet, and nobody sees them but me.
Easy Shoe rollers - LF has a 2 degree wedge pad from 3D Hoofcare and both are packed with blue EDSS DIM, glued with Glue-U Shubond acrylic. This LF shoe got the cuff modified to work around some flaring issues, hopefully that doesn’t bite me in the butt later. This was my first time gluing through the plastic wrap - normally I glue then wrap, but I’ve heard good things about doing a couple turns of wrap and then poking holes to glue through, so I decided to give it a shot this time.
Has anyone tried out the 3rd Millennium acrylic that has a more “sheer” finish than all these opaques? I’m thrilled at the idea of an almost-clear acrylic option, it would (obviously) hide some of my lack of concern for making things “pretty” and being in a humid climate I only ever use acrylics anyway… but it’s a bit more spendy and of course requires yet another special gun. And I have 2 unopened bottles of Glue-U to use up first. If it’s in stock next time I go shopping I think I’m going to have to try it.
Well, my first attempt was a bit of a disaster. The EasyCare adhesive seems to be setting up in the tips. Partway through the first cuff, glue started spurting out where the tip meets the glue container. Maybe because it’s so hot out? I kept it in the relatively cool tack room while I prepped the feet. Or maybe I’m not screwing them on right? It didn’t seem very secure even before I started, but I didn’t see another way of doing it. Argh.
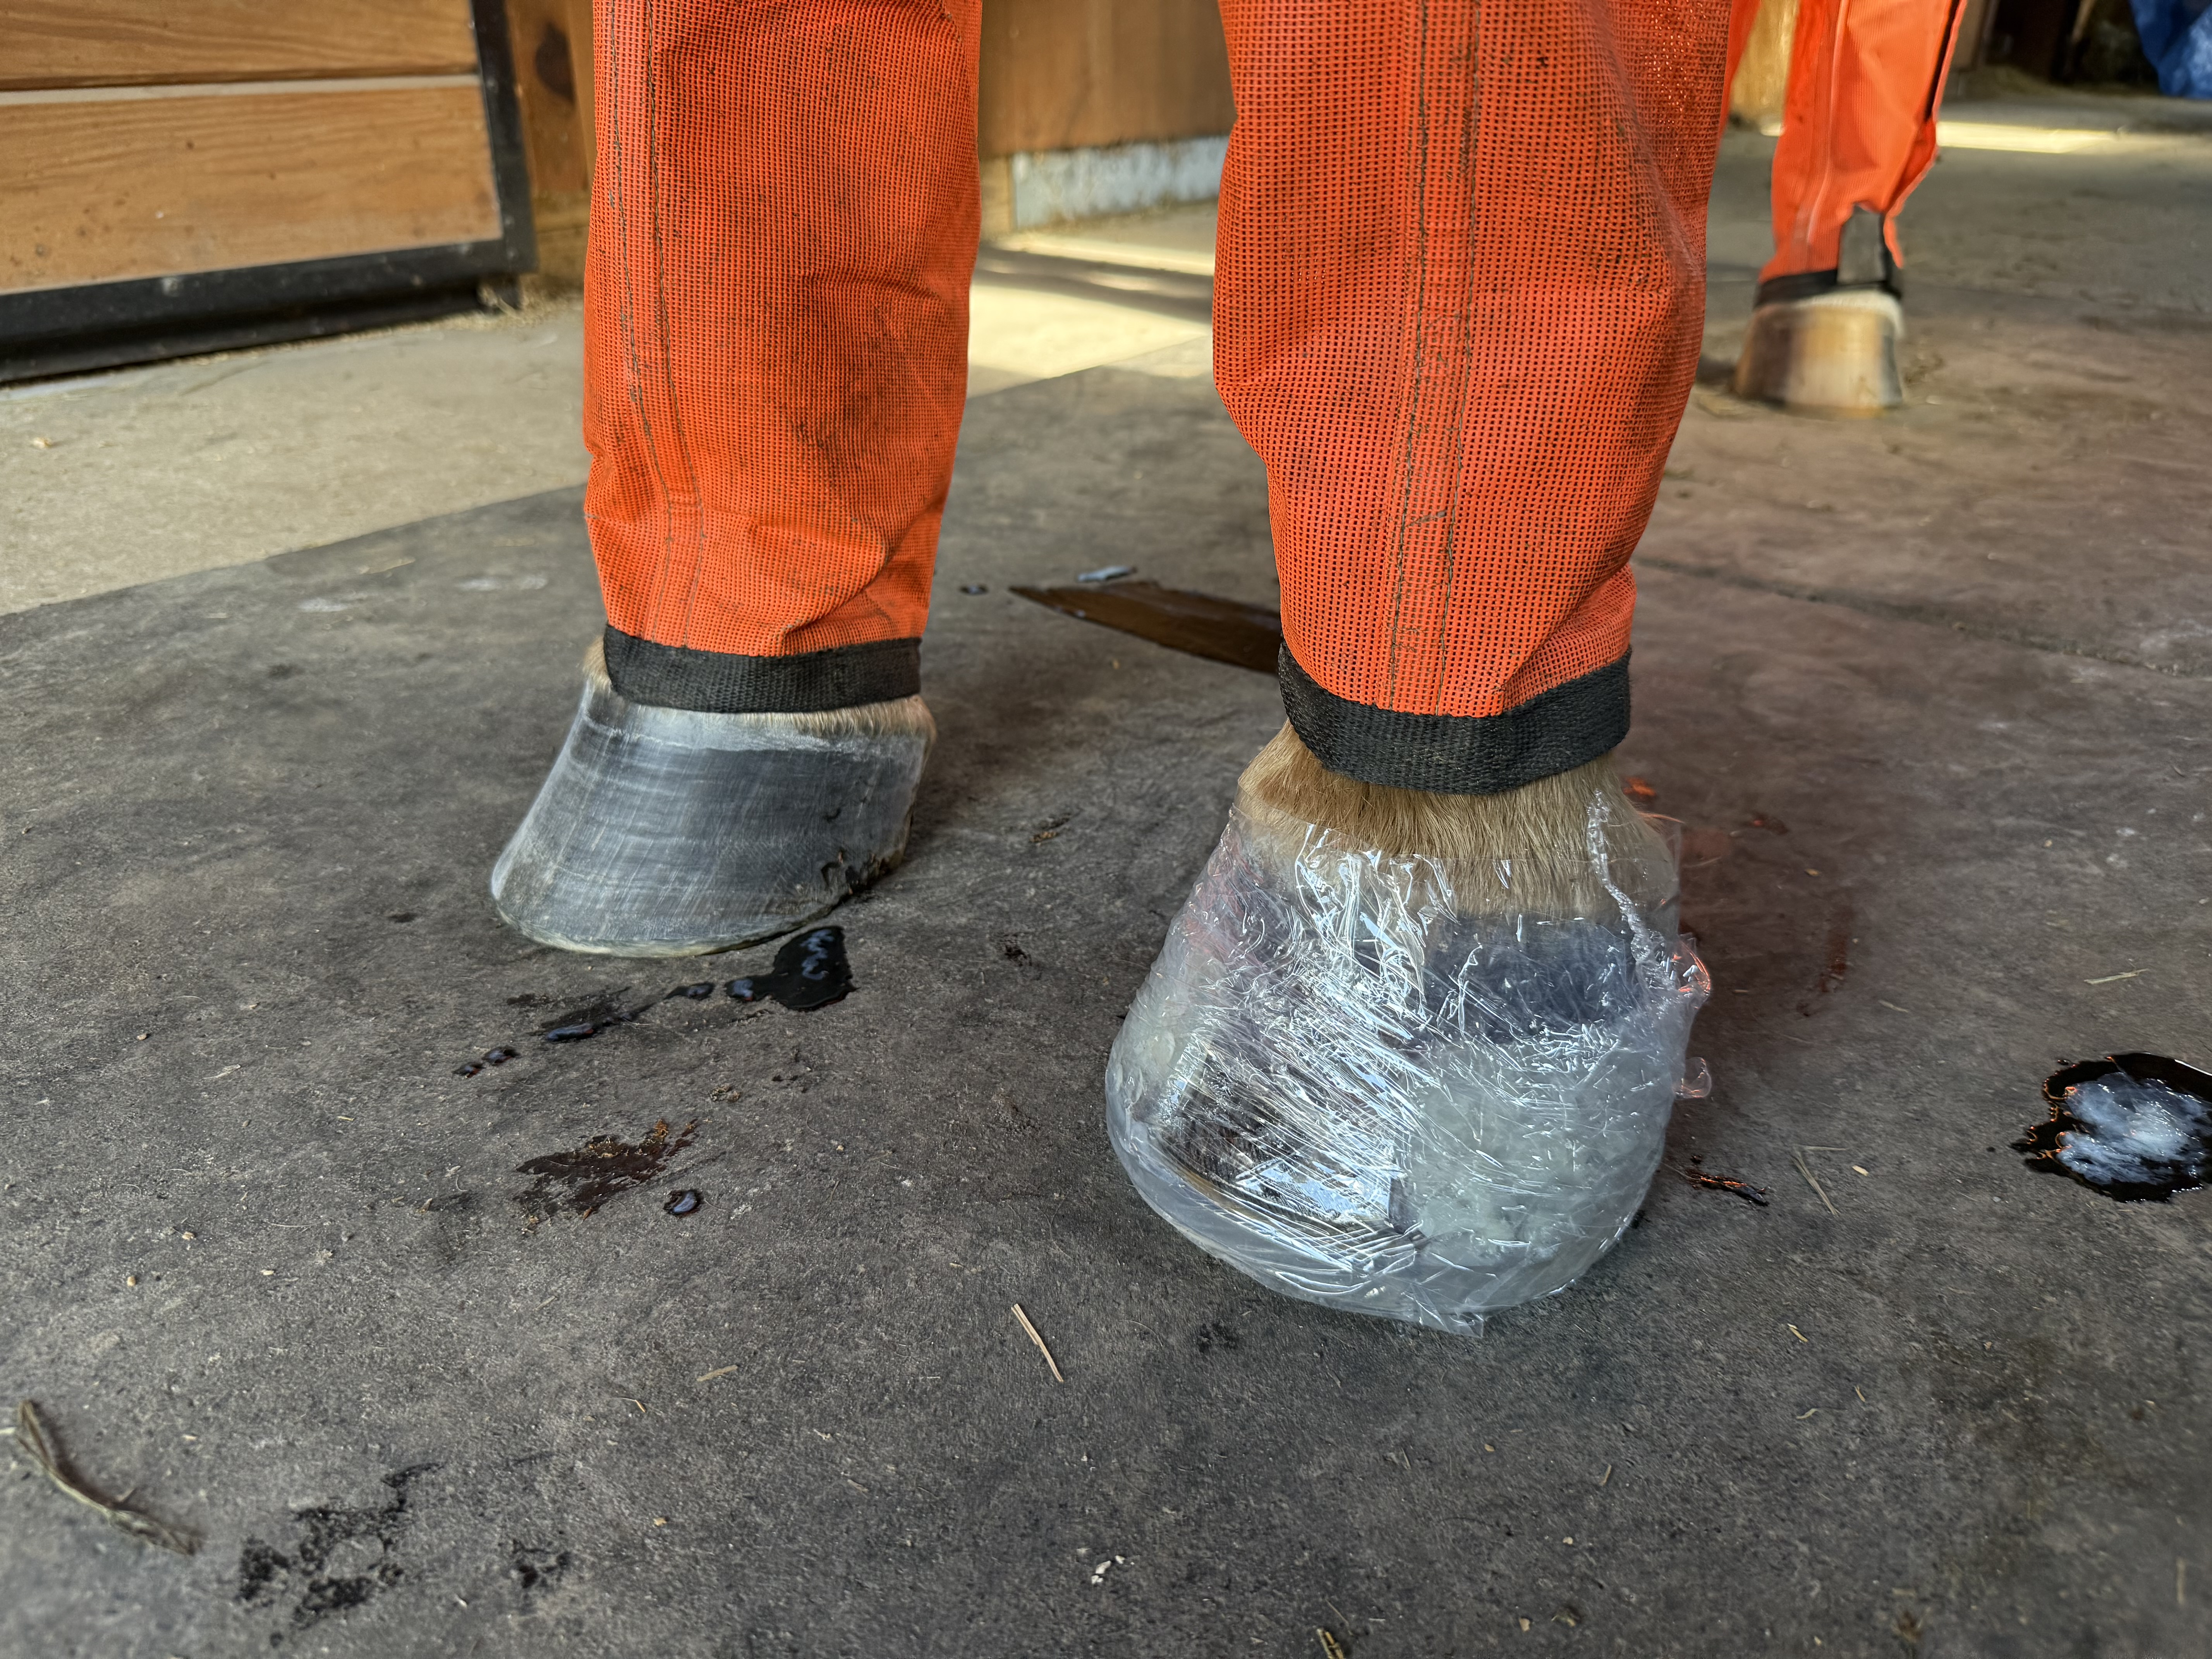
There is adhesive all over the floor and I went through three of the four tips it came with for the first shoe, so I only have one tip left for the second shoe. Of course the extra tips that I bought do not fit this adhesive. I don’t know whether to even try the second shoe today or not. The first one probably won’t stay on anyway…
My current mess:
If it’s as hot there as it is here, you’ll need to refrigerate the glue, or keep it in a cooler on an ice pack until you’re ready to go. You should be able to get the other shoe done with 1 tip, and save the other in case the first shoe pops off.
Some people don’t use tips but rather apply the glue on the cuff with a popsicle stick or gloved fingers and then apply the shoe, so that’s an option. I have never had luck that way, but refrigerating the glue solves the heat issue for me!
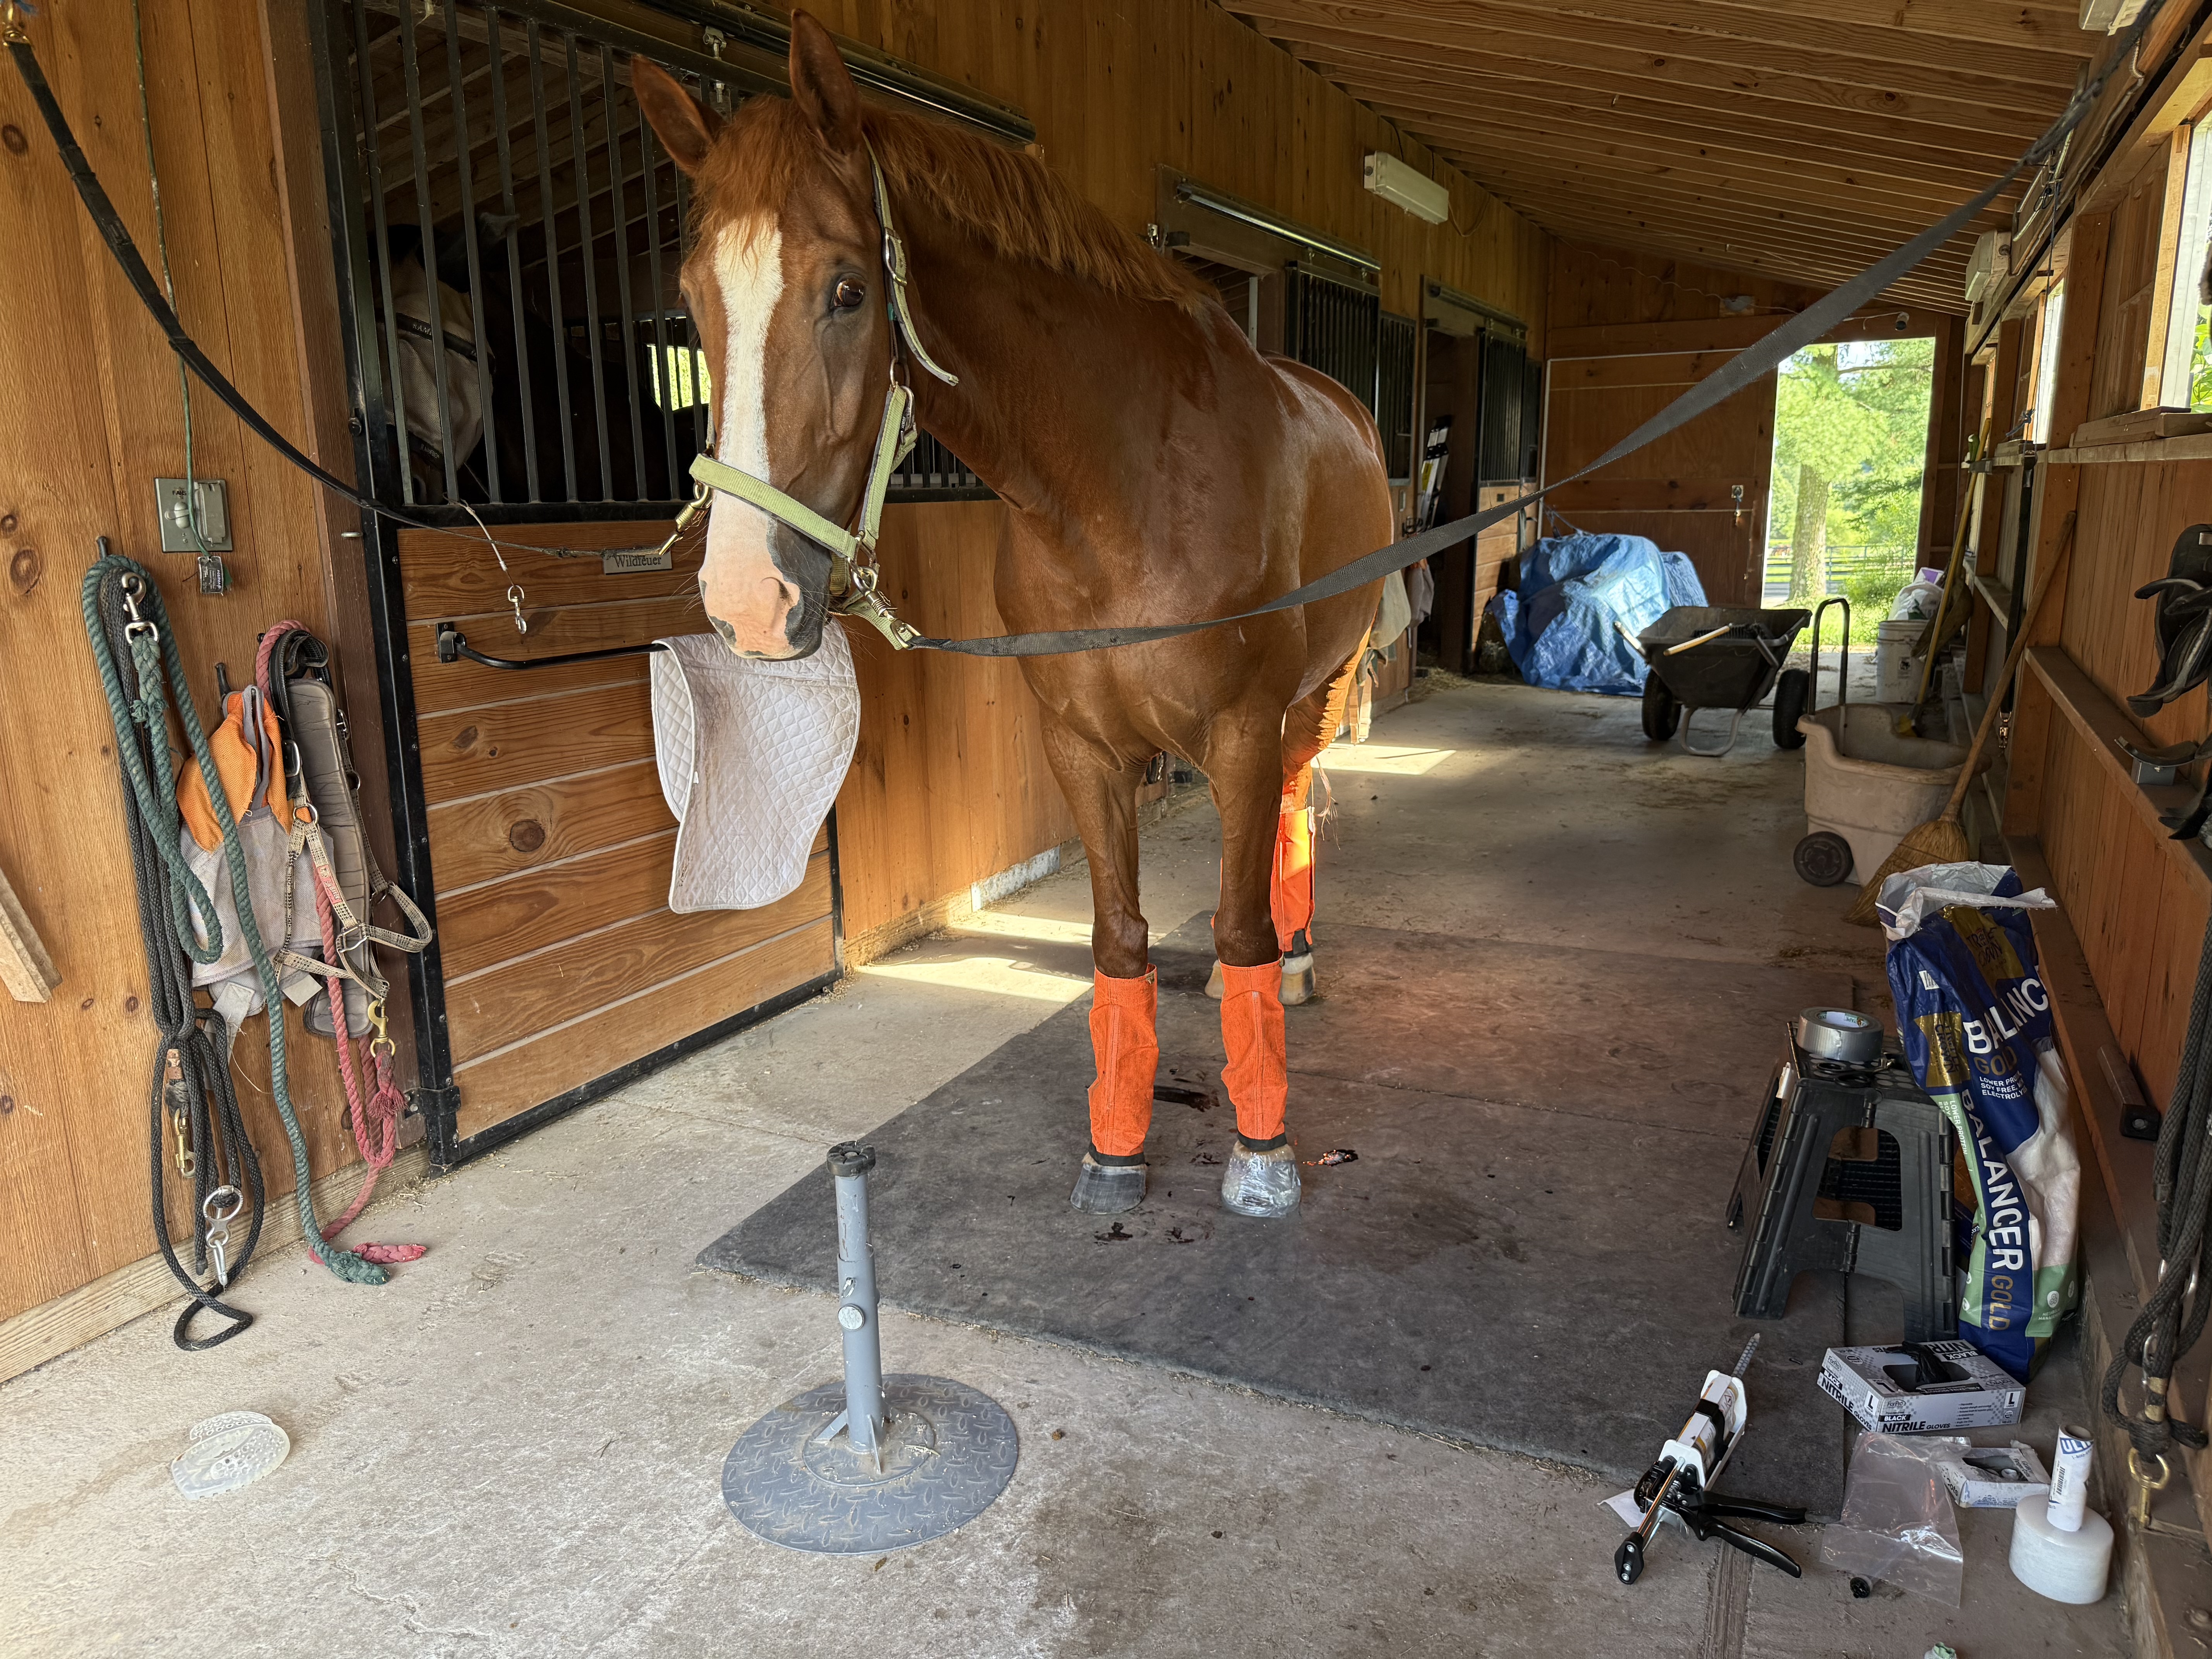
I’m no help on the glue issue, but that pretty white blaze face posing for the camera is a stunner.
Thank you, he is really lovely and also the sweetest and goofiest thing! While I had his feet up on the stand, he would not stop licking me and putting my entire bun in his mouth.
Thank you, now I know! I wish one of the many videos I watched would have mentioned that. And also the EasyCare site says: “Try to keep your glue, shoes, and hoof wall all around the same temperature. In the summer, this is a breeze. In the winter, this will require some extra effort.” It was 85, which didn’t seem too unreasonable to me, especially in the shade.
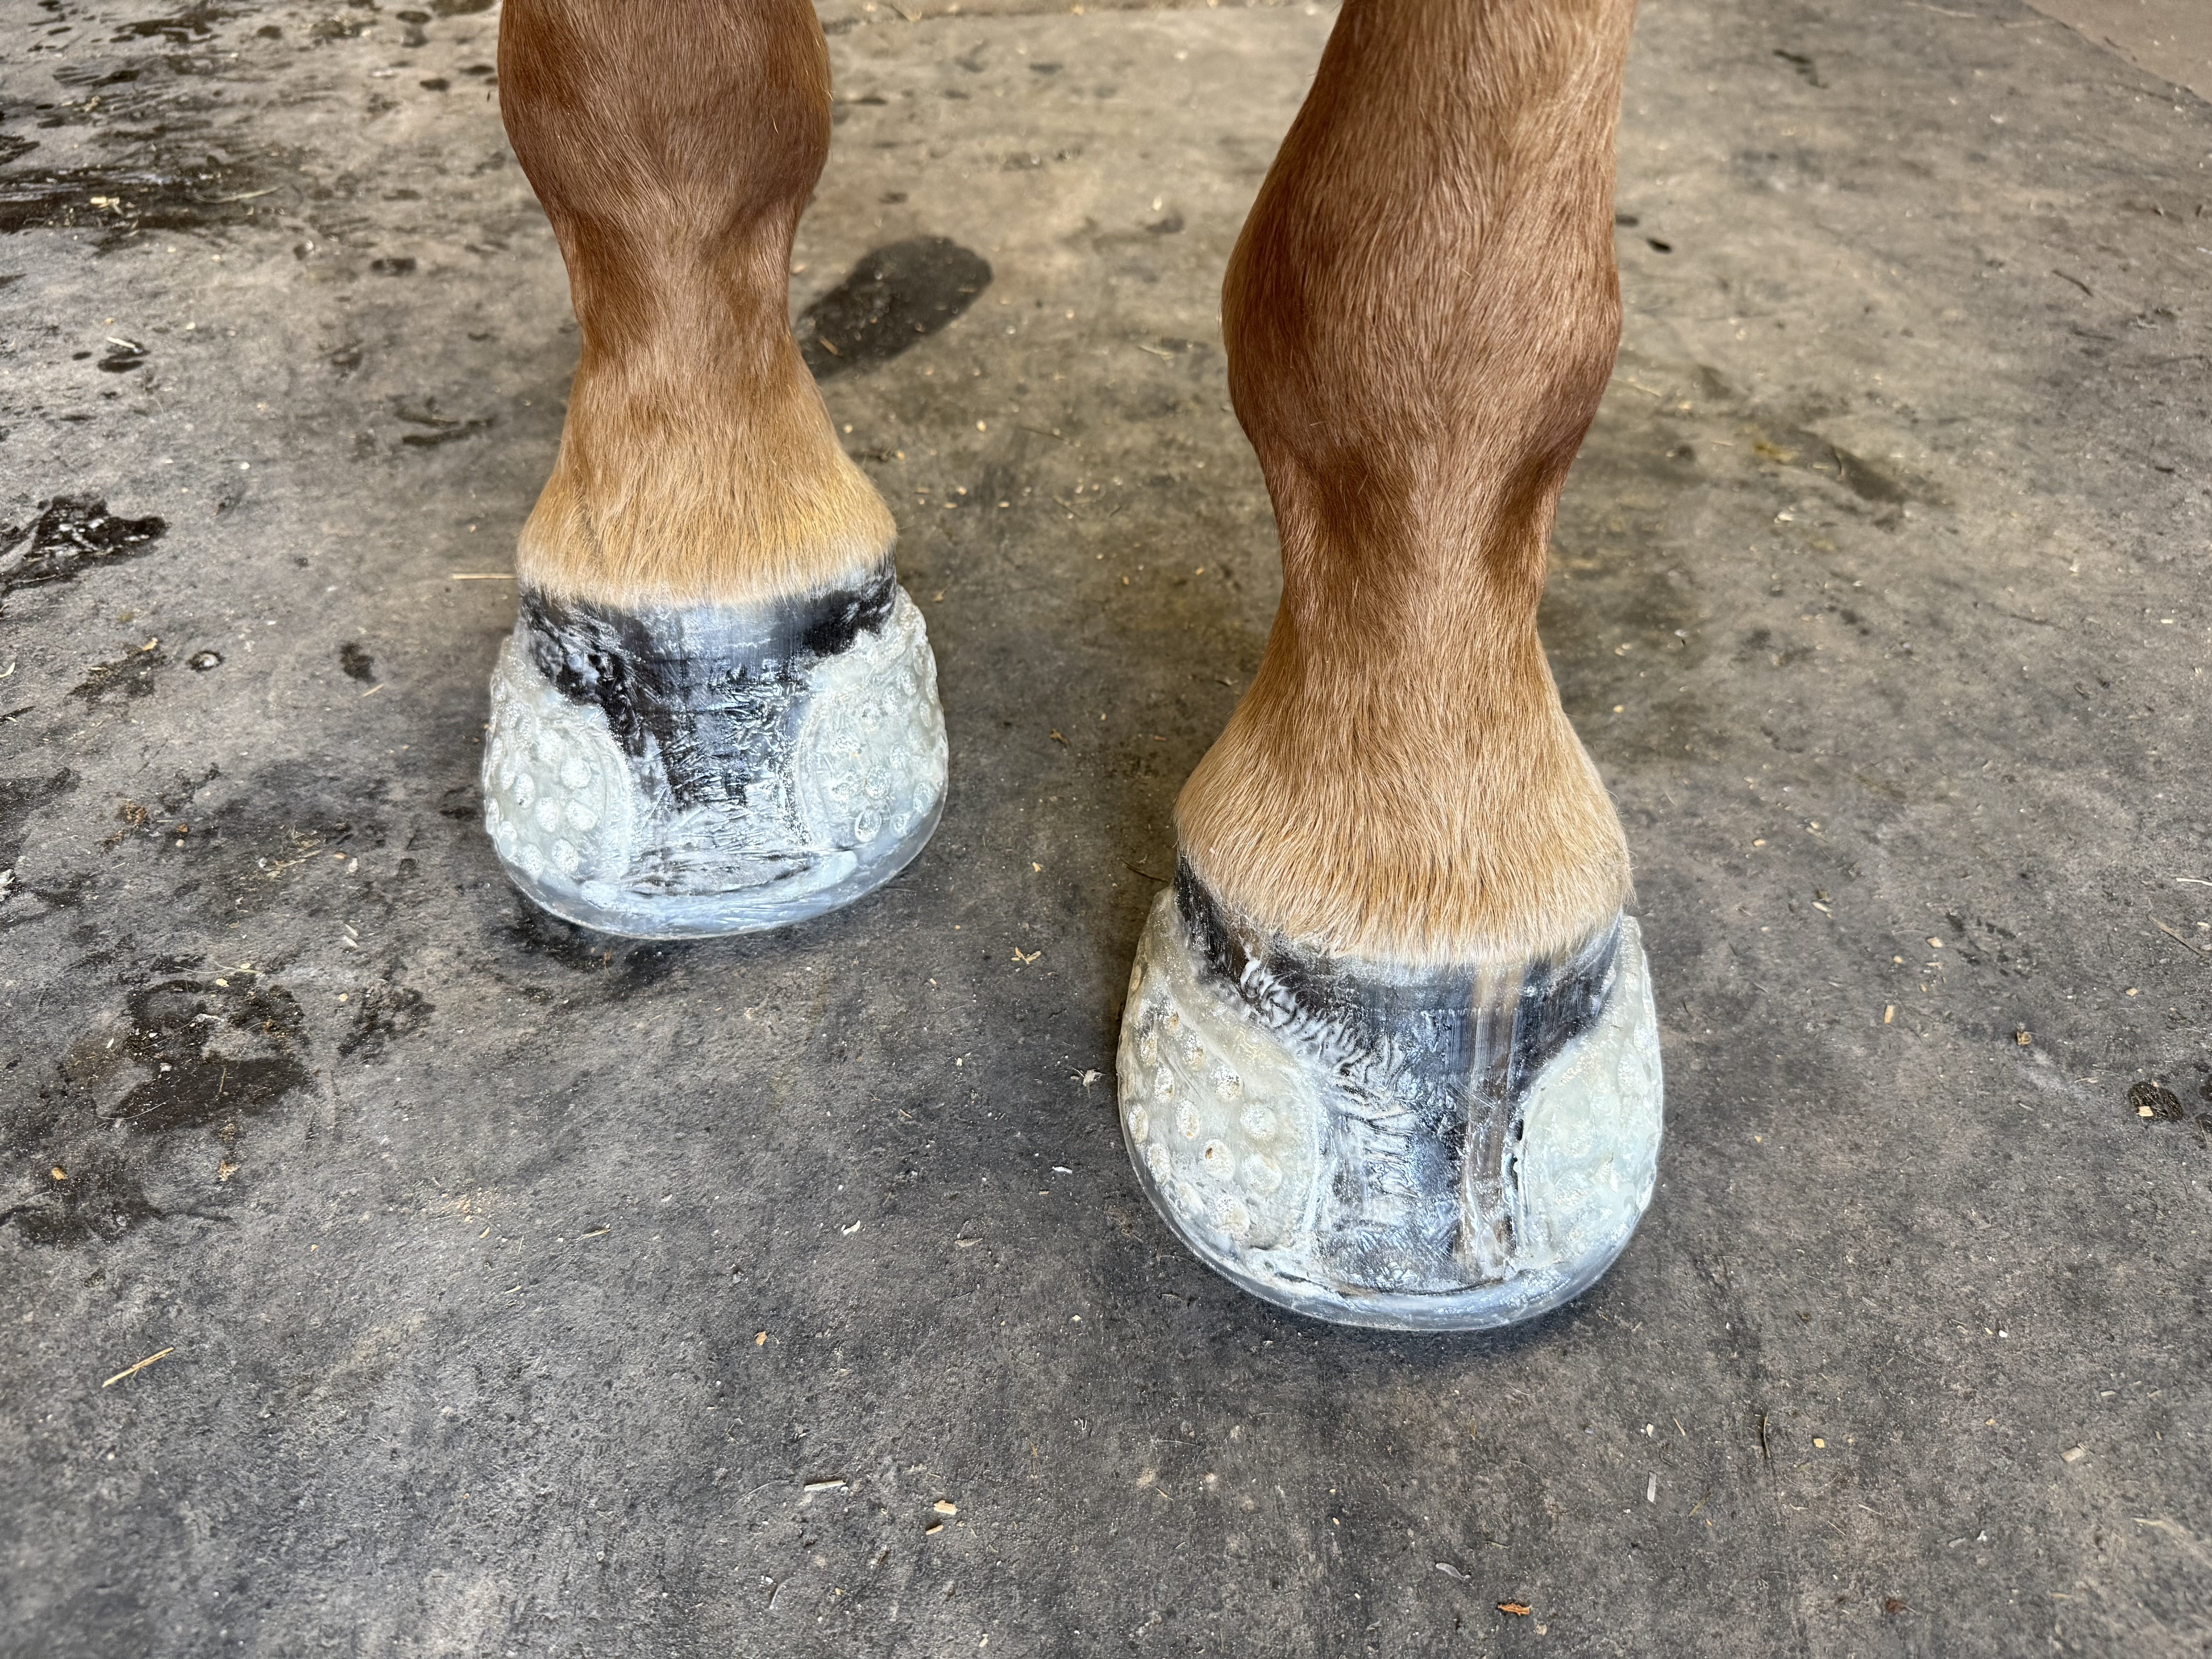
Turns out the other tips looked a bit different but did fit, so I got both shoes on. I think I used about 8 tips  , I got glue all over the floor and my clothes and my hands and arms, and the shoes look like they were set by a blind, drunk, one-armed monkey. But he was immediately comfy on gravel and they might last the night.
Should I have used black for him? As a chestnut I thought natural would be better. I wish gray was an option.
Yeah I think the glue needs to stay around 70 degrees? I’d have to go look on the label. As a general rule, cold AND hot are bad, it wants to be comfortably office-temperature
Your application looks fine, and it gets cleaner I promise! You quickly learn how to keep the mess to a minimum - I always have a piece of cardboard or other garbage to lay anything glue-related on. Also, the Hoof Buffy can be used to polish up the cuffs and any overage on the hoof - it makes a HUGE difference. Worth the investment if appearances matter (they do to me!).
Black glue may help, but the shoe is still that off-yellow color. Some people dye the shoes black (and all sorts of colors!) but I never got that far since I’m not competing and my horse wears hot pink bell boots anyway
Forgive me if this sounds like a stupid question, but are you putting the tip on before you are totally ready to glue?
I don’t uncap my glue or put the tip on until I’m 100% done with prep, the DIM is in, the shoe is on, literally cap off, tip on, straight to glue into the shoe. It’s 90+ here and I know I’ve got no more than about 30 seconds before that glue starts to set if it’s not flowing.
If that’s what you’re doing and it was still clogging up, either the tip isn’t on there properly or there is some sort of manufacturing defect in the plastic parts that is allowing oxygen to get in there.
Those honestly don’t look bad at all! I’ve done worse. I think the tan glue is fine.
Not stupid at all…if anyone can help me figure out what I did wrong, I am all ears! I didn’t take the cap off and put the tip on until I started to glue, and about halfway through the first cuff the glue exploded out where the tip attaches to the nozzle. I hadn’t paused or anything!
The tips that came with the glue didn’t really seem to snap on securely. The extra tips I bought have little white tabs that fit onto the nozzle. But by the time I was using those, there was a lot of spilled glue caked around where they attach, so maybe that was part of the problem? I really did not dilly dally at all, and a couple of the tips were clogged and leaking all over the place in less than 20 seconds.
Interestingly, the tips in the product photo aren’t what I received, are green instead of black, and do have the little tabs. So maybe incorrect tips were part of my problem.
The supplies arrived by FedEx, immediately came inside the air-conditioned house for about 2 hours, and then were in the tack room for about an hour while I gathered everything and prepped the hooves. It’s not like I left them baking in the sun.
For people who use the EasyCare Adhesive, how many shoes do you get out of a bottle? Mine is probably 80% gone, but I don’t think I way overdid it. So much ended up exploding onto the floor. I’m trying not to add up the $28 tube of adhesive, the 8 (?) tips, the $50 gun, and the $52 shoes that probably won’t last a week.  Though at least they’ve made it 24 hours now!
Is the EasyShoe Bond Glue any easier? It sounds like it sets a little slower. It looks like it might fit in a standard caulking gun too?
Did you secure the tip on the gun by screwing the threaded cap back onto the cartridge after positioning the tip? I just did a set of shoes last week using Adhere w/ the vettec gun. The easycare adhesive appears to be the same product relabeled. At its base the tip has a wide tab and a narrower tab. First step is to position the tabs on the correct sides of the cartridge. To secure the tip you replace the round threaded cap. It screws back onto the cartridge, holding the tip in place. In this heat, I’d suggest refrigerating the adhesive for a few hours before using it or keep it in an air conditioned room overnight before use.
fyi I think your application looks great! I’m a versa grip octo user, but am experimenting w/ the speeds w/ cuffs on one horse.
Omg. No, I did not and now I feel pretty dumb. That would definitely explain all the leakage. And maybe it’s actually a miracle some of the tips worked as long as they did. Thank you!!!
Not dumb! There’s a reason I am very aware of this step…
Yes definitely screw the base part on! You might still have an issue with glue setting up in the tip especially when hot out. I’d often need multiple tips for big feet just using Equipak pour in. For glue work (and just repair/maintenance for my horses with nailed shoes!), definitely multiple tips even if I was only using a relatively small amount of the tube.
I am already obsessed with this DIY glue-on thing. Riding Warehouse has a bunch of EasyCare stuff 20% off through the end of the month, so I stocked up on some different shoes and glues to try. Maybe I will feel differently when these shoes rip off prematurely or I have to remove them and try to get all the glue off for a reset, but right now I’m kinda excited to be learning a new skill and having options to do hoof care myself!
I do need to figure out what supplies I need for a clean-up/reset, before it becomes urgent. I already have a bunch of 20V DeWalt tools so I’m eyeing their die grinder as a dremel-type-thing… I suppose I will want a Hoof Buffy at some point too, but I’m trying not to spend all my money at once. That’s horses though I guess!