Update post 252: I did it! šŸ˜… Has anyone done this: DIY glue ons after farrier trims

Iā€™ll be interested to follow along with your experience!

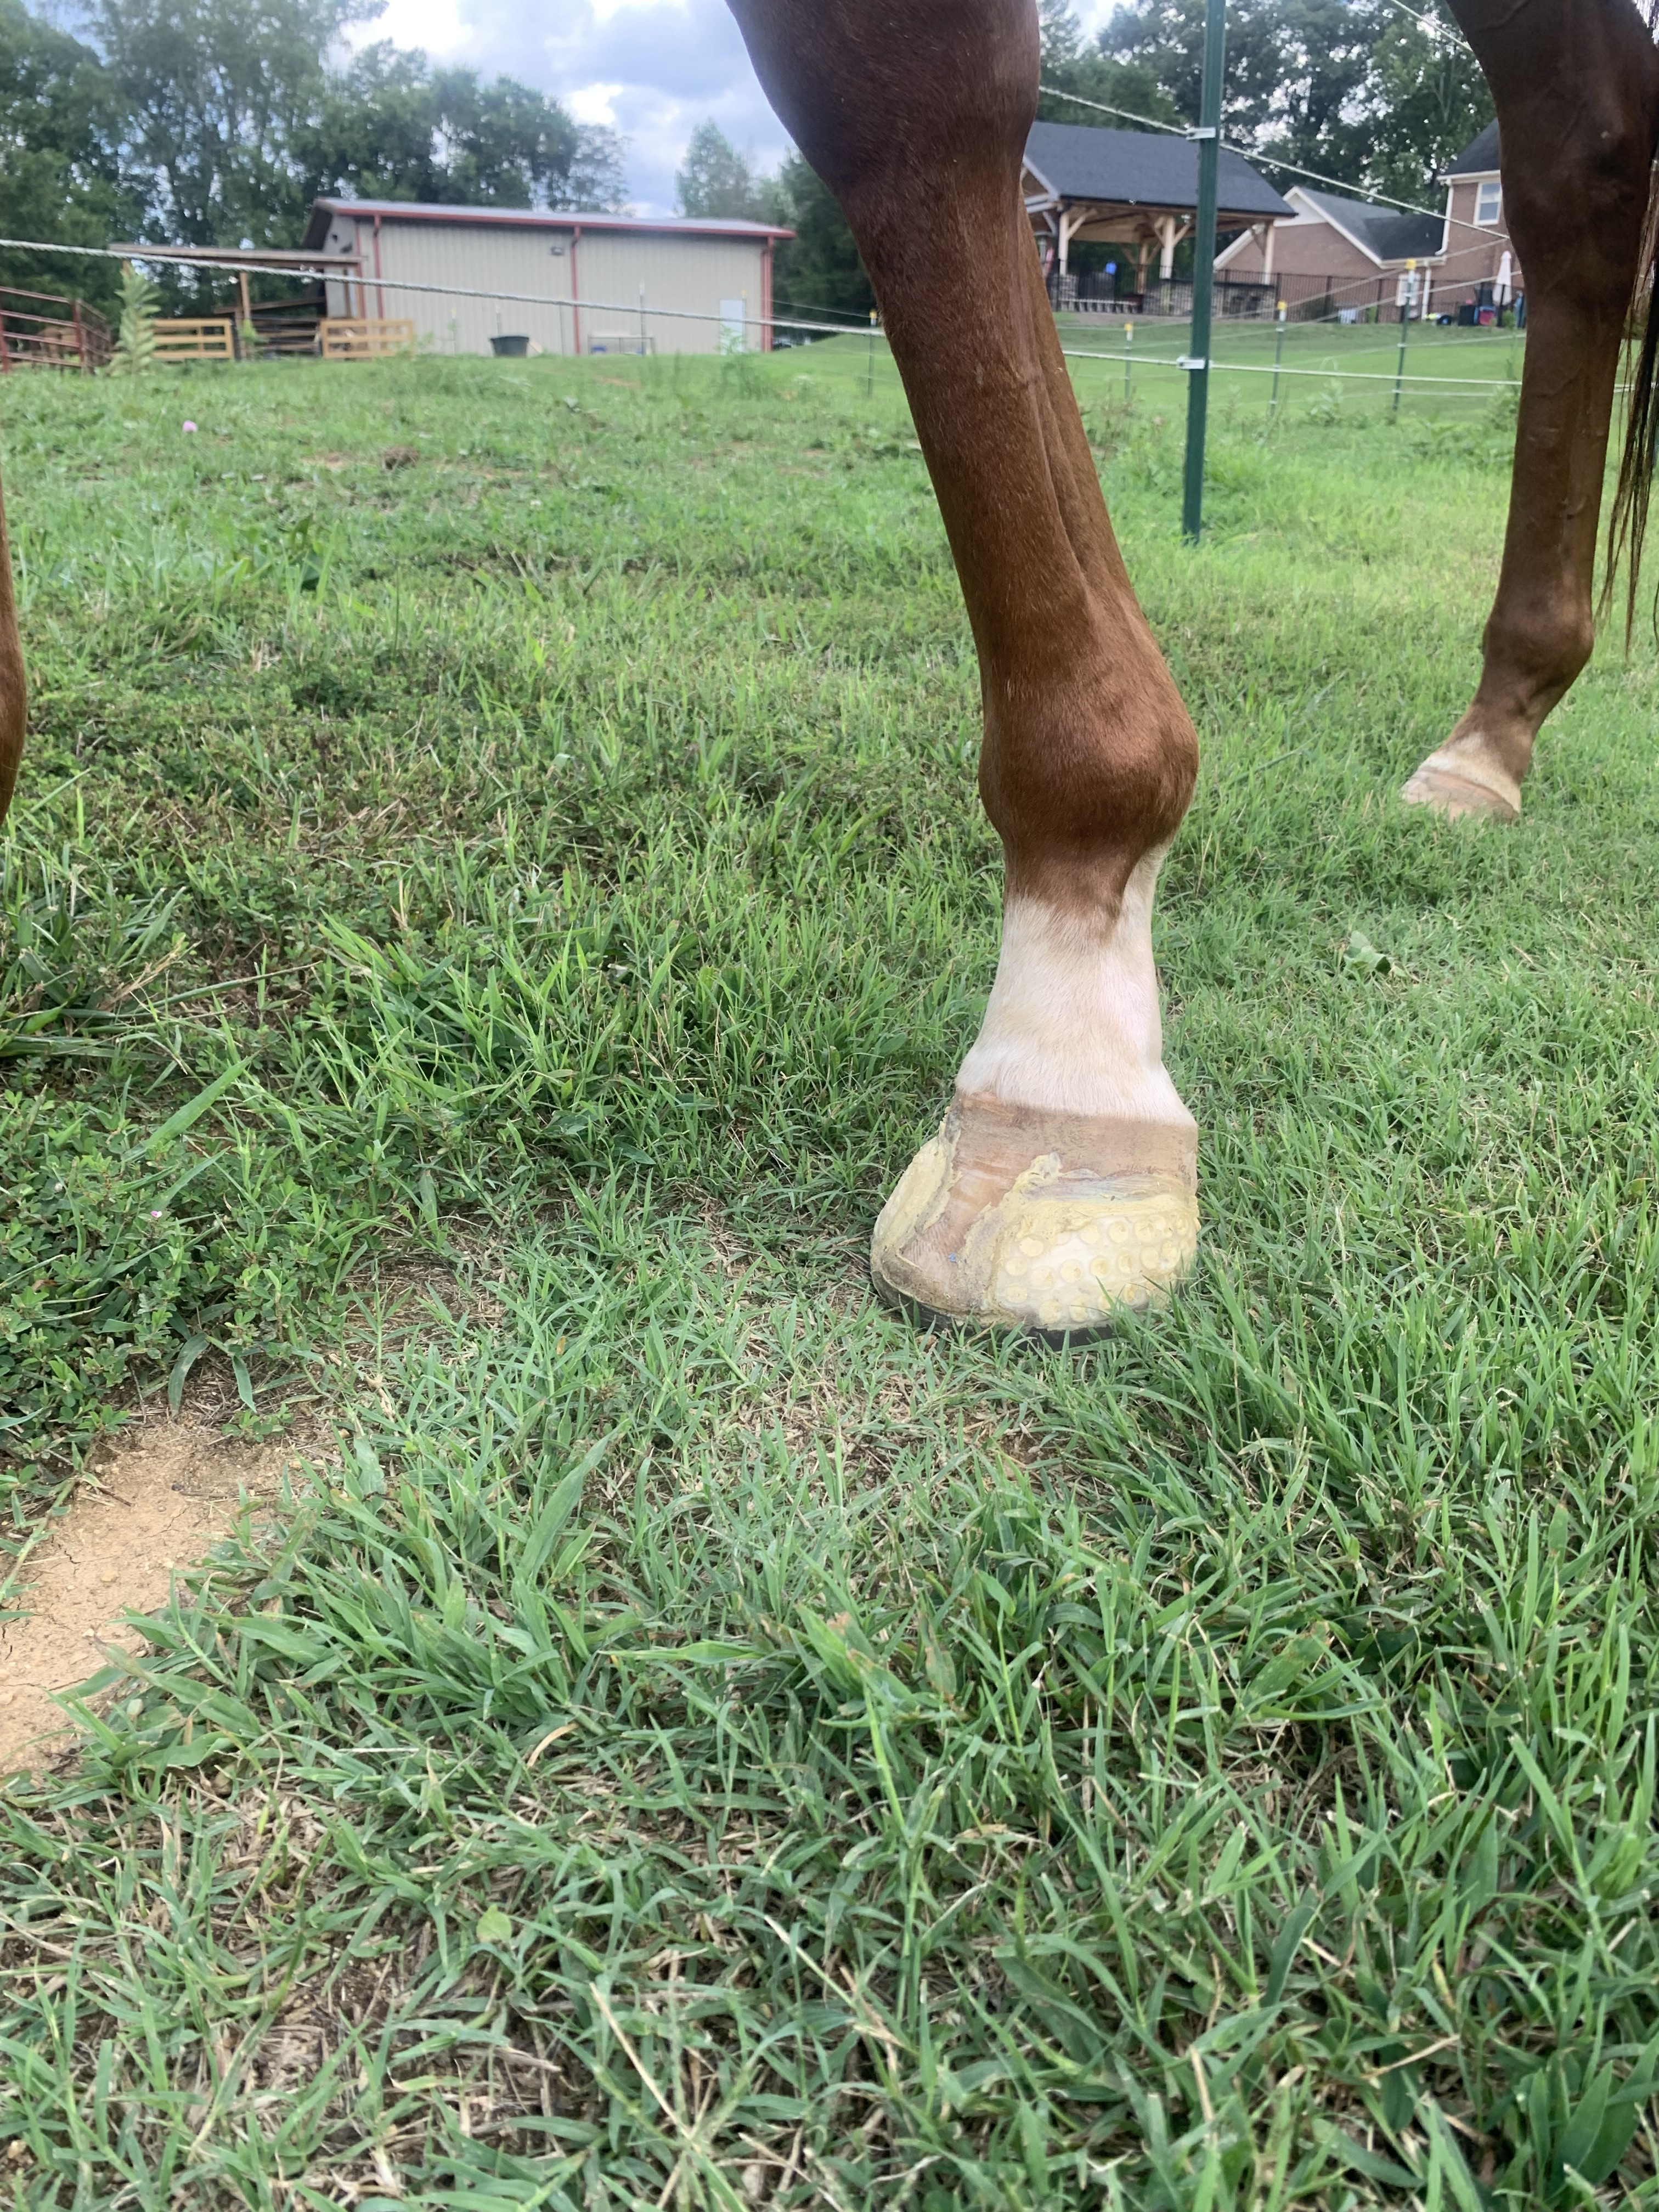
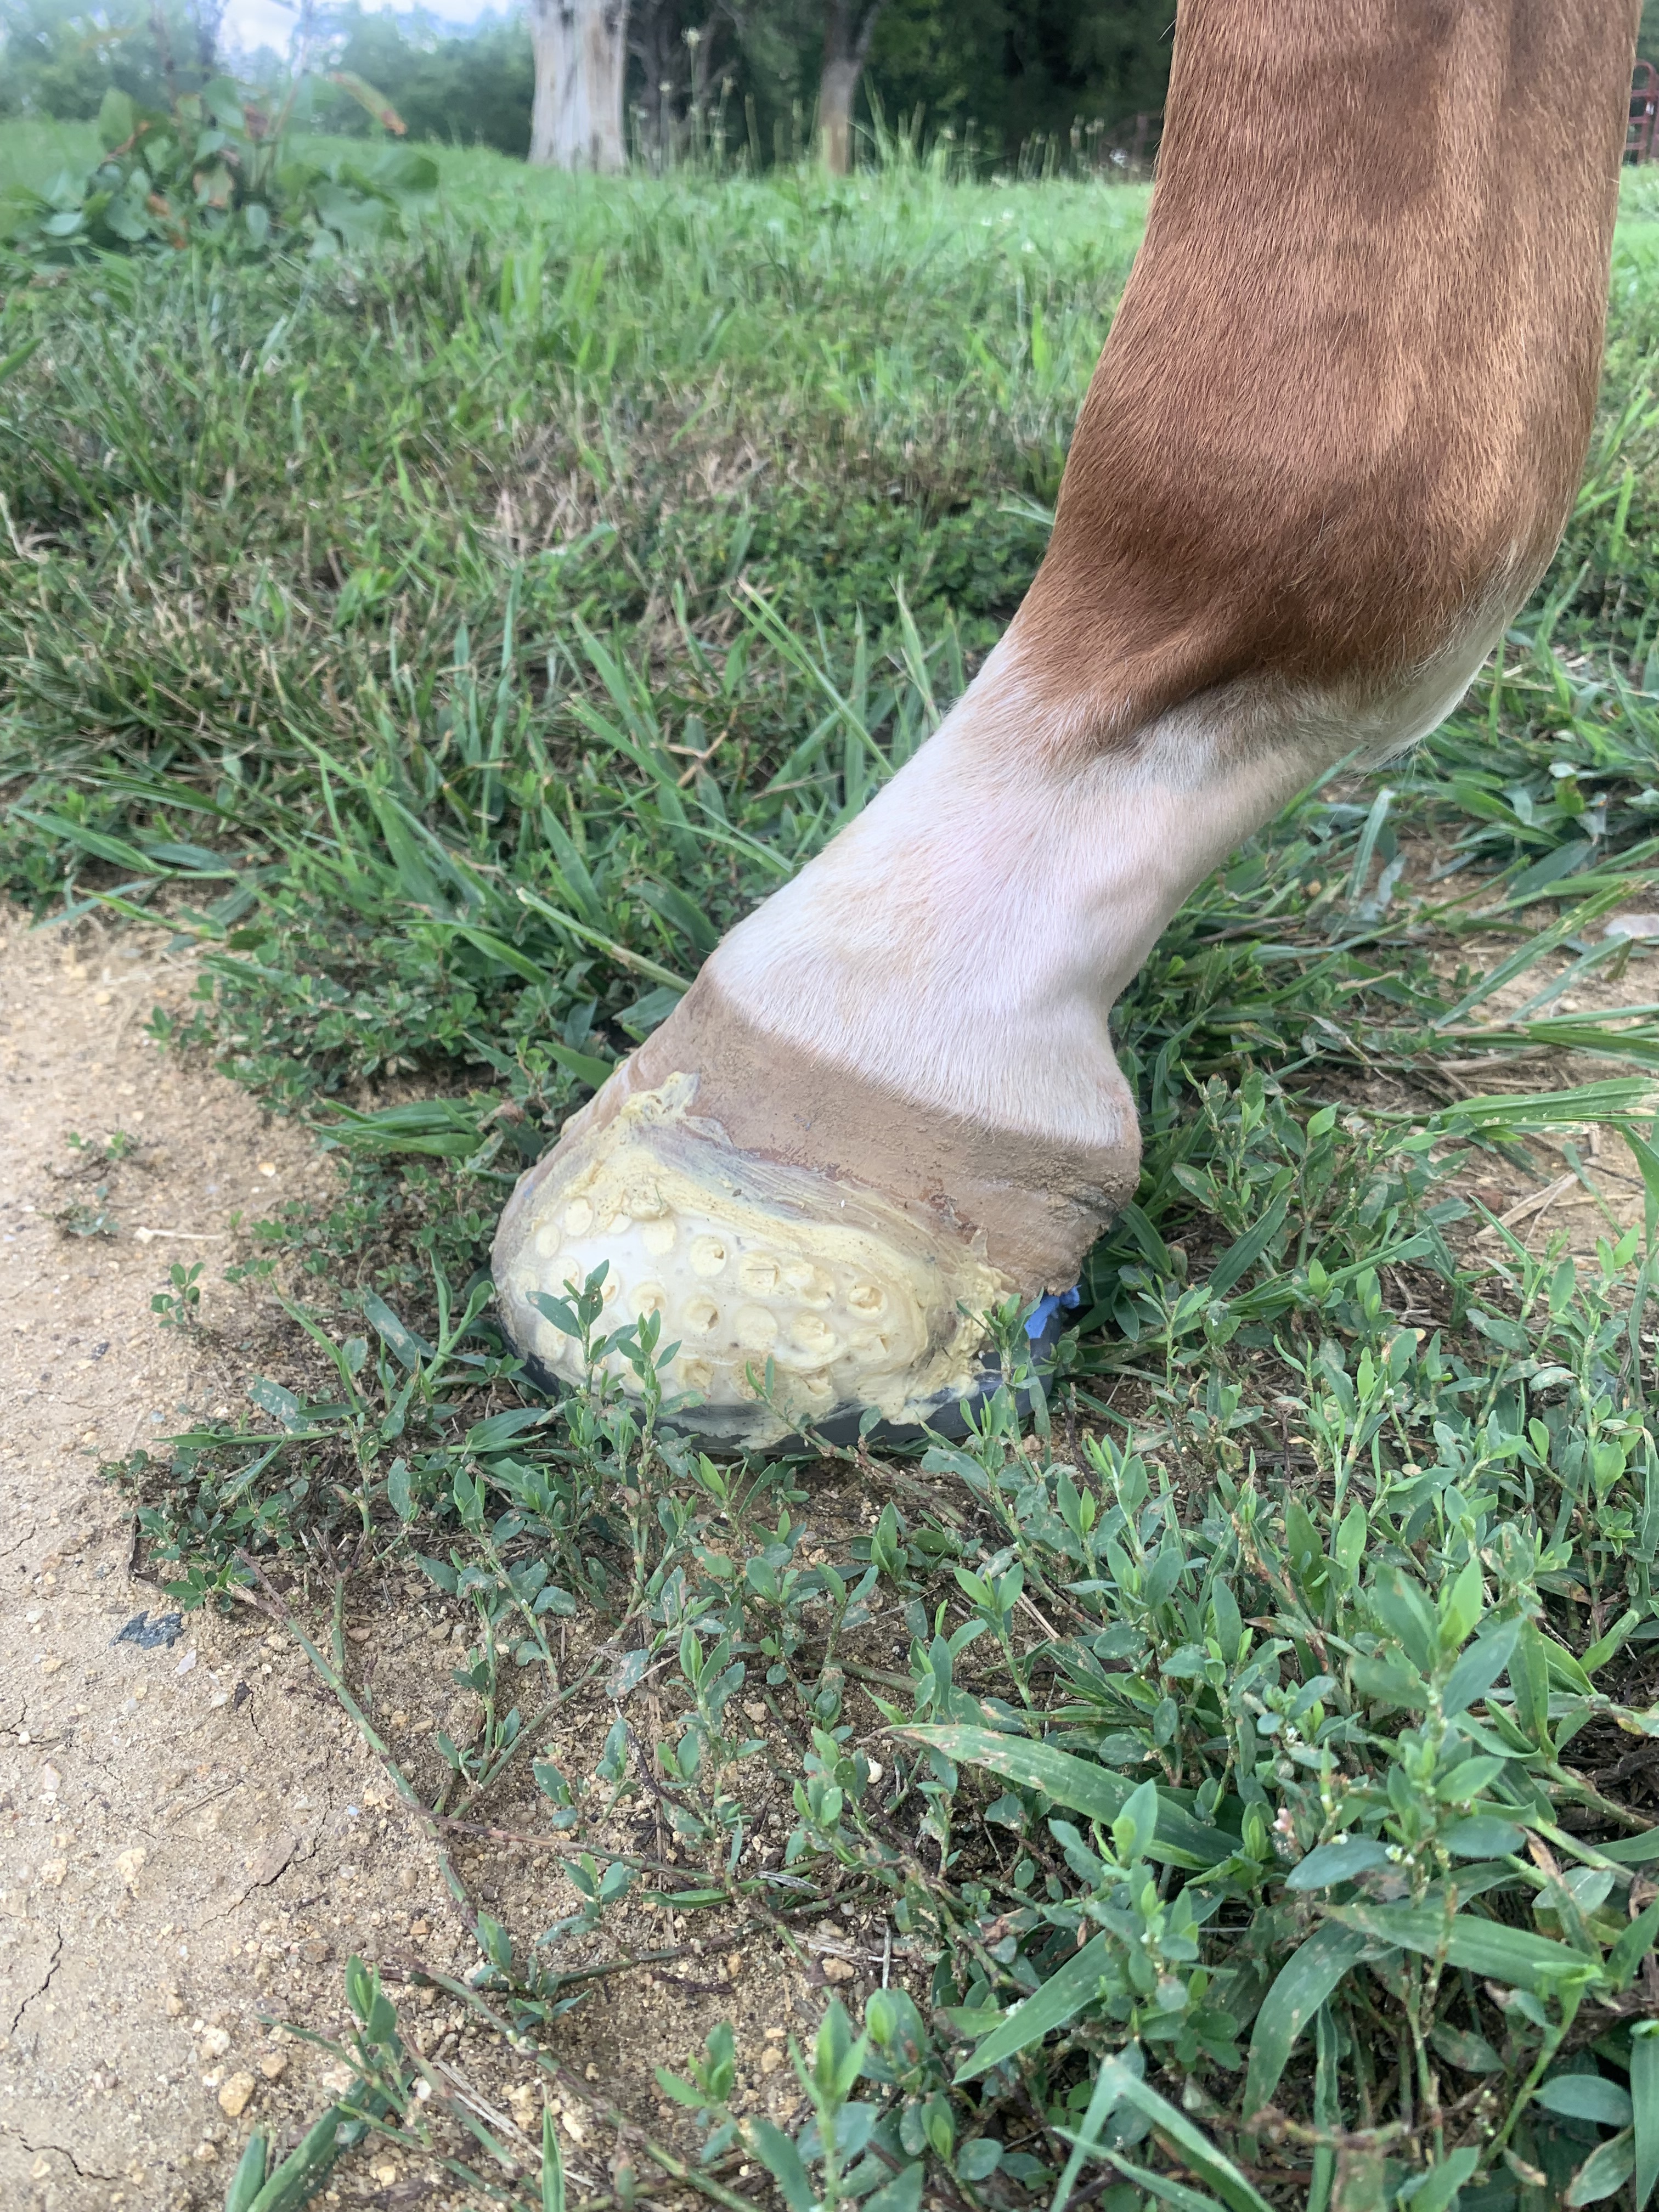
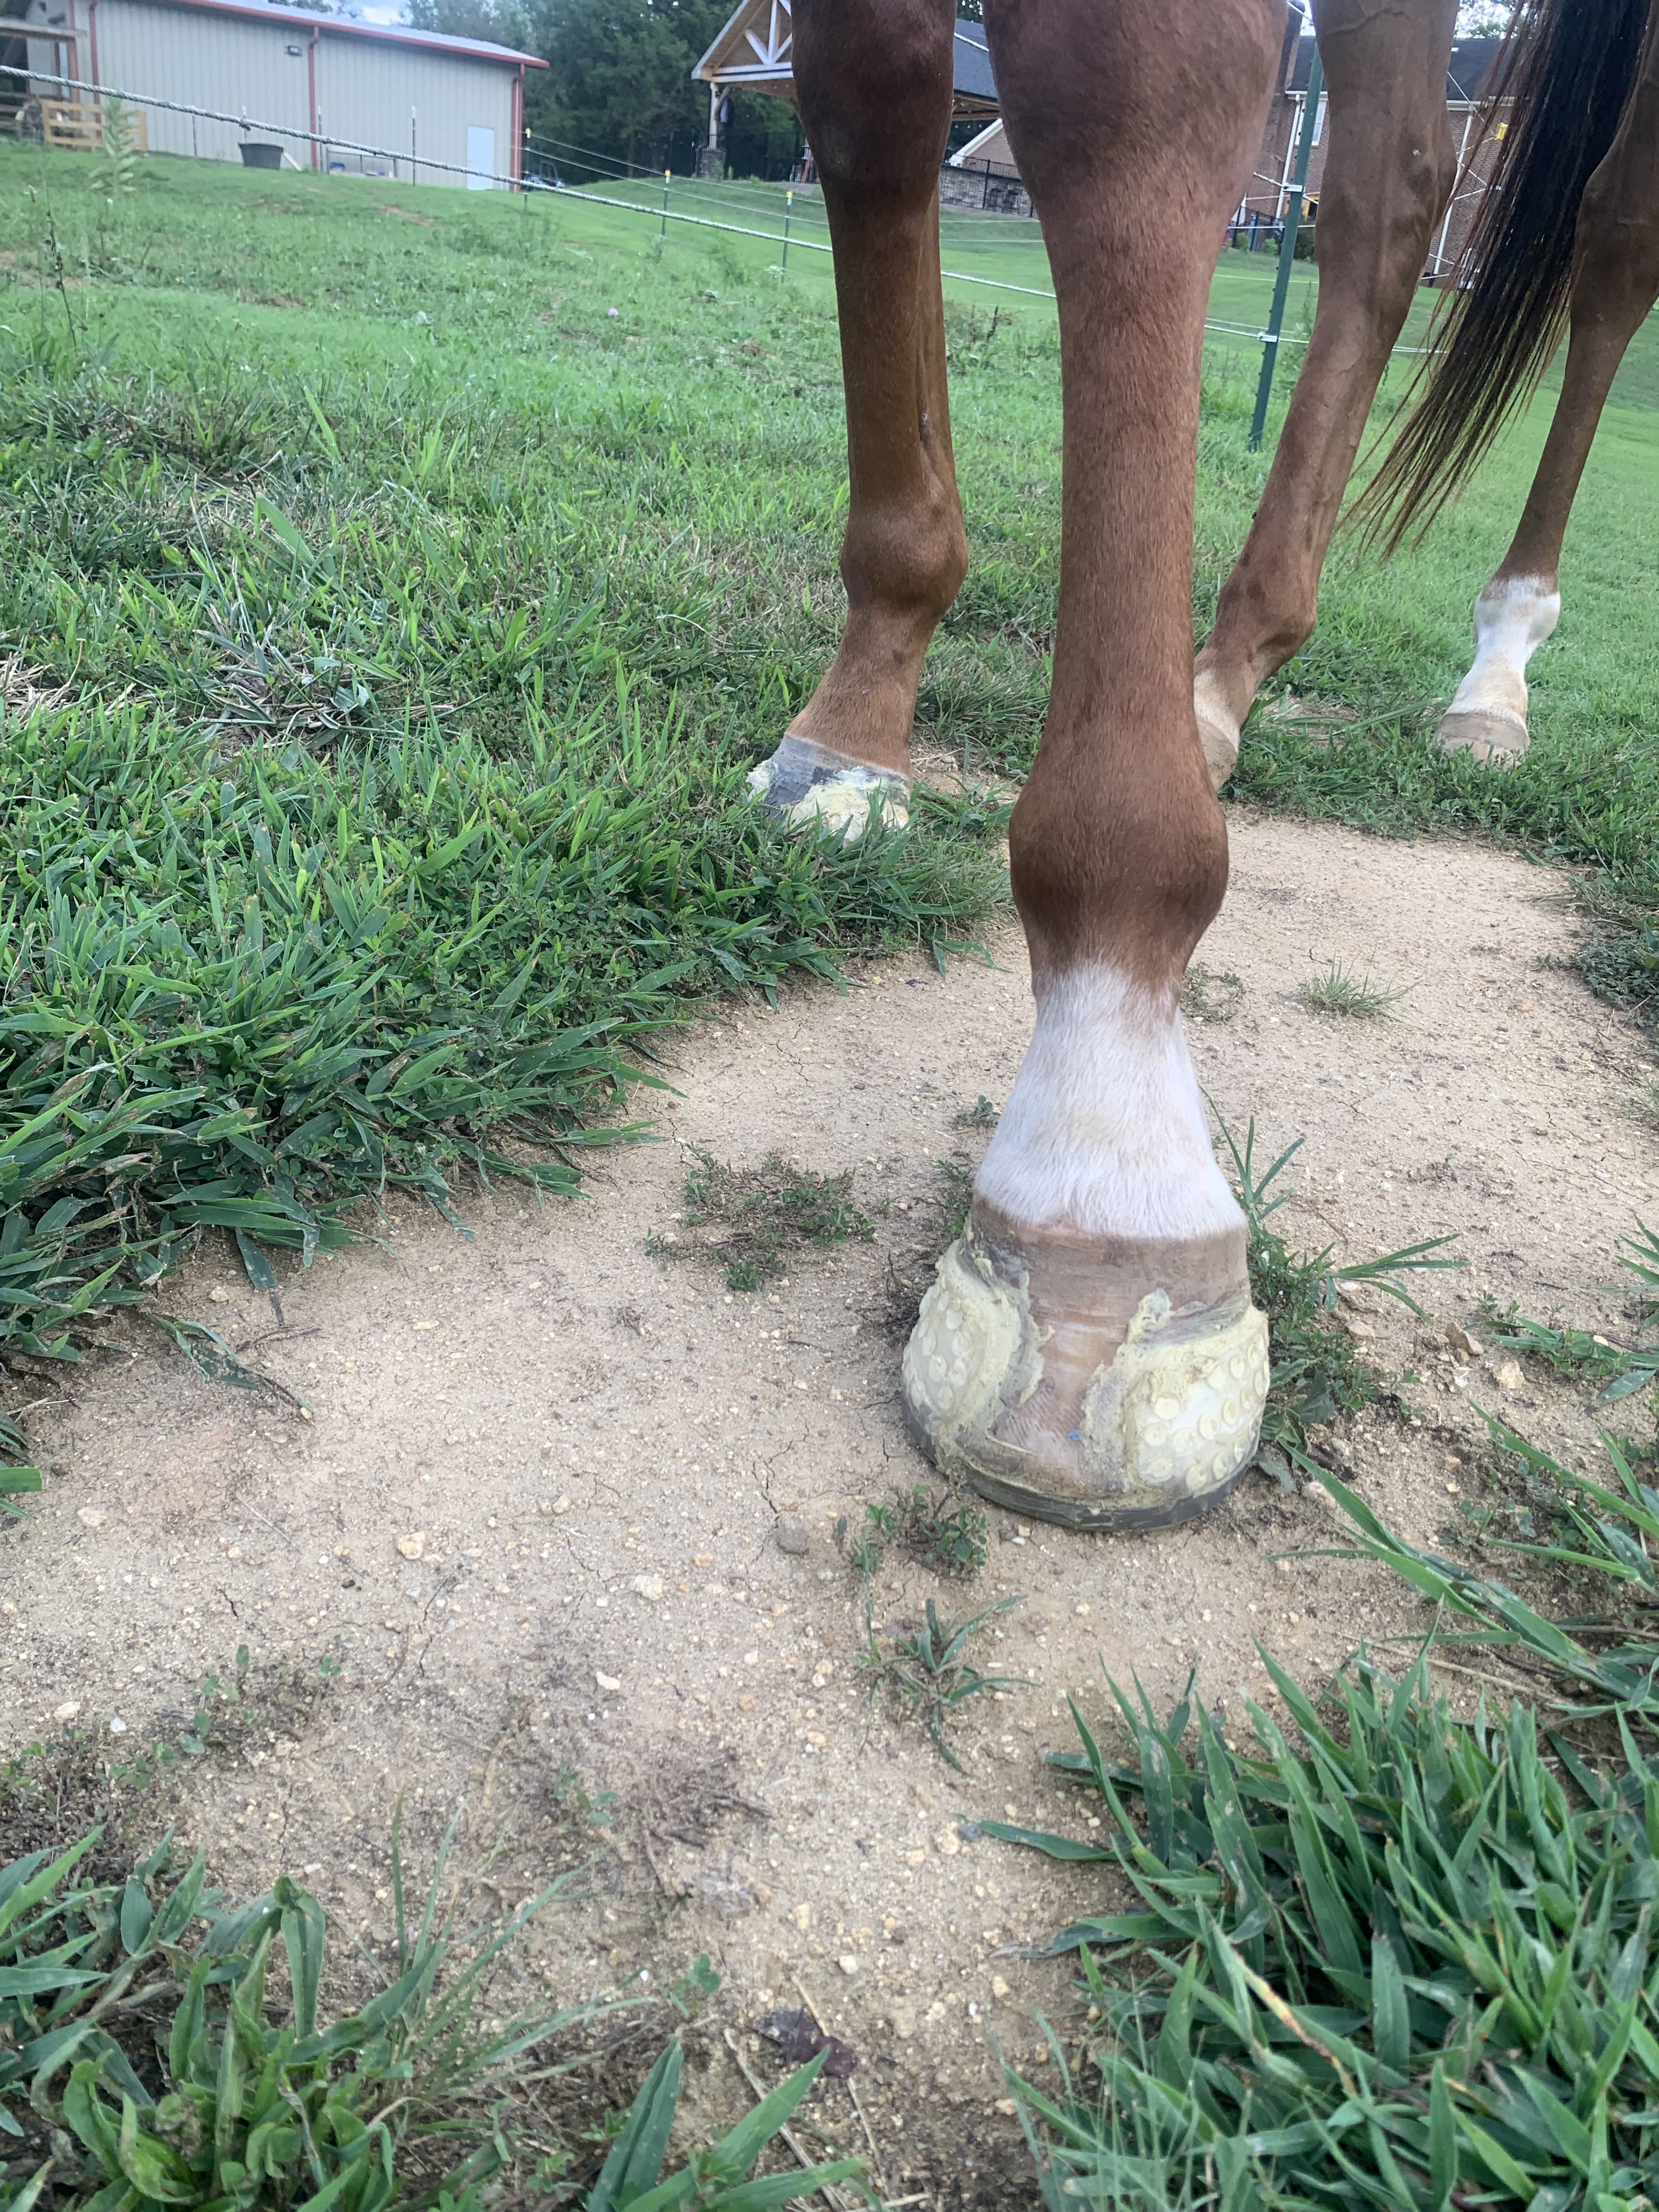
Of course right after my last post, saying the Wolf-Busch tabs were working well, my mare came in with a shoe ripped clean off, and all tabs still in place. Canā€™t blame the superglue for that one. I decided to try the shoes without a pad, and see if that helped with retention. She was sore the next day (had the shoes off for a couple days), so I packed them in with Magic Cushion. I think going forward, Iā€™m going to just do this if I shoe without pads (with pads, I use the Luwex DIM). It seems like a good way to keep gunk out of the space between the shoe and sole, and she was comfortable the next day.

For heat guns, Iā€™ve been happy with my SeekOne from Amazon. It comes with a reducer, so it works for welding, and has a digital temp adjustment, so Iā€™ve used it for drying feet as well. I found my creme brulee torch and used that last time and my mare was NOT impressed when she smelled a bit of burning. Thatā€™s it, momā€™s trying to set me on fire!

Iā€™ve read on the FB group that some people are doing a couple wraps of saran, and then the electrical tape over it. Iā€™m going to give that a go next time since I always end up with a few spots of tape glued on the tabs/hoof wall - itā€™s just a cosmetic issue, but slightly annoying.

4 Likes

This is a great idea!

1 Like

FiveStride, youā€™ve totally got this. Two additional comments:

  1. Order more equilox tips than you think youā€™ll need. At least 1 per hoof, probably 6 or so the first go round if you feel like you want to touch up the glue (i.e., itā€™s nice to smear a bit to kind of ā€œsealā€ where the cuff meets the hoof, or at the toe where the shoe meets the hoof wall. Smear and feather the glue where it contacts the hoof (just use a gloved finger, easy peasy) to present any gap which will, over time, get bigger and bigger.

  2. If you use a bigger size (which is nice, especially at the heels, for additional support), I recommend leaving bell boots on 24/7 on all four unless you like resetting things every damn week. Especially while you learn and get your technique down. Eventually you probably wonā€™t need them everywhere all the time, but I have bigger surface area out behind the heels, which is really easy to get grabbed. A smaller shoe wonā€™t be at quite so much risk.

  3. You have totally got this. It will get easier pretty quickly. Itā€™s a lot at first, but by the 3rd time, youā€™ll have a routine. By the 4th time, youā€™ll be a pro. Iā€™ve been doing mine a few cycles now and I love it.

Also, what works well for me is having at least two sets of shoes, so I can pull off the old ones and have fresh ones ready to go. Then I take the old ones home and clean them up for reuse next time. (Assuming you donā€™t want to buy new ones each time.)

5 Likes

Alright yā€™all, Iā€™m almost ready to try these!

I realized when I went to test fit for size that I measured to the heel buttress rather than the bulbs/where we would LIKE the heels to be (his are run under). They arenā€™t too small, they are about how big a farrier would set them normally, but Iā€™m thinking I may want to try another size next time. For now, less shoe sticking out to catch with a hind is probably fine :joy:.

Anyway, I cut the debris guards out (why are those even there??), and rolled the heels and edges just a bit with the angle grinder. I was extremely conservative, but better too little than a useless shoe :sweat_smile:.

Iā€™m making do with a sandpaper block and no Jack stand for now, but I expect a Buffy and stand are in my future if this goes well. Iā€™m waffling between trying just the shoe vs the plugs and hoof packing for this first round. On one hand, the foot might breathe better without a covered solar surface, but on the other hand itā€™s harder to pick out and keep cleanā€¦ I donā€™t have pads to put in the shoe yet. :thinking:

Anyway, Iā€™ll take pics when I get these done. :crossed_fingers:t3::crossed_fingers:t3::crossed_fingers:t3::crossed_fingers:t3::crossed_fingers:t3::crossed_fingers:t3::crossed_fingers:t3:

5 Likes

Good luck! :crossed_fingers:

1 Like

Damnā€™, I welded EasyShoe glue cuffs on a pair of Duplos last night, and glued with Super Fast. A shoe came off within 8 hours and my horse wasnā€™t even turned out, just loitering in her stall and pen. The BO said it looked like the glue didnā€™t stick to the hoof wall at all. I was really pleased with the weld I got with the Duplos though. I might transition over to those shoes as my Versas wear out or are lost in the field. Iā€™m thinking Duplo with the WB tabs and super glue from here on.

If you have a torch of some kind, you can heat-fit the shoes to get it in the right spot. A butane torch (like the kind you would use for creme brulee, even - doesnā€™t have to be the big industrial ones) will warm the cuffs so you can slide it back on the hoof to get more support at the heels. I havenā€™t tried this yet (I will next time I get a new set) but I think thatā€™s how people are getting the smaller sizes to sit far back enough. Kristen Wertz has a bunch of videos in the Glue-On Composite Shoe facebook group.

You canā€™t use super glues with the cuffs - the cuffs need acrylic glues in order to take up space between the cuff and the hoof wall. You can use super glues with the finger-style attachments, though.

Edit: for the sake of not spreading misinformation, see below - SuperFast is not a super glue/cyanoacrylic! Itā€™s a urethane glue, and will, indeed, fill in the space in cuffs, just like acrylics.

3 Likes

I used Vettec Super Fast not super glue.

1 Like

Youā€™re right that itā€™s not technically cyanoacrylic, but if itā€™s the stuff that goes on thin and sets within ~30 seconds, it almost certainly wonā€™t work with the cuffs.

Superfast is a urethane. It can be used to build and fill space. Itā€™s quite thick, it just sets much faster than acrylic. IME itā€™s also much more particular about prep and no moisture than acrylic.

1 Like

People in the glue on group have been using it with the cuff and getting good retontion. It did a good job of filling in the holes in the cuffs, it just did not stick to her foot at all on the left. I did a good prep job, but Iā€™m wondering if some fly spray residue got on the hoof wall. The other side was on solidly on. Temps were also on the high end, so I might try resetting later this week when itā€™s supposed to be a little cooler. I got a super solid weld onto the Duplos, so I hate to cut them off to switch to tabs.

Well, they ainā€™t pretty but I learned SO MUCH for next time. Including to order way more tips than 4 :joy:. I was planning to do all 4 feet but ran out of mixing tips and just did the fronts.

We are supposed to get a week of rain and this horse lives outā€¦ itā€™s already mucky, but he seems to need protection for anything firmer than slop. Hopefully they stay onšŸ¤žšŸ¼.

Pics below. Be nice :sweat_smile:. We are hand grazing when I took these because horsey was D O N E with me by this point :joy:

13 Likes

That looks like an awesome start to me! Honestly prettier than my first application of these, I think I had glue on the hairline, possibly the fetlock, on my clothesā€¦

And yes, buy tips in bulk!!! Wayyyy better to be drowning in tips than to be out and just have to touch up one little bitā€¦ :sweat_smile:

What does he think so far??

2 Likes

Thanks! First foot is pretty ugly, second foot is light years better!

I think he likes them. I was getting his full track up behind when walking on pavement (which he wasnā€™t doing). I also think heā€™s doing a full swing stride from the shoulder, but itā€™s hard to tell when walking him in hand.

We will see. I saw some really funky white line which I dug out as much as possible - I think the boots were just soaking his foot. :sweat_smile::grimacing: 
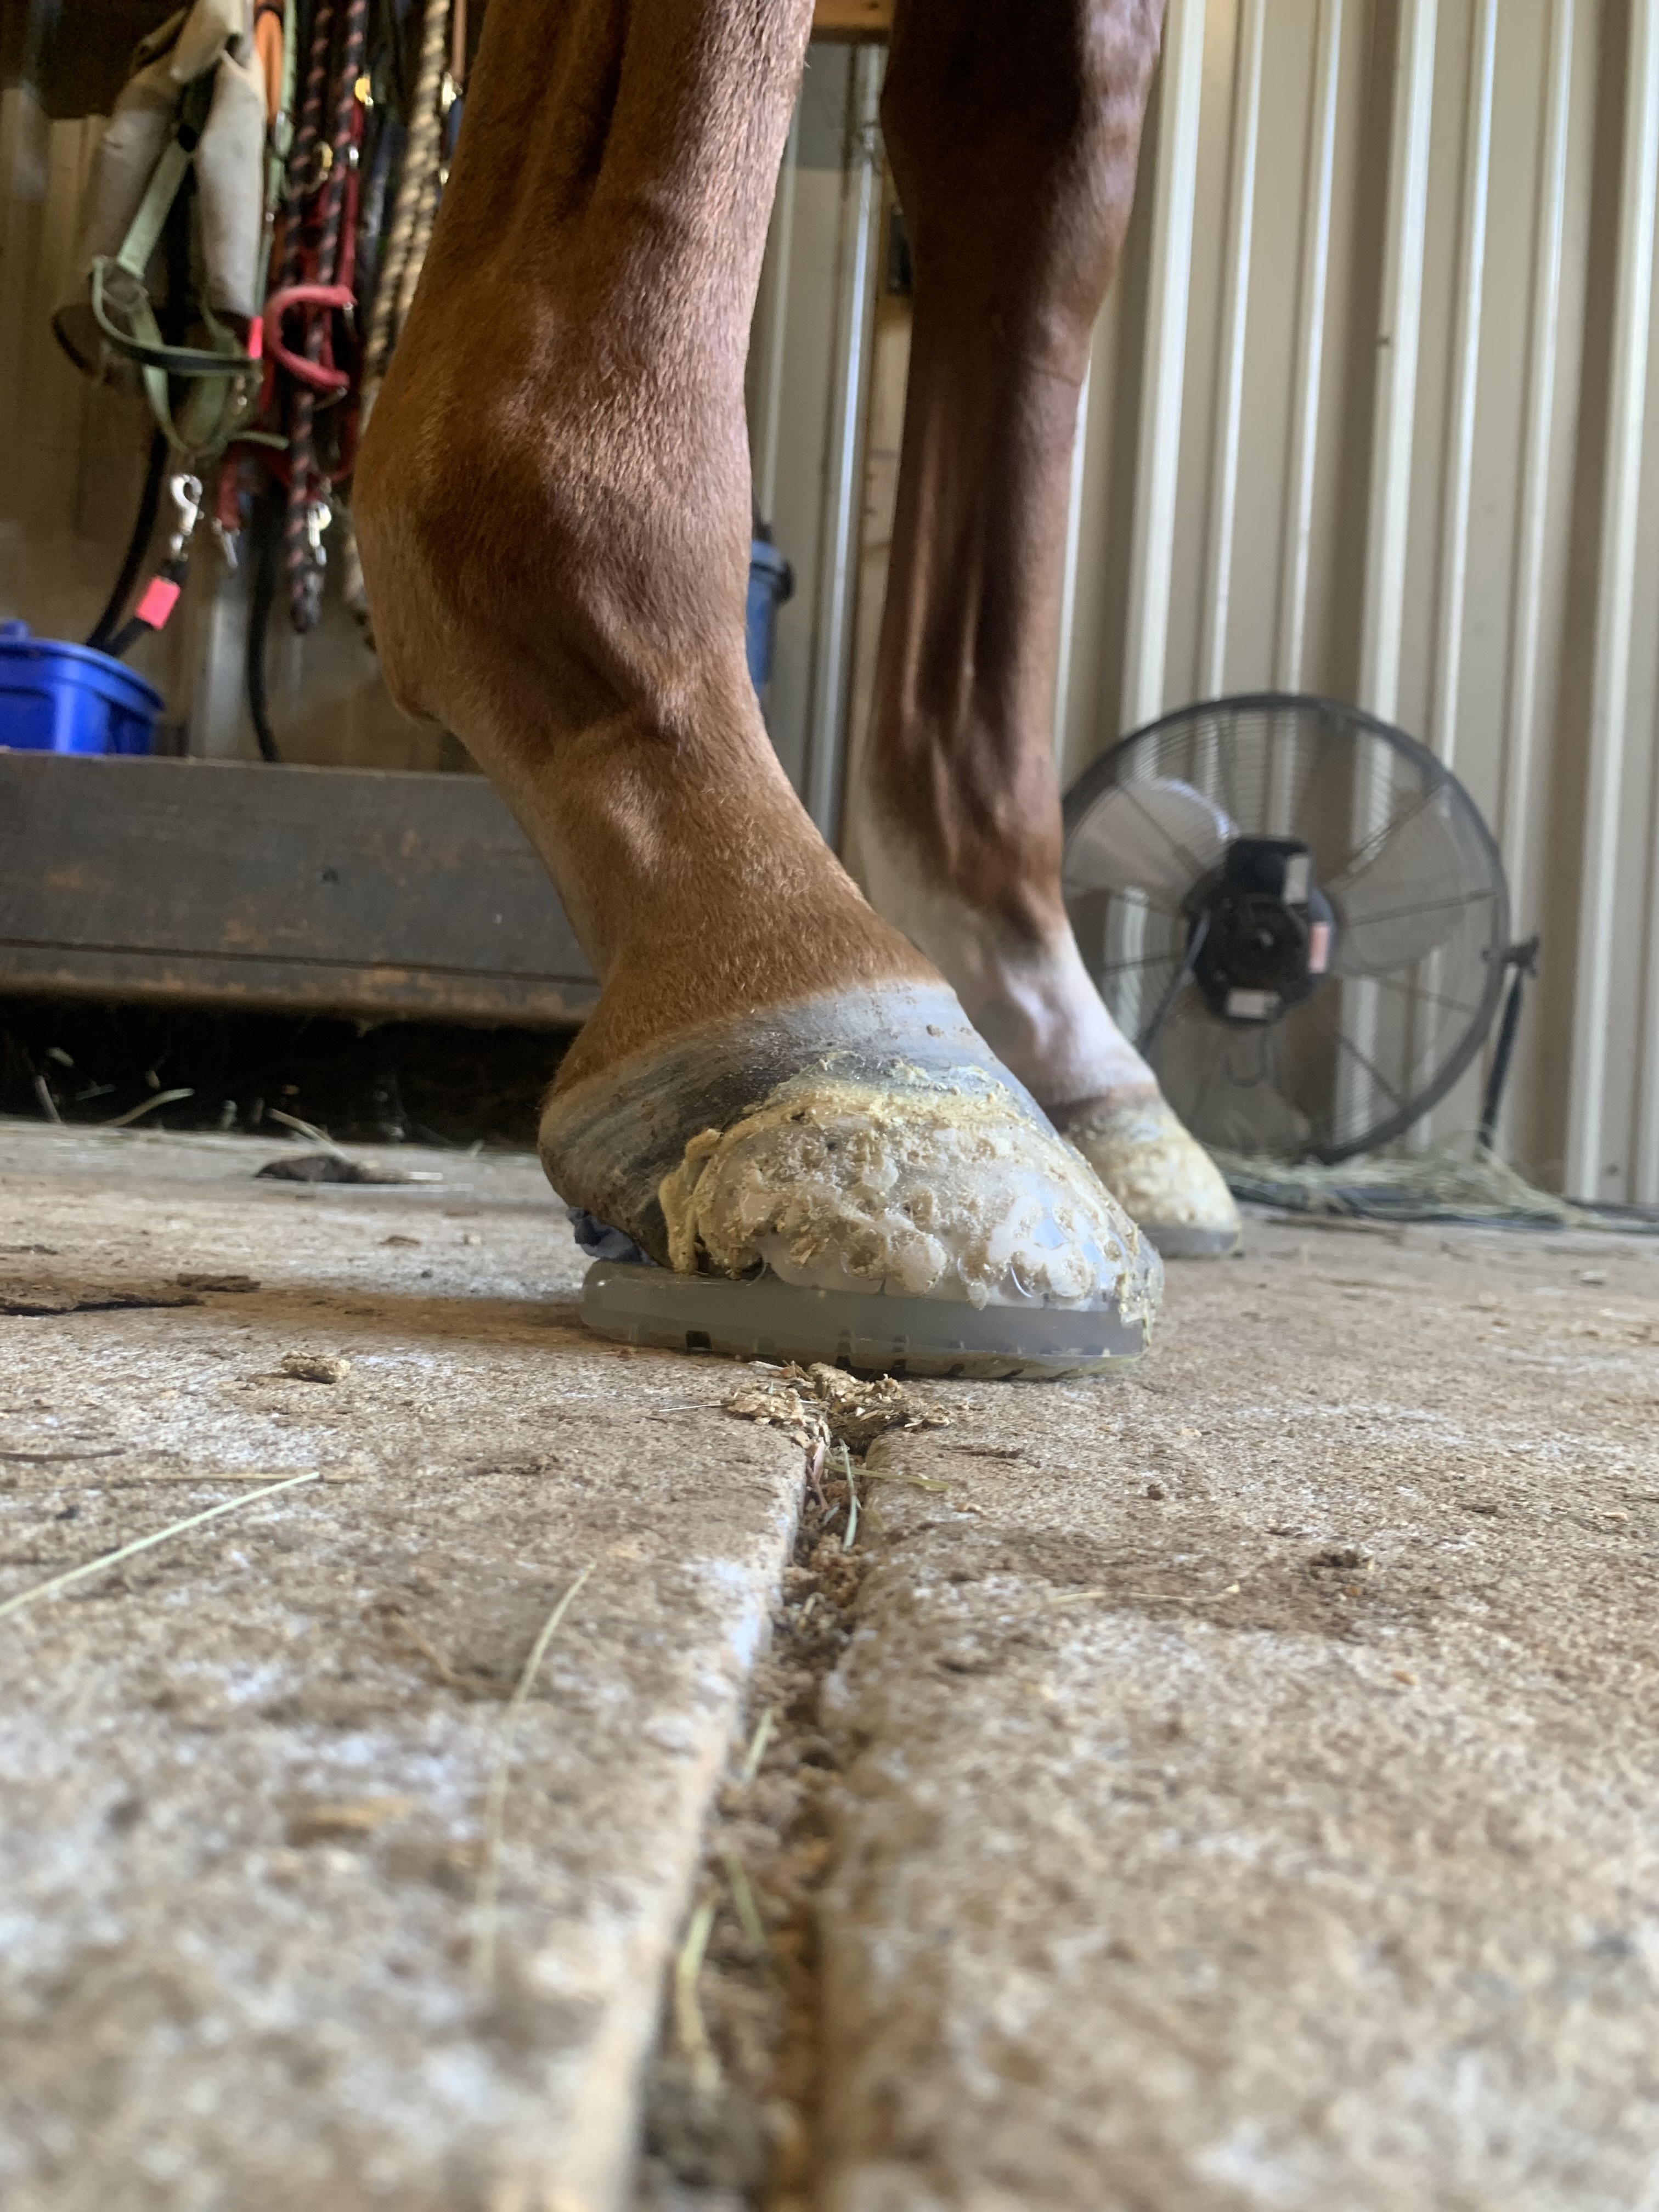
Hopefully these will be better for him!

1 Like

Mea culpa for the misinformation, then! I didnā€™t realize it would fill in the gaps, also. In that case, it makes me wonder why Equilox and the EasyShoe Bond glues seem so much more prominent for the cuffs. Or maybe its just the circles I run in :woman_shrugging:

3 Likes

Some better photos:

ETA: the white foot is a struggle, and he definitely tends toward run forward feet. I think I could have put in more of a breakover on the shoe, but that will have to be next time. I heard some forging here and there, so Iā€™m thinking an aggressive breakover is going to be best. Iā€™m looking at the EasyShoe rocker, but Iā€™m not sure if I need something like that (farrier has used shoe rockers before on another of mine and they were awesome), or if I just need to grind more off the shoe itself.

Heā€™s been footsore so my farrier and I both are very conservative when trimming - Iā€™m hoping these shoes will allow us to make good progress. I also realized I shouldā€™ve put the hoof packing in differently, but thatā€™s all part of the process!

We have a hurricane rolling in so this will be the ultimate test of the shoes I think. My barn owner commented that he had been a bit footy this morning but looks much happier now that heā€™s got shoes on!

8 Likes

That looks fabulous for a first application, seriously!!

For the next application, Iā€™d try to get the shoe set back a bit further if you can. Use a lighter/torch on the front 1/3 to 1/4 of the tabs until theyā€™re very clear, youā€™ll want to do a few passes on each side, then set on the foot. I have the best luck getting them on the foot then pulling the shoe slightly toward myself by the toe of the shoe, keeping the palm of my hand over the back half of the shoe to make sure I donā€™t accidentally tip the back half up off the foot if that makes sense. That will help with forgeing and breakover. From what I can see you did a great job grinding breakover into the shoe! Setting it back anotherā€¦ehā€¦half inch? Maybe quarter inch? Will get it in an even better spot and offer more support for his heels, too.

I really like the rockers for the right application, but these feet donā€™t scream rocker attachment to me yet. The rocker adds a lot of height and bulk, and IME itā€™s a real pain to remove from the shoe after itā€™s been on a few days if you decide he doesnā€™t like it. If you just screw it on, walk around, then want to yank it off, that works.

Theyā€™re working on a new shoe that has a base you glue on similar to the Versas or Speeds, then a bunch of possible attachments you can attach via t-nuts, including a rocker, a clog-type thing, a wedge, etcā€¦I am VERY excited for that to come out, it may end up being a good option for your fellow.

Seriously, good job! And good on you for taking the leap! I know itā€™s daunting AF, and if youā€™re anything like me there will still be blood sweat tears and swearingā€¦but itā€™s worth it. :slight_smile: 
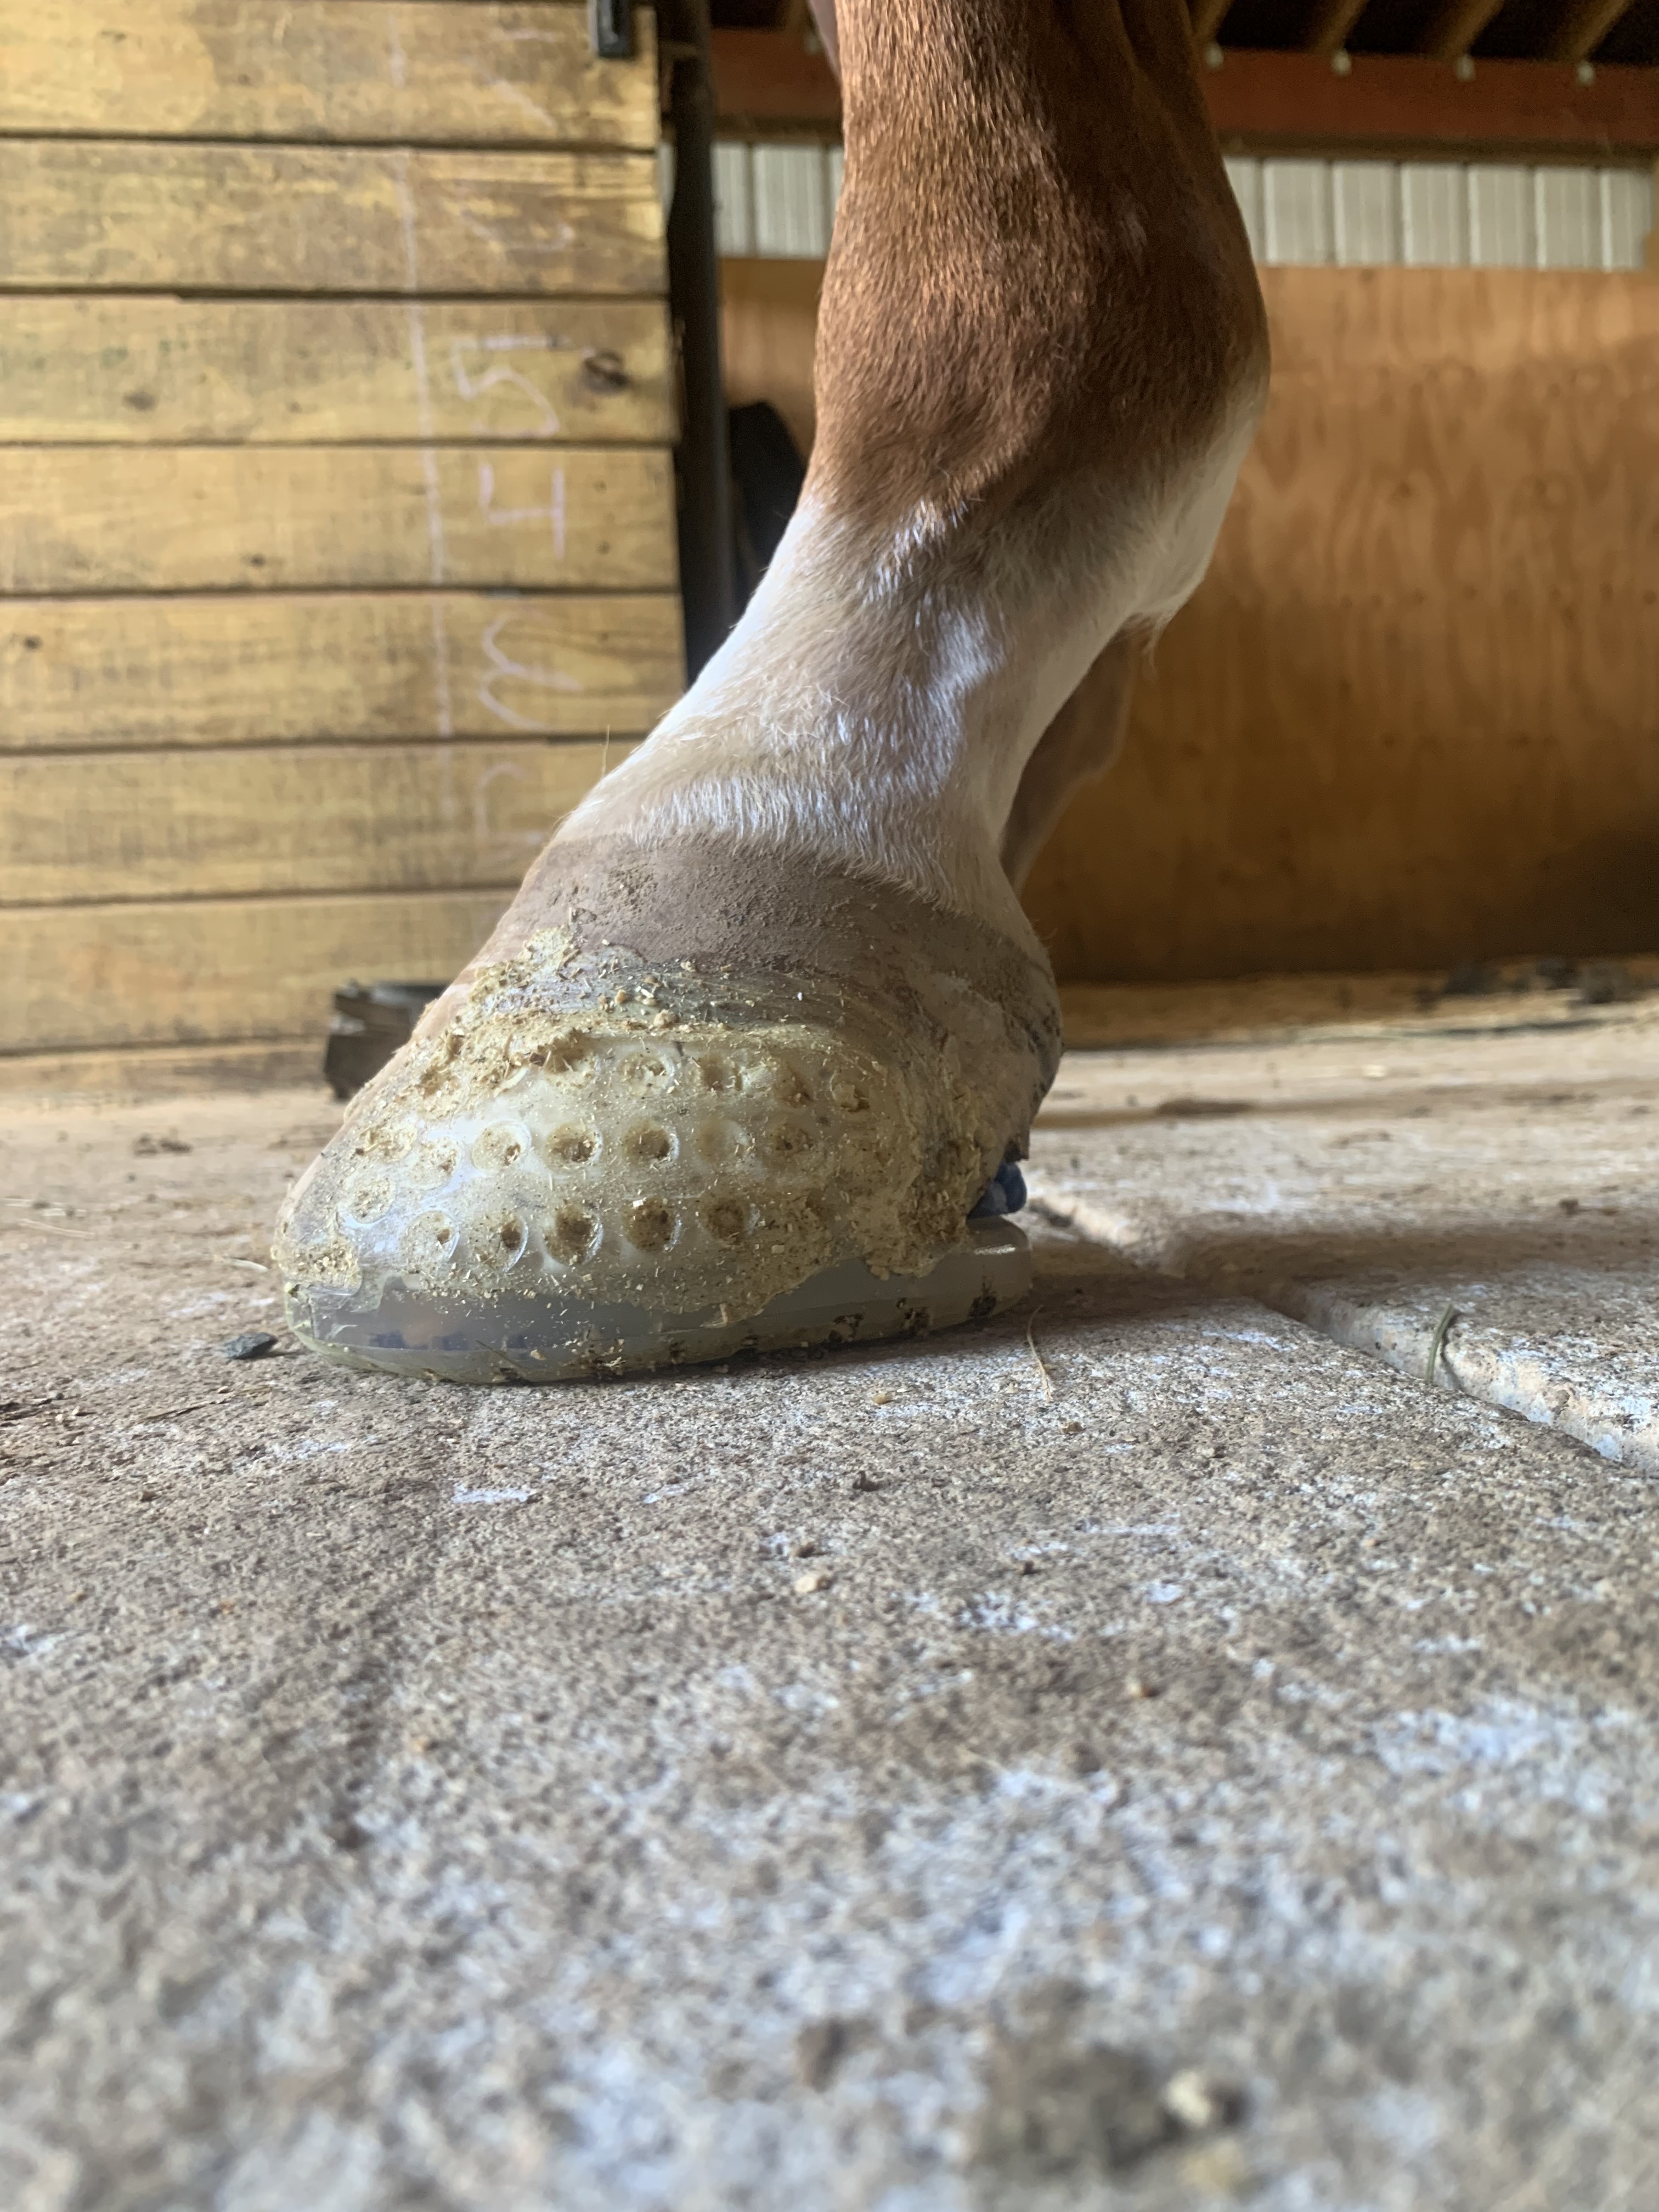
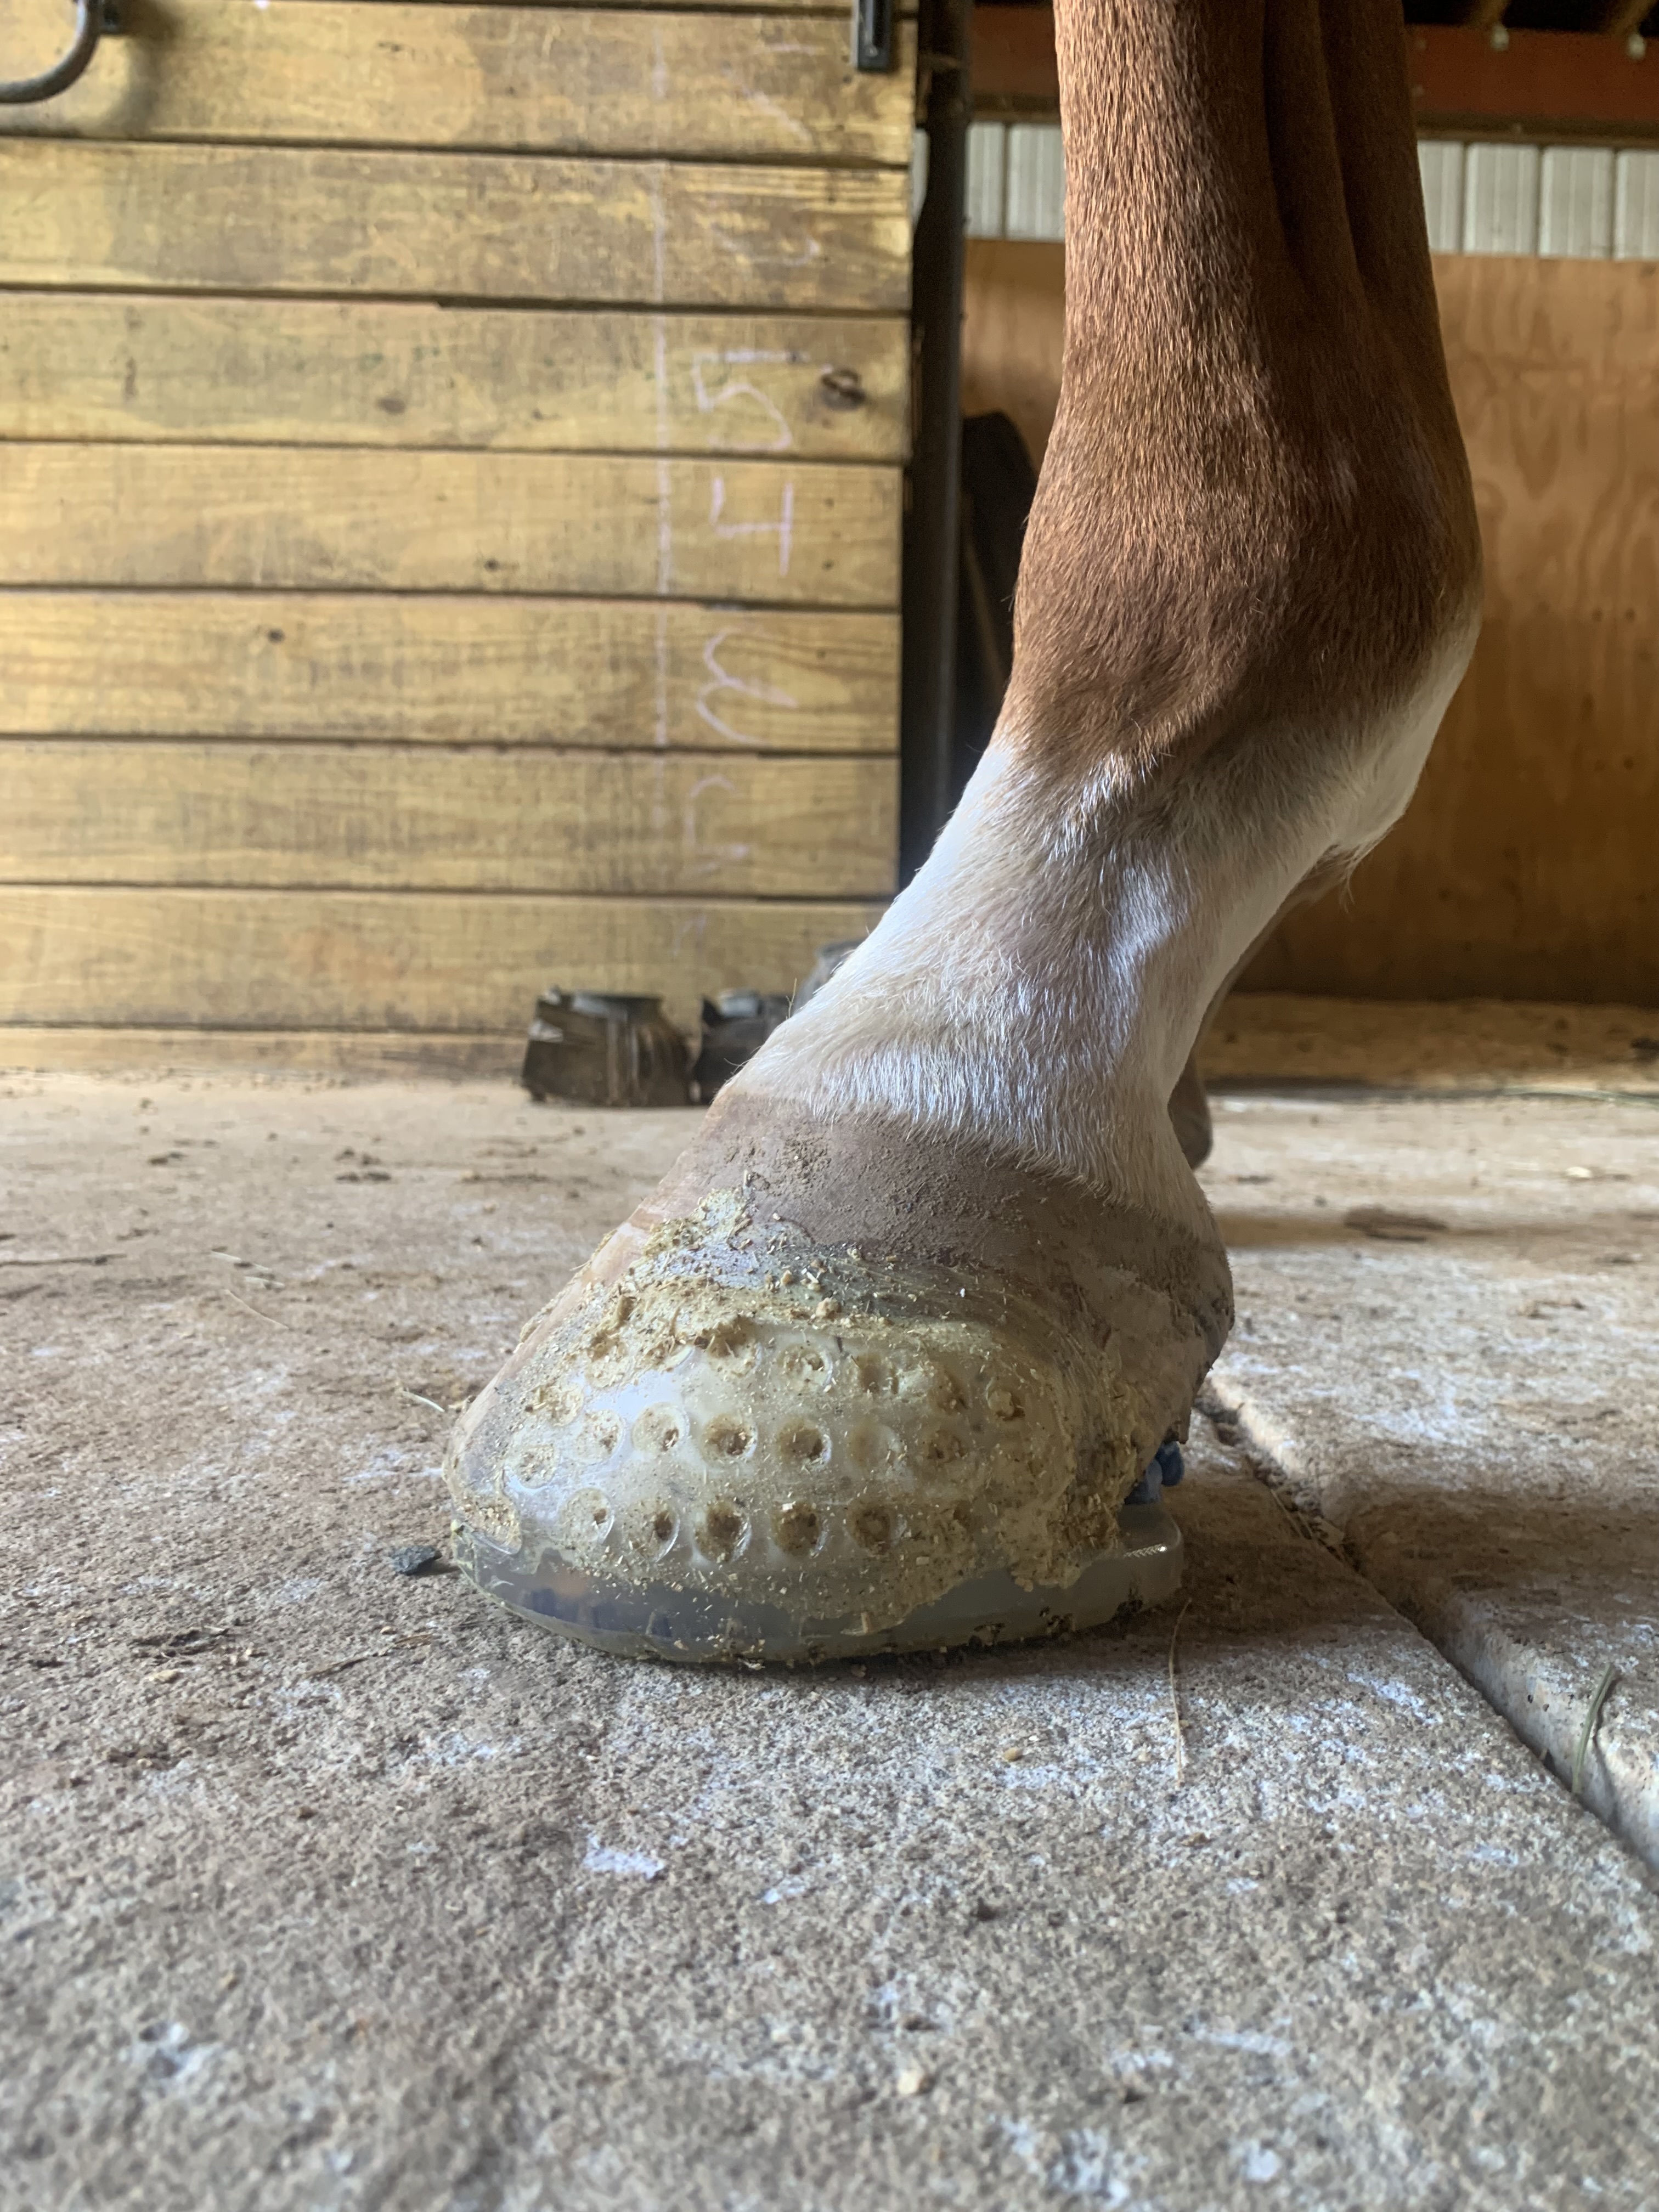
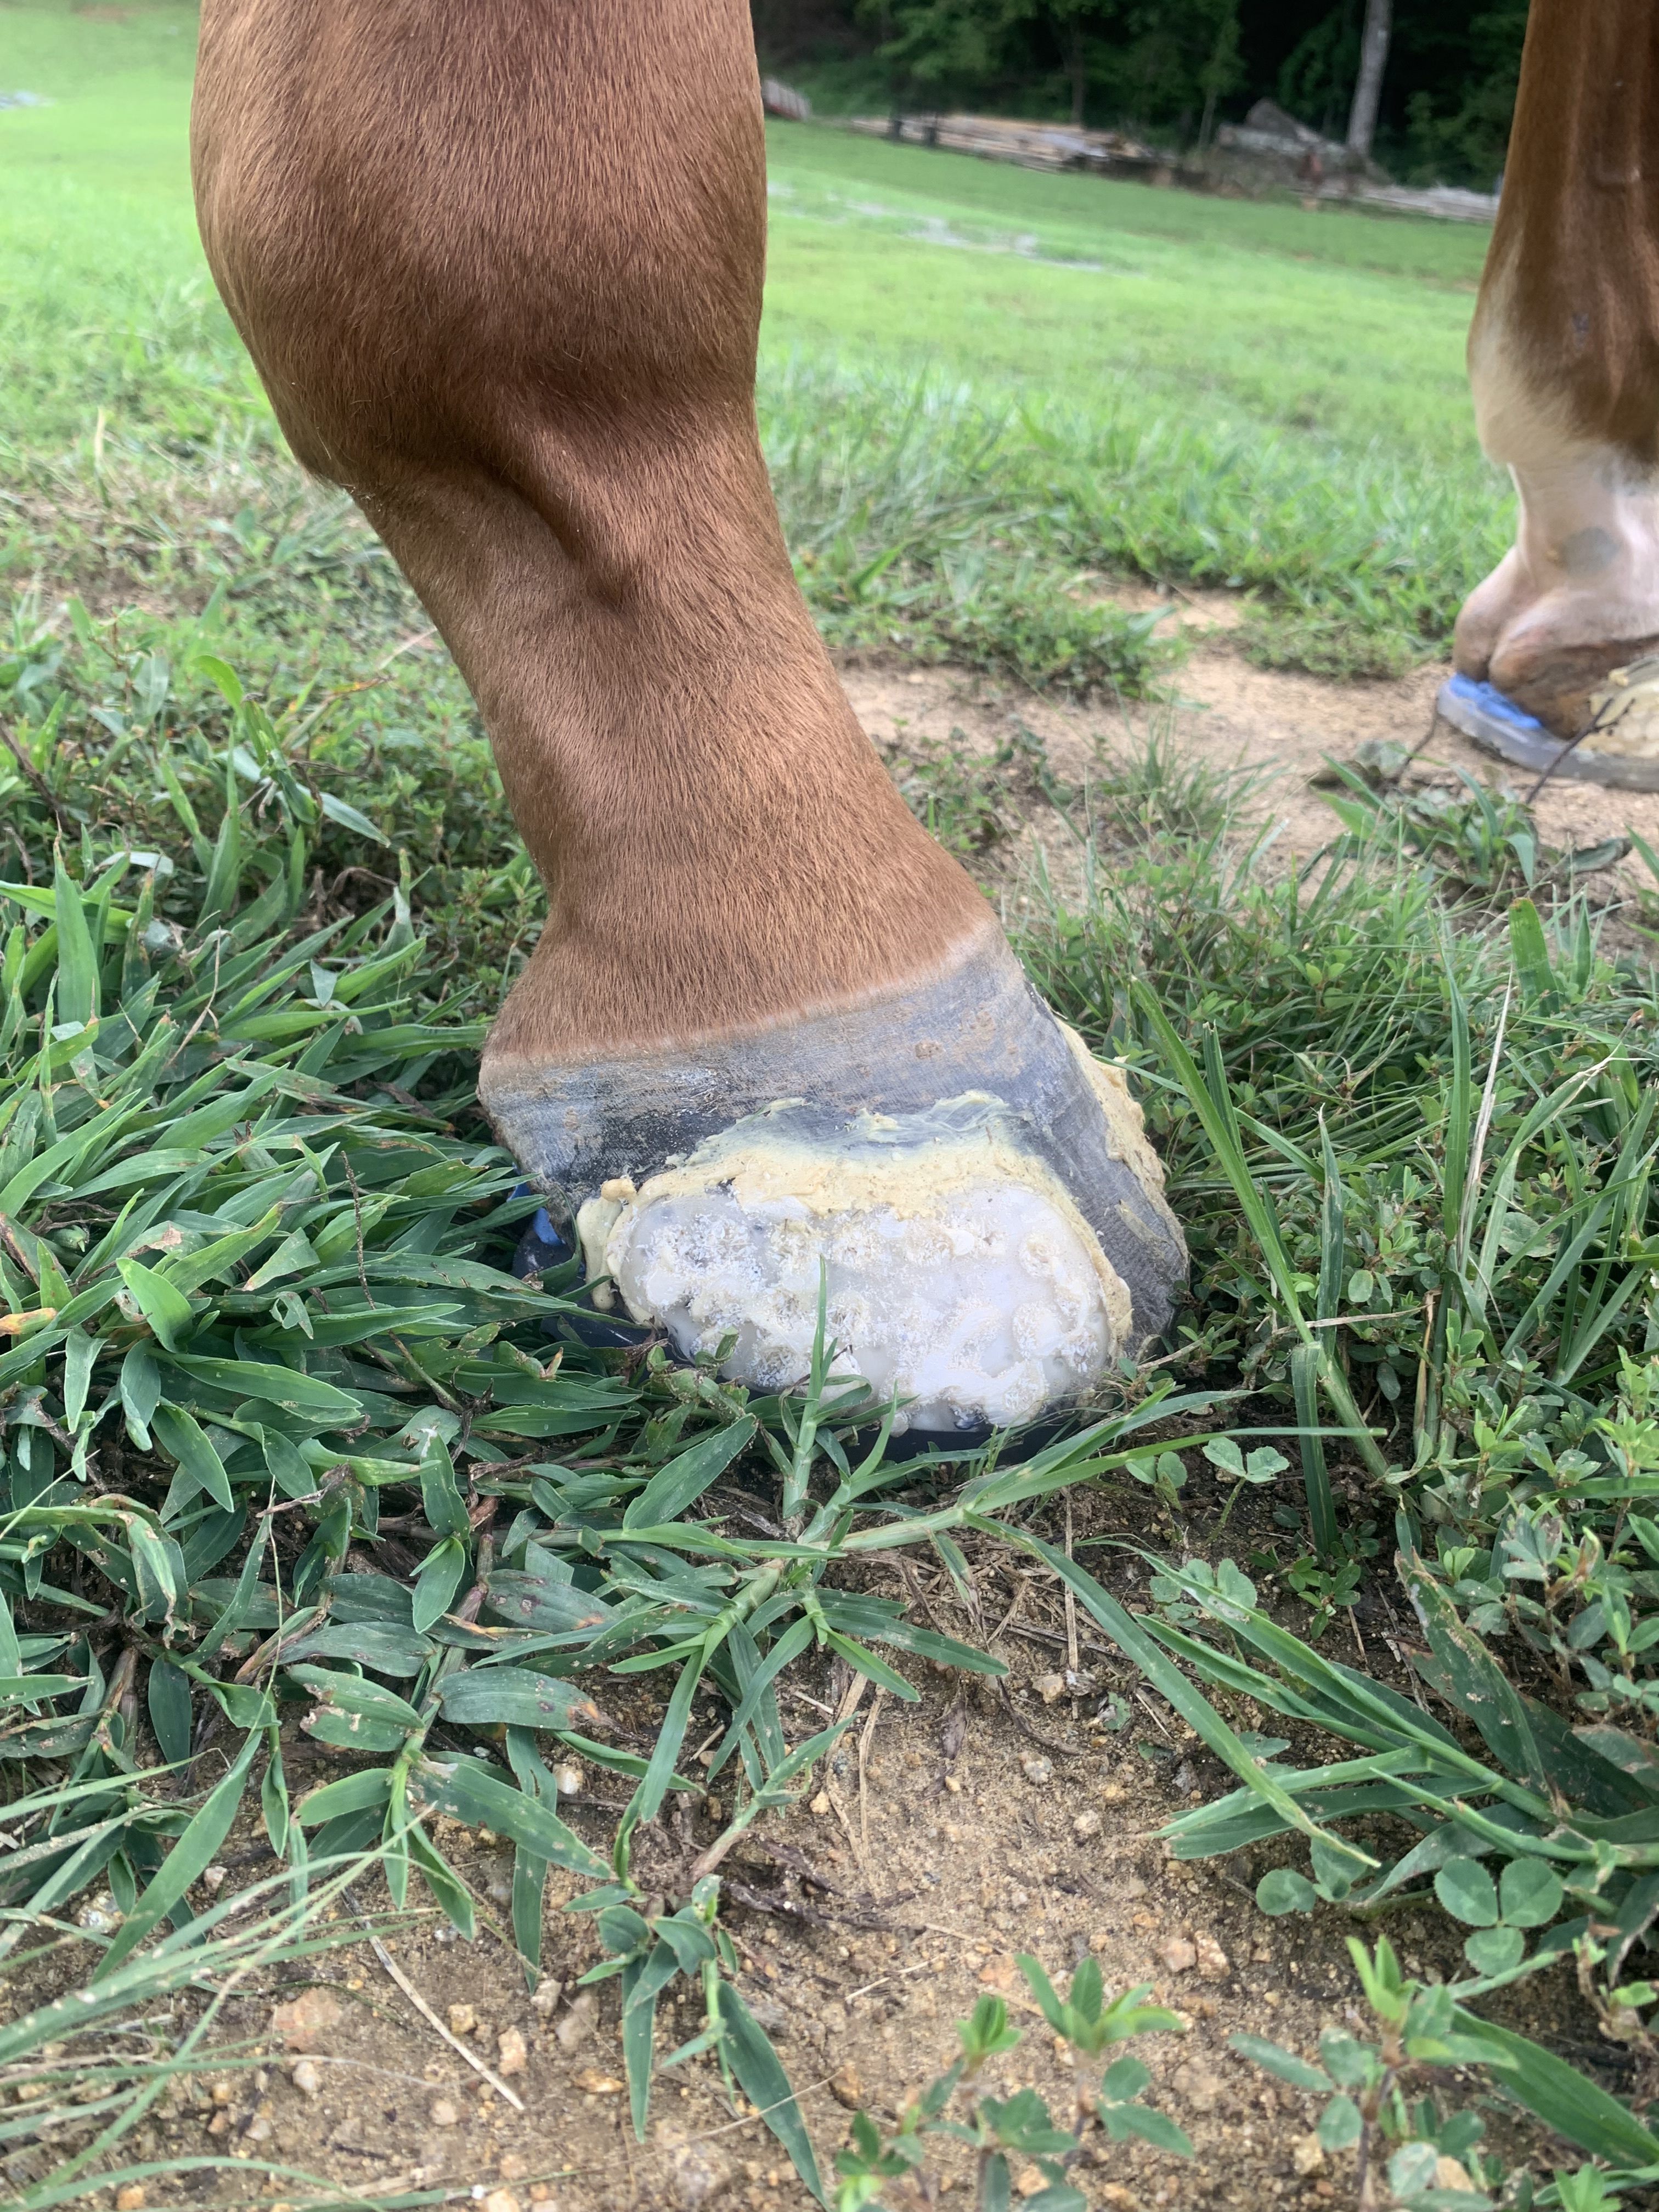
(I say, as I glued on a package on my problem child yesterday, who is currently not loving said package with like $150 worth of materials on his feetā€¦sigh. But heā€™s a major problem child re: his feet.)

3 Likes

I find glue preference and prevalence to be very regional and very personal! Folks tend to gravitate towards what their mentors use, and towards what they first learned with. Urethane also does better where itā€™s very dry, and in applications where you need something that sets FAST. You have very little working time with SuperFast or Adhere or any of the others (HoofTite, EasyCare has their own tubes, etc), but that also means you donā€™t have to be as concerned about horsey nonsense while the glue cures. I think urethane glues may also be slightly cheaper, or at least more accessibleā€“a lot of feed stores might carry a handful of tubes of SuperFast or something like that, while in the vast majority of places you need to order acrylic online or from a specialty farrier store. Urethane also has very little odorā€“I personally find the fumes from acrylic glue pretty noxious, but it fortunately doesnā€™t trigger migraines or asthma for me. Iā€™ve read that it does for some folks, who then choose to stick to urethane glues.

Acrylic (Equilox, ES Bond, and others) gives you a lot more working time and you can more easily build height on a shoe with it. It also has the added benefit of being able to hand mix it, which allows additives such as copper sulfate to help with any funk that might get between the glue and the wall. Itā€™s much more tolerant of moisture, and it bonds well to itself. Shoes that have been glued with acrylic are easier to reset, because it will bond back to itself while urethane glues wonā€™t. If youā€™ve just pulled a pair of shoes, trimmed, and are now prepping to re-glue, you can leave a little bit of acrylic glue still on the wall when buffying/sanding to help with retention since it bonds to itself so well.

They both have their place! I learned mostly with urethanes, but have branched out into acrylic and obviously superglue. Iā€™m cheap so I prefer to superglue whenever possible, but Iā€™ve come to appreciate the acrylic glues quite a bit. Itā€™s nice that I can just run and grab a tube of superfast from my local feedstore in a pinch if needed, though.

4 Likes

Great overview, thank you!

I think youā€™re spot on about folks using what their mentors and/or local farriers used. I donā€™t think Iā€™ve ever seen SuperFast or Adhere in action in real life (since my farrier and our mentor use acrylic), but I also havenā€™t sought out videos of them online, either. I may have to give 'em a try and see how it all compares vs. acrylic and the ordering online/running out of tips/set time, etc.

Glue-ons are such an interesting, accessible area of horse husbandry, and Iā€™m happy that they are gaining in popularity.

1 Like

Agree with others above that next time with the shoes, take more toe off and set the breakover point back a tiny bit, too. But wow, I commend you for being brave enough to DIY this, I hate anything to do with glue!

1 Like