Update post 252: I did it! 😅 Has anyone done this: DIY glue ons after farrier trims

I finally took a crack at these today! It took forever to get the correct sizes and all of the supplies. I felt pretty confident going in and my first impression is that this is going to be very doable, assuming I can get them to stay on - something only time will tell.

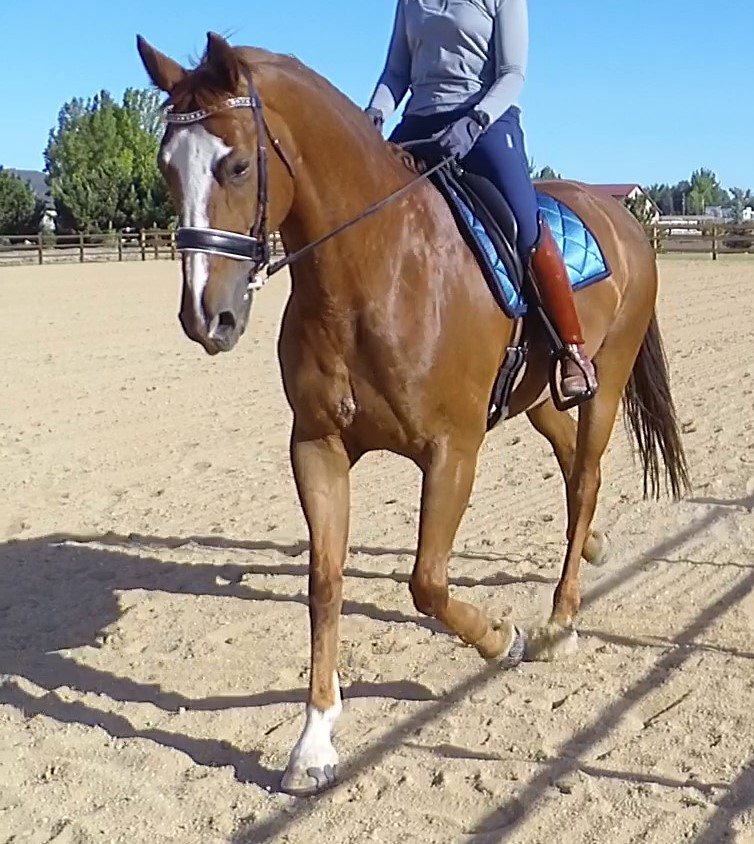
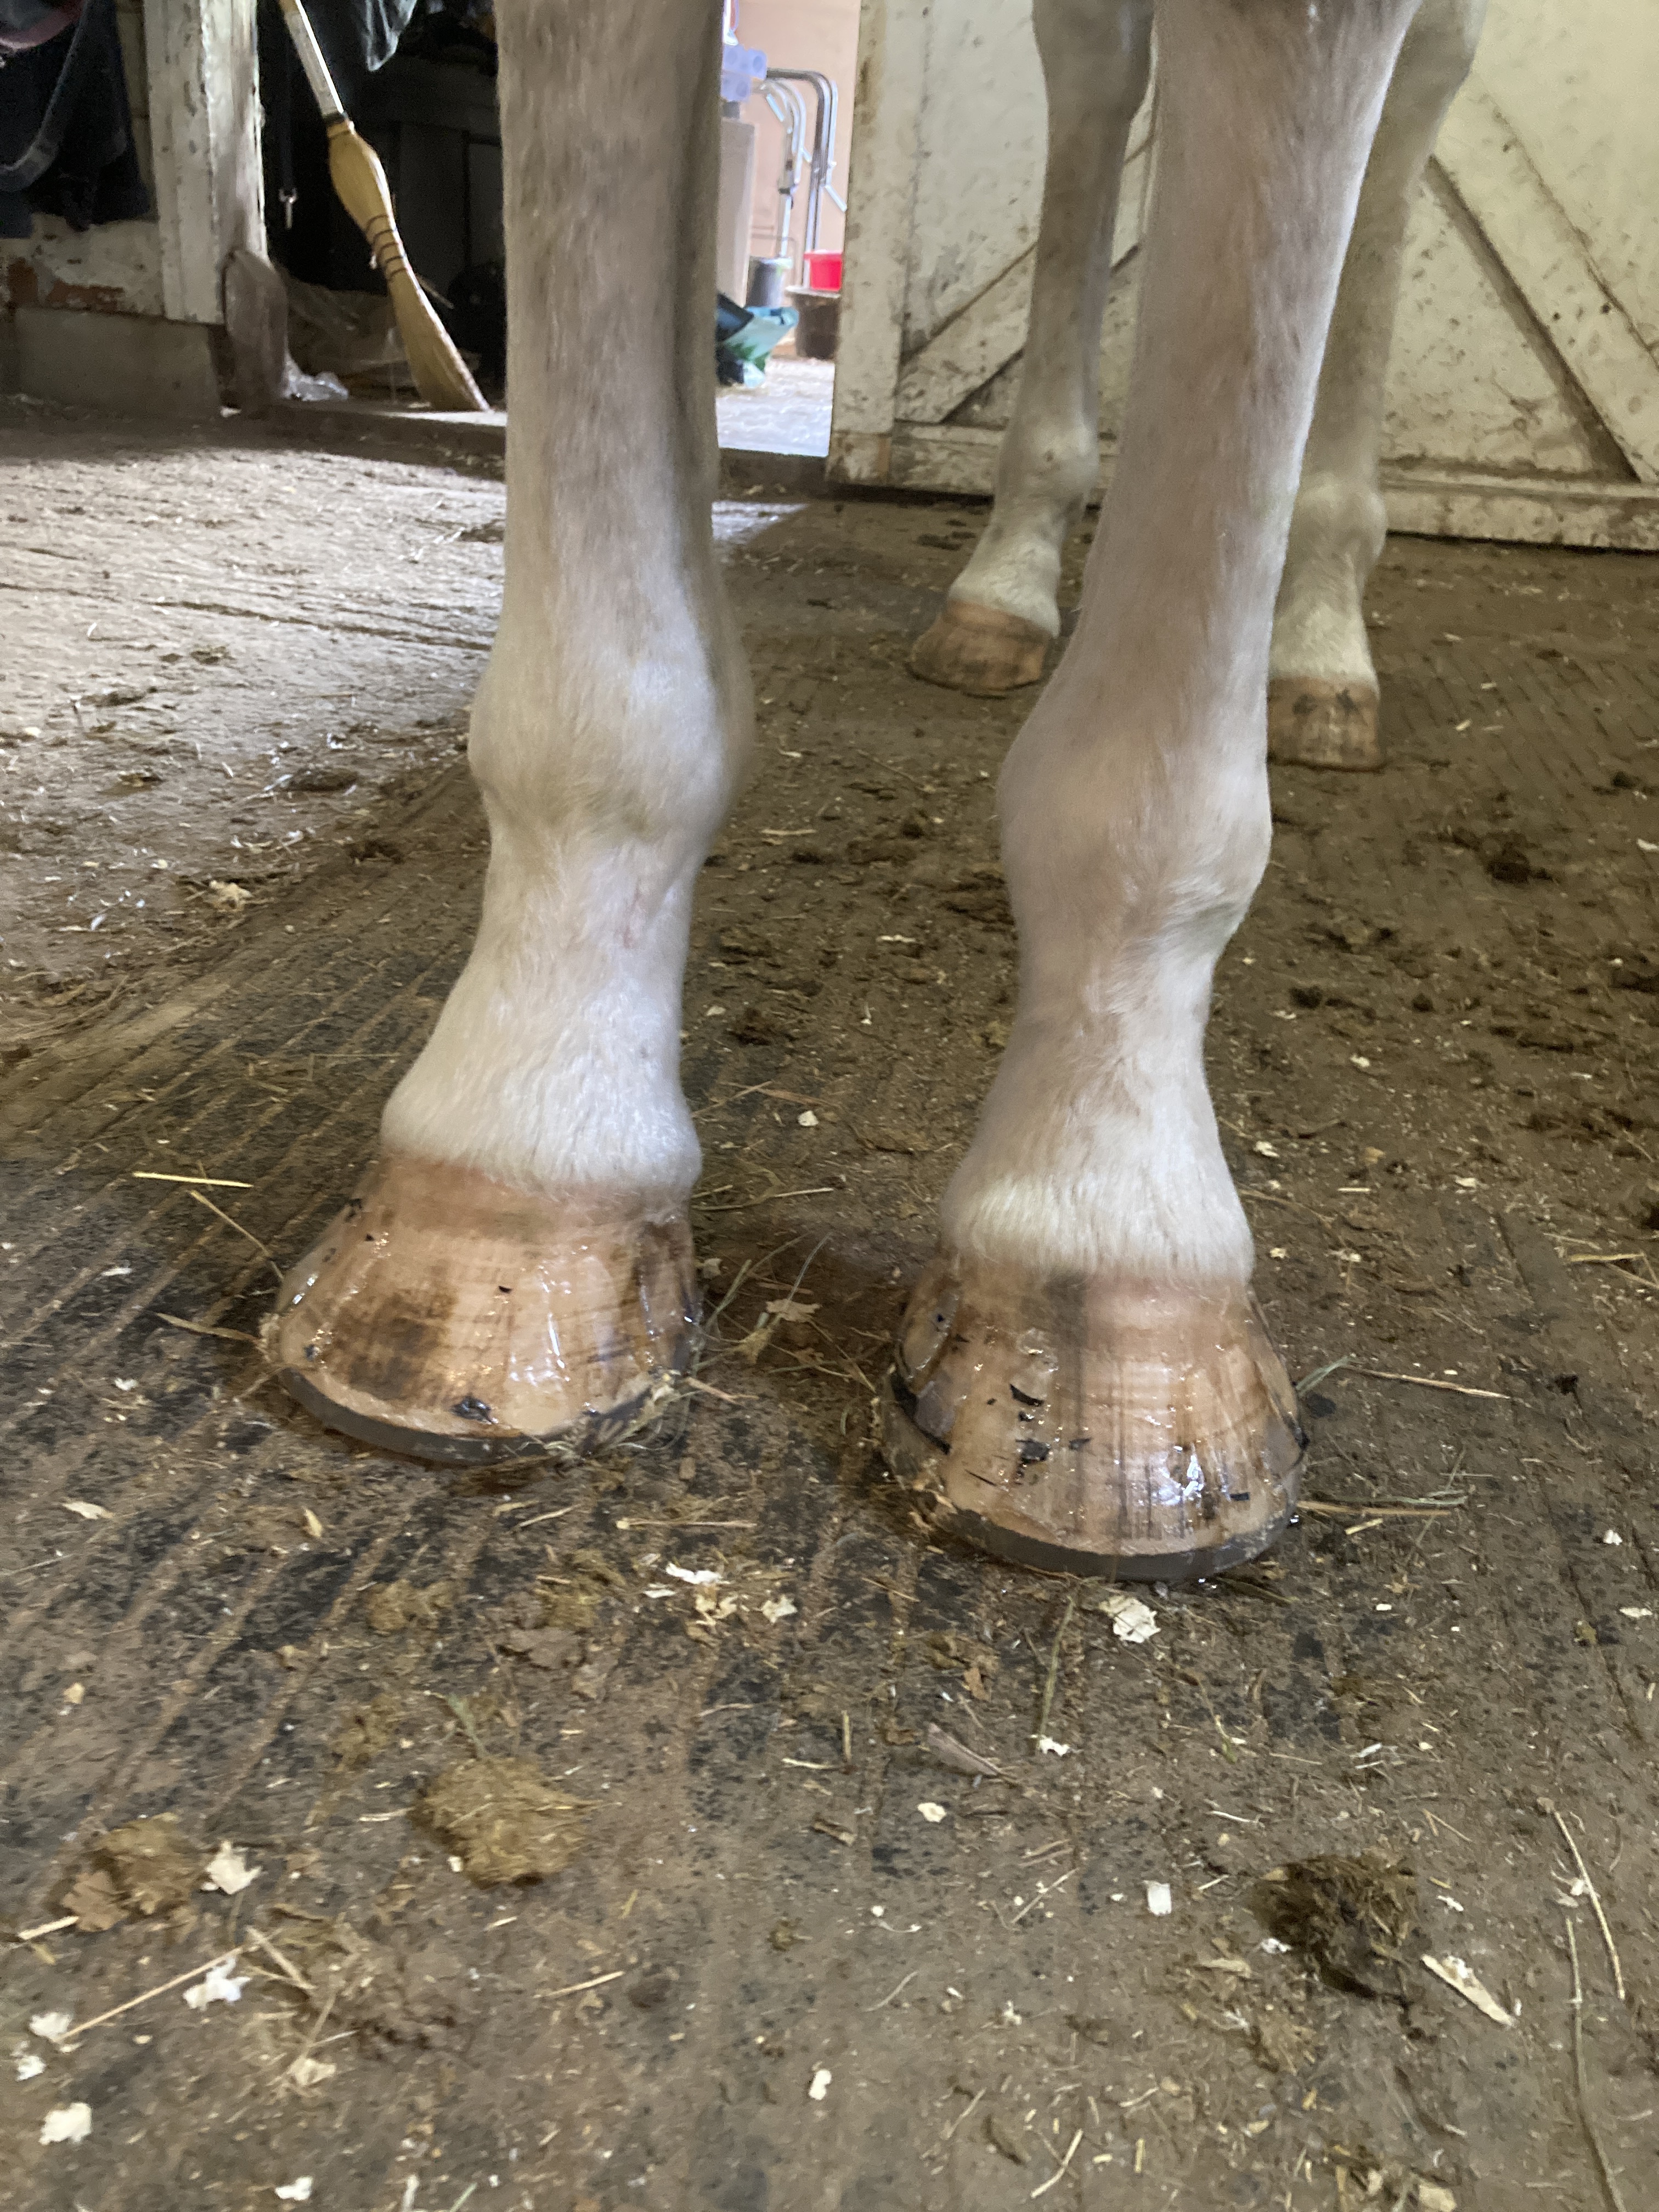
I am terrible at documenting things, but I did manage to snap a couple of photos. I did fronts on both my mares today; my gelding will get done this weekend. I used the Versa Grip Octos with wedges.

Not surprisingly, fit is key. One of my mares fit pretty perfectly into the 122s right out the box. My other mare has a bit wider foot and I felt she was harder to fit. I had a really hard time setting the shoe back far enough to get a good break over. My farrier is out in three weeks and he said he would help me fit them. So I’m trying not to be too nit picky; they’re both better off than they were yesterday!

Both my mares have a low left front. The wedges were easy to attach to the shoe, just be mindful that they screw in flush and don’t pull away from the shoe. Also, they drop ship from the warehouse so they take several days longer to arrive. I ordered from Valley Vet.

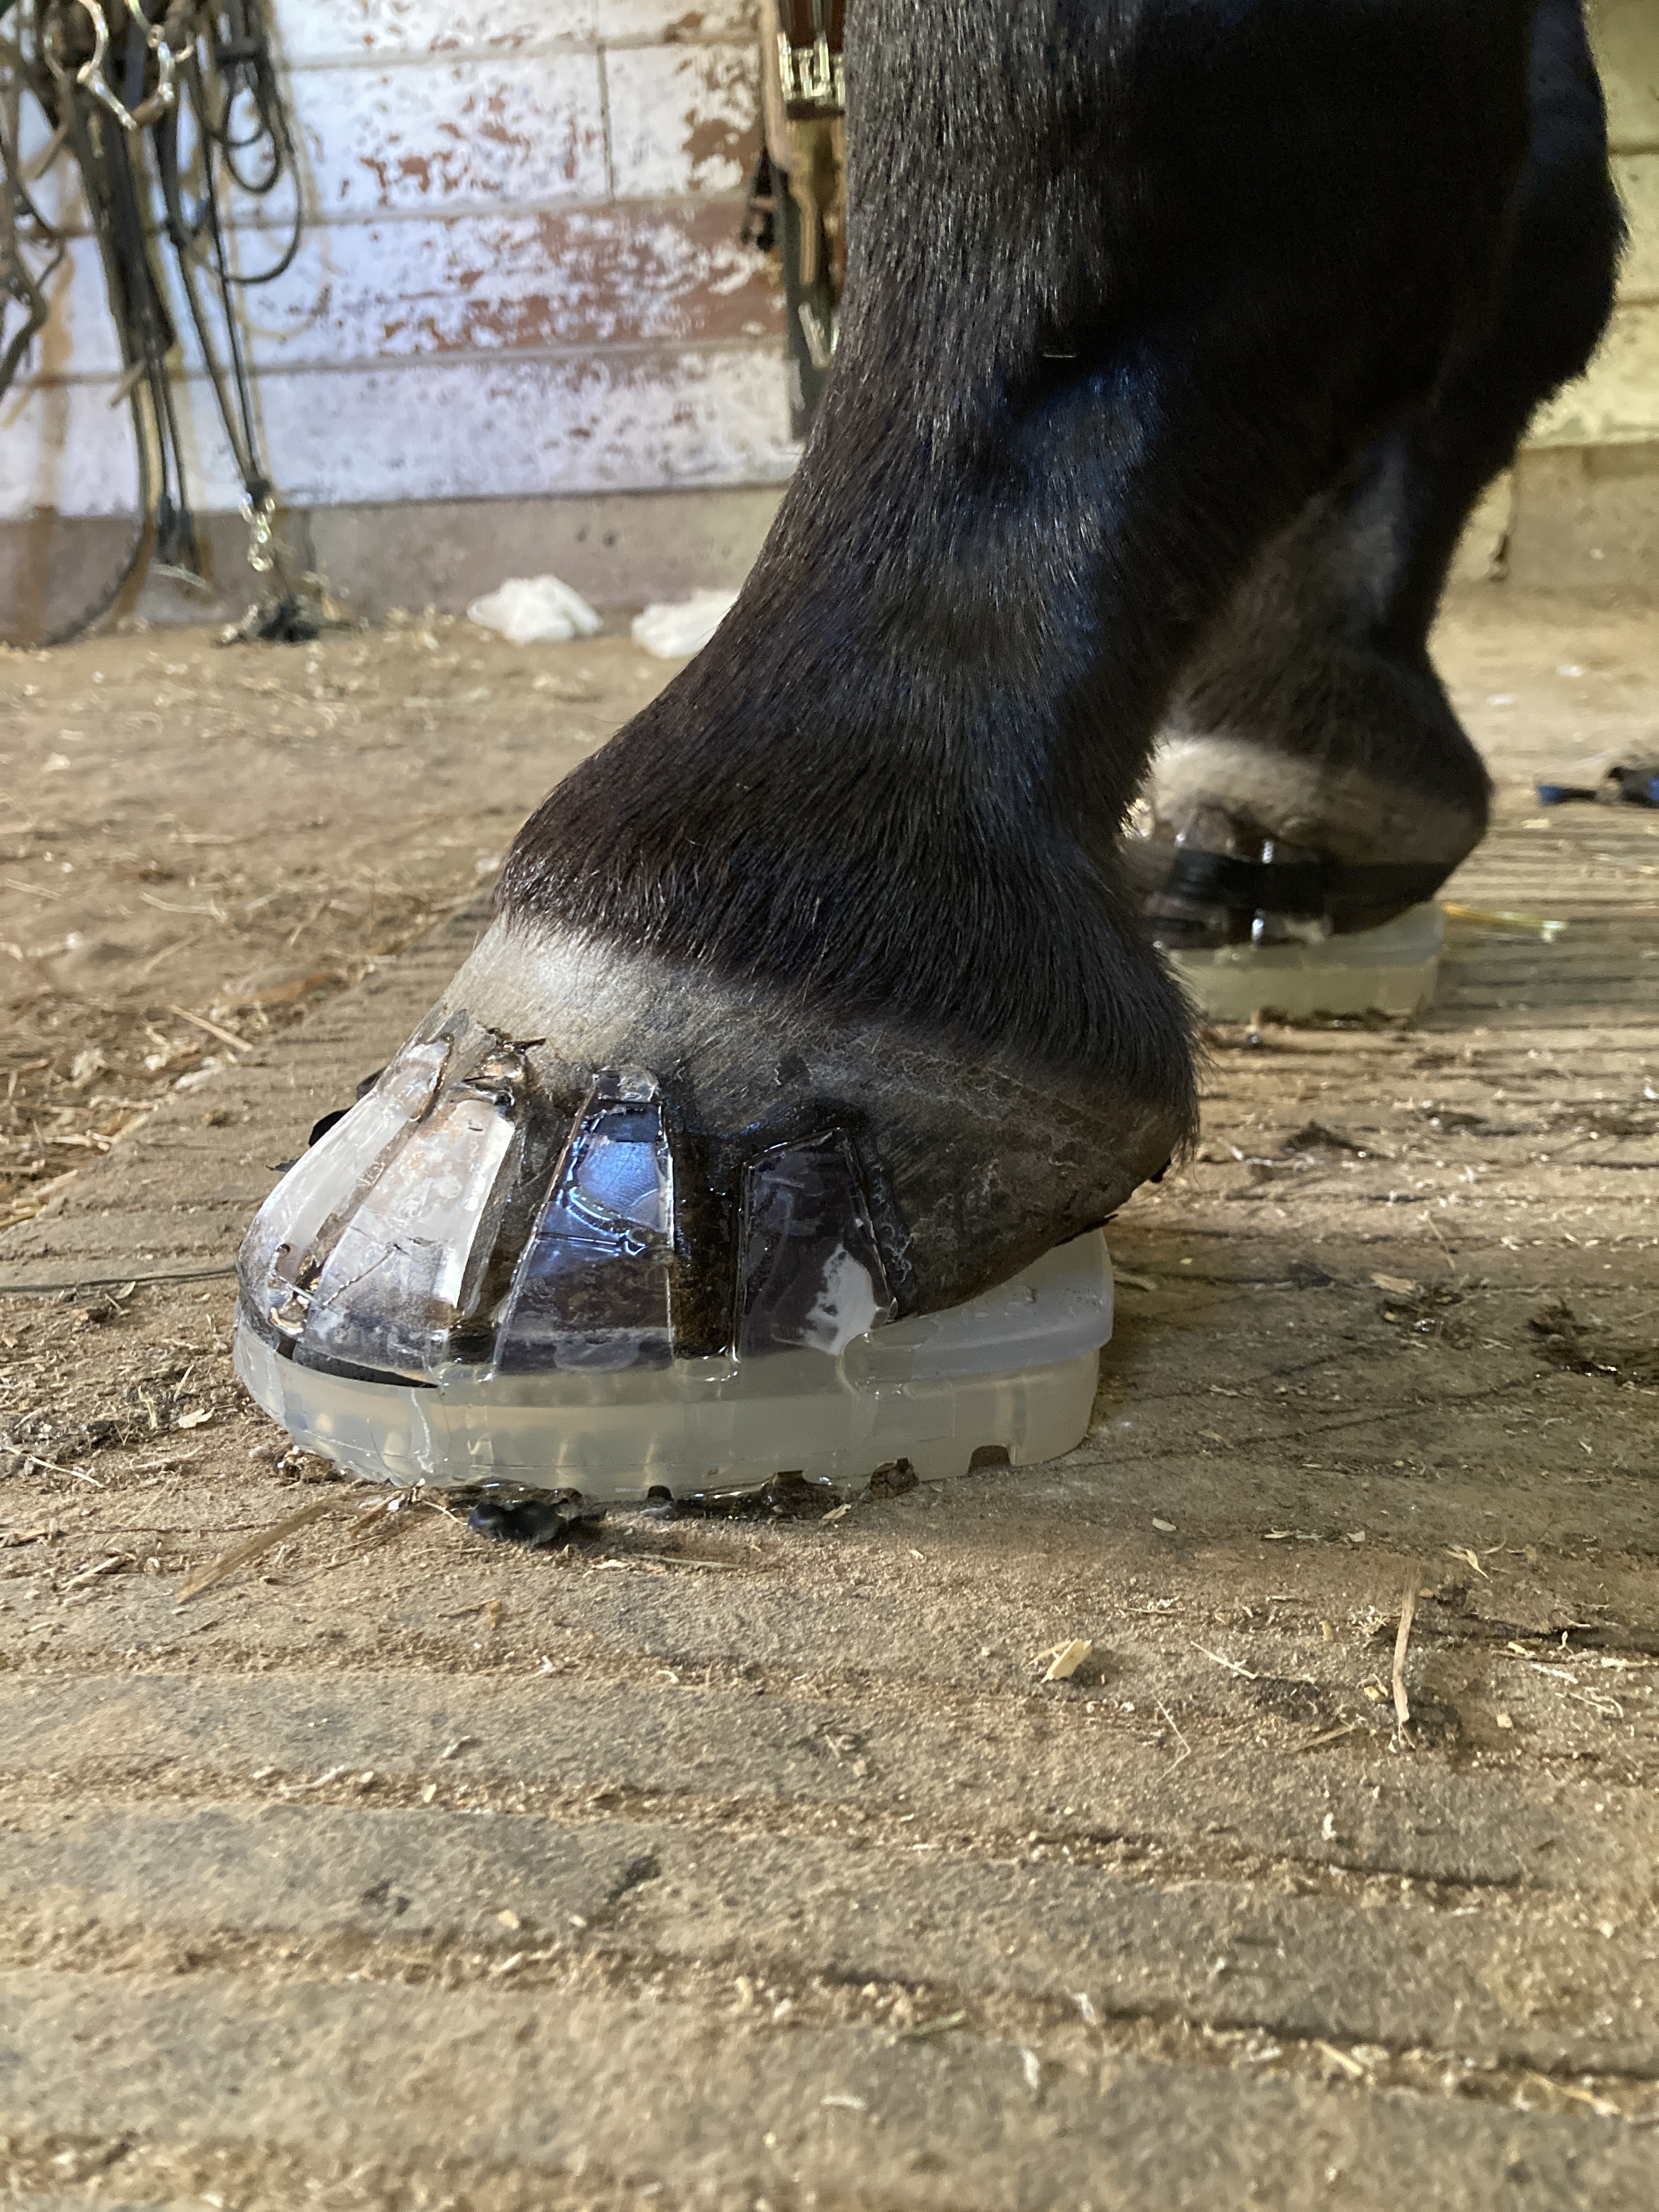
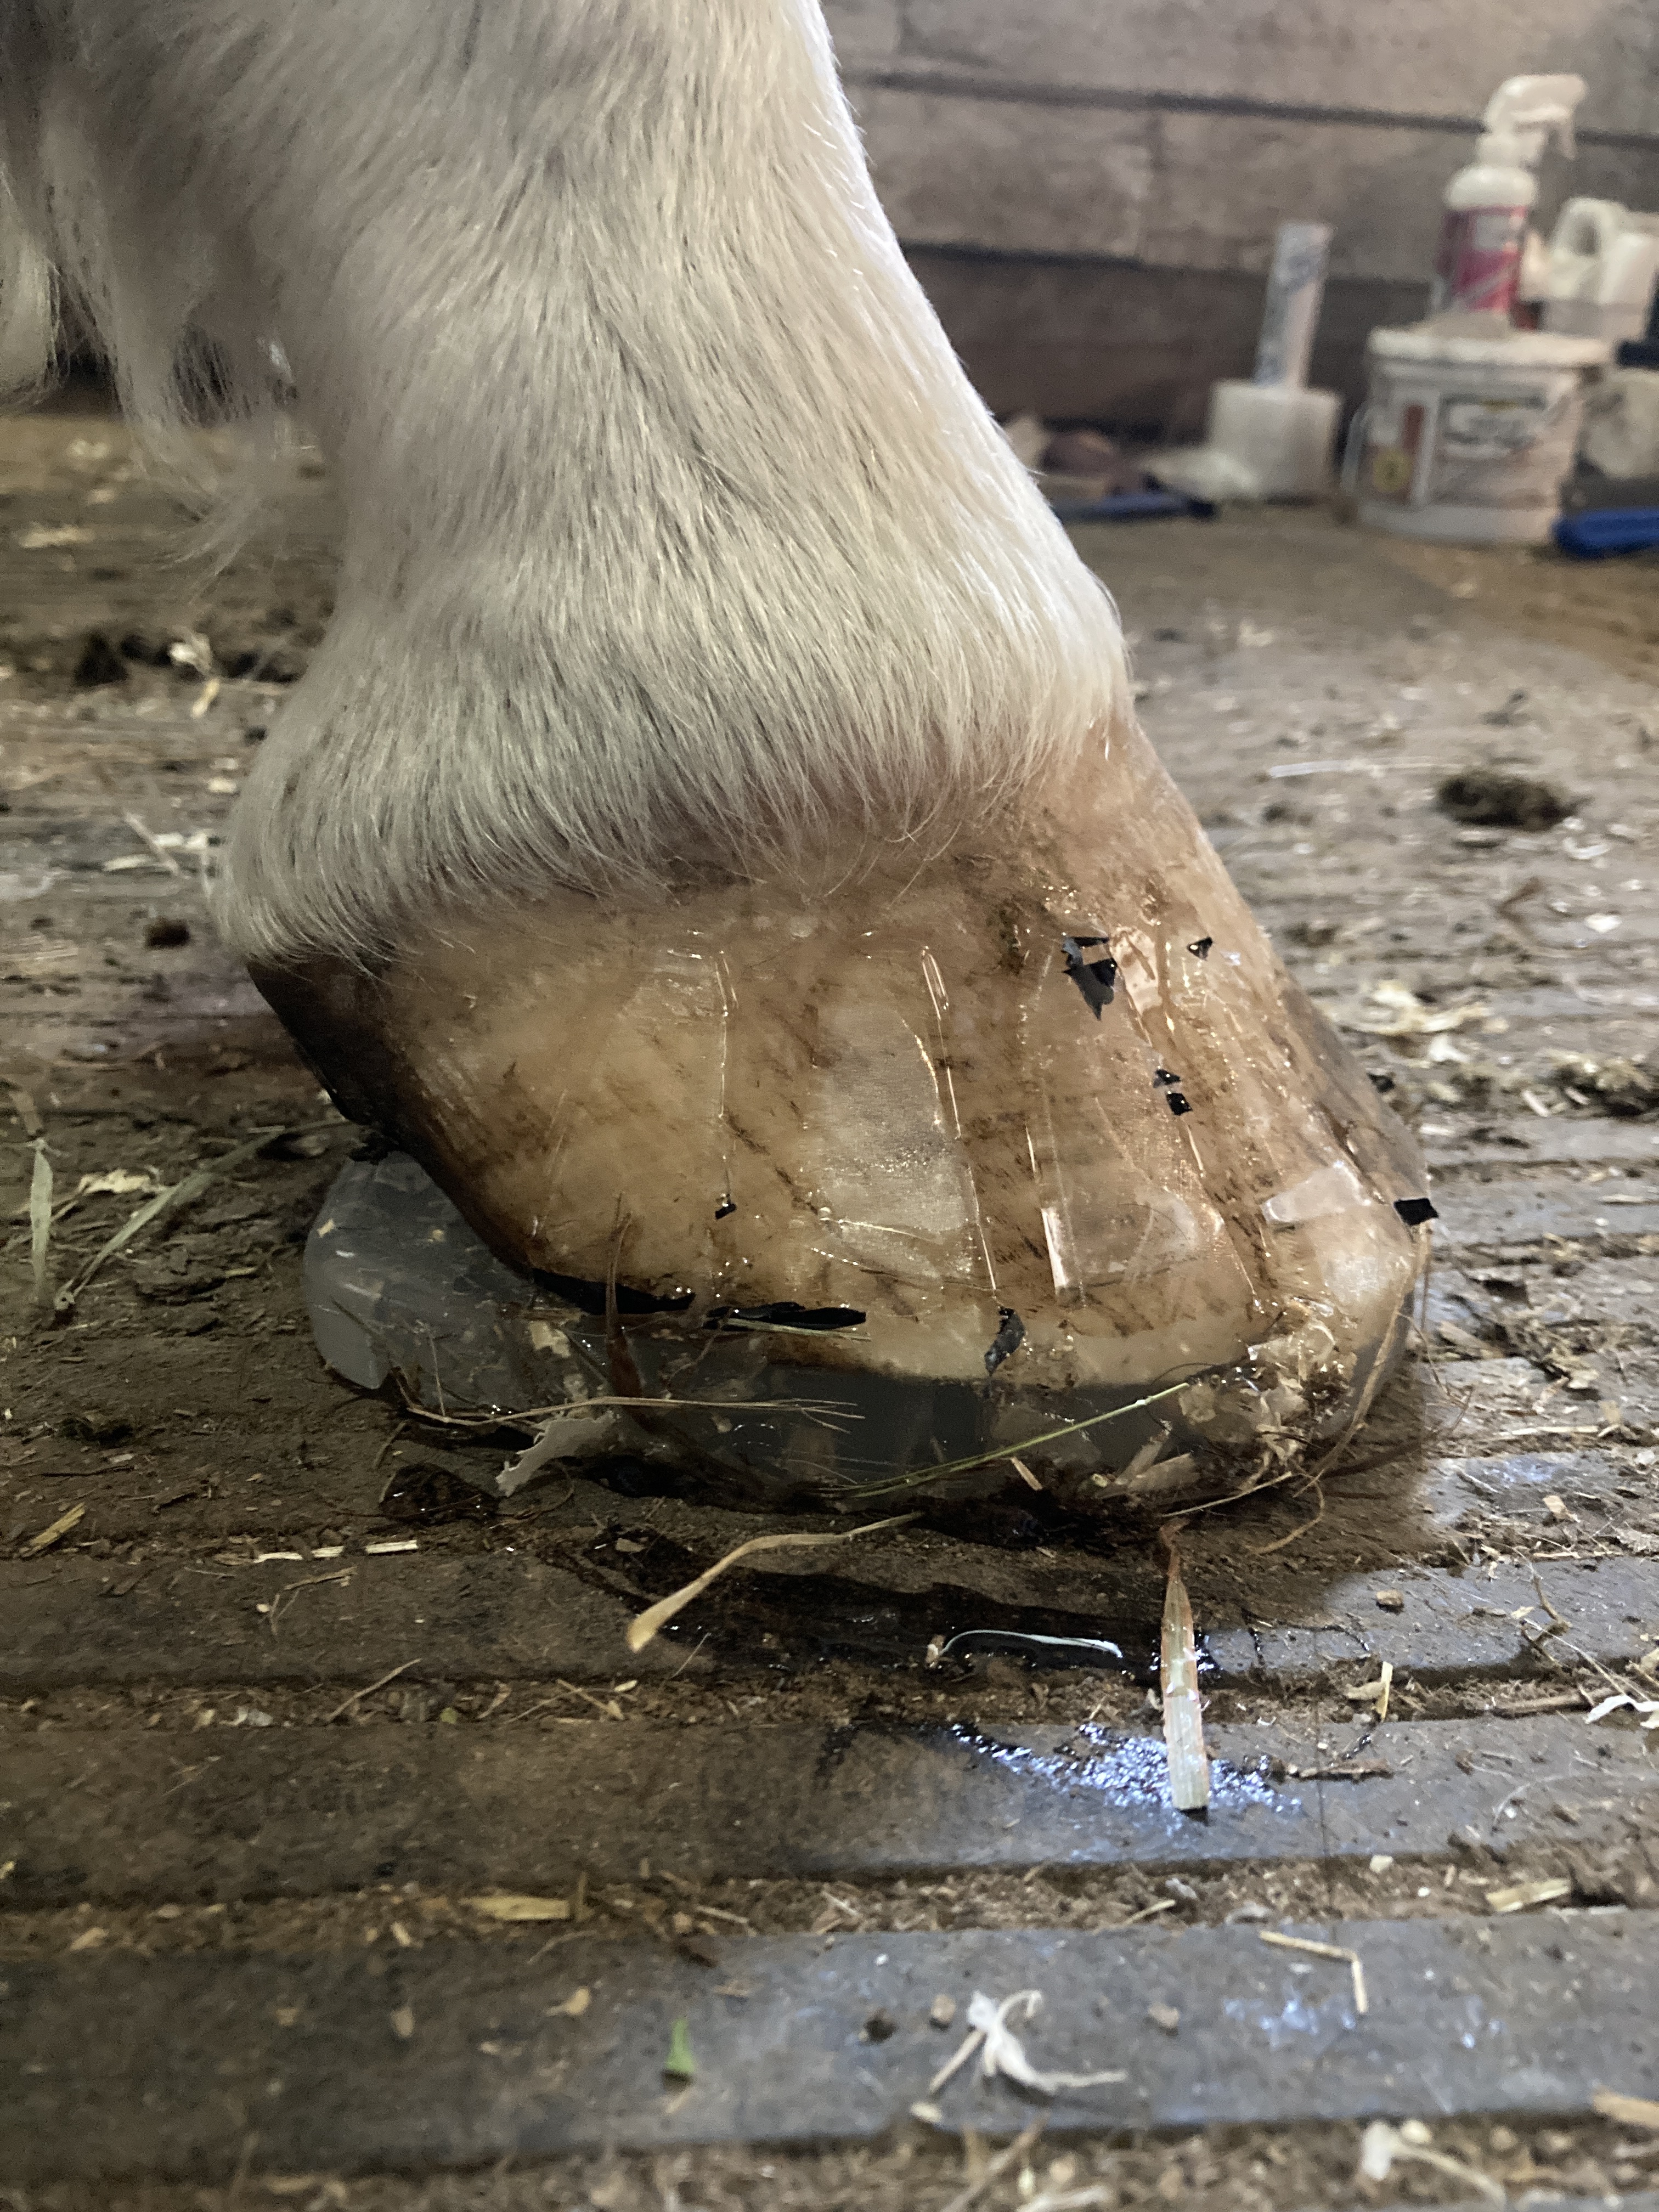
Left front on mare #1.

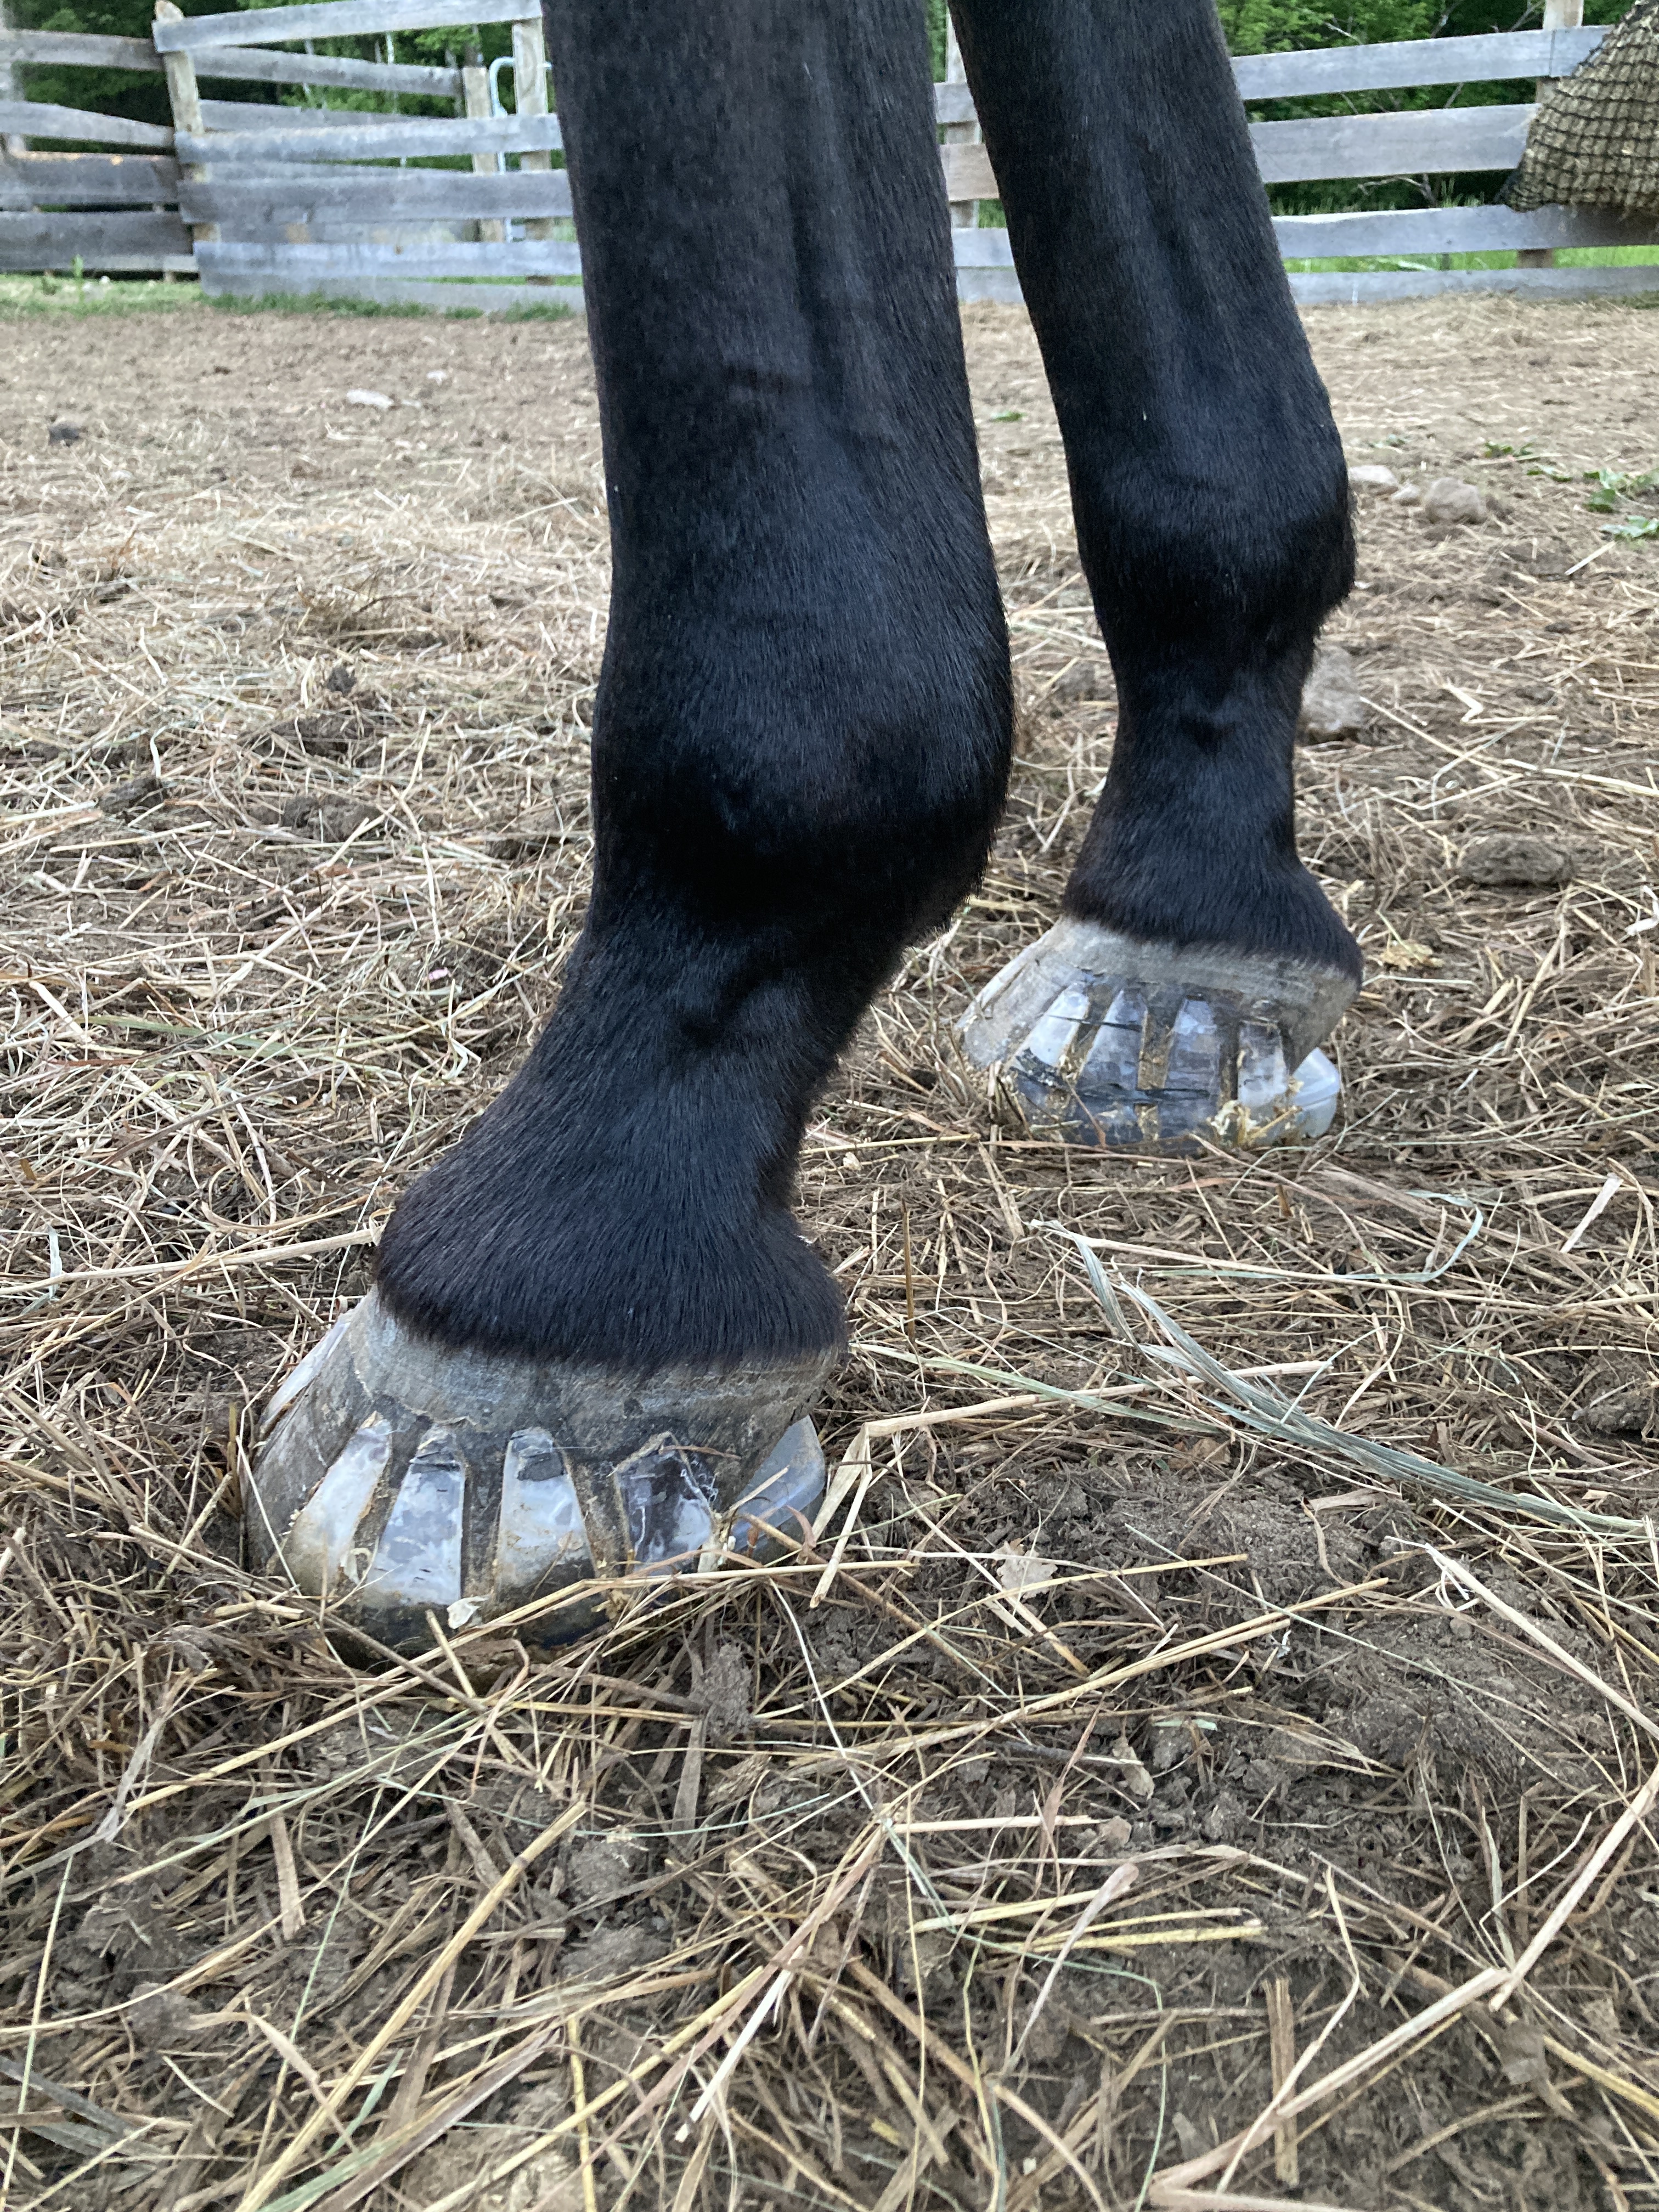
Left front on mare #2. This is the ugliest hoof on paper, but she is the most comfortable of the bunch barefoot.

One tip I picked up from scouring the internet: use electrical tape instead of plastic wrap! I tried the plastic wrap first, but quickly switched to electrical tape. It’s much easier to get a tighter wrap and thus a better glue bond.

It’s been super dry here so I didn’t have to do much in the way of drying their hooves. I rasped, cleaned with a wire brush, and then sanded the hoof wall a bit with 60 grit sandpaper. No fancy tools.

They were still attached at night check. :sweat_smile: We’ll see what tomorrow - and turnout - brings!

9 Likes

Nice job! Good on you for taking the leap. :smiley:

Not to be discouraging, I promise, but don’t be shocked if they come off pretty soon. :frowning: The cloudiness in the tabs indicates spots of air. When you have a good bond, the tabs are all pretty clear all the way through. I’ll see if I can find a pic. The good news is that I’ve actually had better luck with tab stickability on tabs that have already been glued–the additional roughness helps with the bond. I would also suggest going REALLY ham on the electrical tape. I wrap the tabs all the way up and down, completely covering them, then press pretty hard with my hand just to squish any additional air out. I leave the tape on for about 30 mins usually; I’ve done less time when in a rush and longer if I have time to kill.

There’s a few different things you can try: a size down, using a hind shape (narrower and a bit longer, so a good option when a size down in front is too small and short, but a size up leaves gaps), cutting some extra tabs from a set of 11-finger tabs and “shimming” the Octo tabs by gluing the shims, which can help fill gaps, and/or using heat (I use a small handheld butane torch) to soften the tabs and then pressing them to the foot to cool and form to the hoof. With the heat method, it can also allow you to set the shoe back a bit more. You just have to experiment a bit to find the right mix of melted enough to stretch, but not so melted as to tear.

I hope this is helpful! It can be a LOT at first, and you just have to stick with it and experiment and fail a few times to figure out a routine that works for you. It can be frustrating and expensive at first, but once you have it down, it’s super rewarding!

ETA:

Found a picture that hopefully shows what I mean with the bond. This pair is on its third reset in this picture, so it’s not as clear as a brand new pair would be, but you can see how the tabs are clearer. This is after I pulled off the electrical tape, and right after I applied glue around the edges of the tabs to seal them. There’s a couple small air bubbles low in the tabs, which have started to work a bit loose after 4 weeks (pic is from late April), but the tabs are still going strong. I haven’t decided yet whether I’m going to go for one more reset on these or put on a new pair.

3 Likes

Thank you! This is super helpful! I’m not expecting these to last long, lol. The hardest part was getting a good bond because I felt like the size was just slightly off. I sized down on both of them and I felt like some of the tabs were bulging a bit at the bottom (the opposite of having gaps), so it was difficult to get them flat against the wall. I read about the heat method and think I will try that. Also, I will put them on right after a fresh trim from my farrier next time. These were almost 2 weeks post-trim and even though i rasped and cleaned them up a bit, it’s not the same. :sweat_smile:

I have definitely spent a small fortune on this endeavor. But I think it will end up being economical in the long run. Time will tell!

2 Likes

I feel that way about boots - but my horse is SO much more comfortable so it’s worth it!

If I want to show this horse in the hunters, I’ll have to do glue ons. Pulling boots on and off just isn’t practical at the venues around here, especially since I’m usually on my own or with one helper! I’m just not there yet but your process is super educational!

1 Like

Well, they survived their first day. Mare #2 got a quick spin under saddle and then they both got tossed outside (in the smaller field just in case a shoe popped off :joy: 
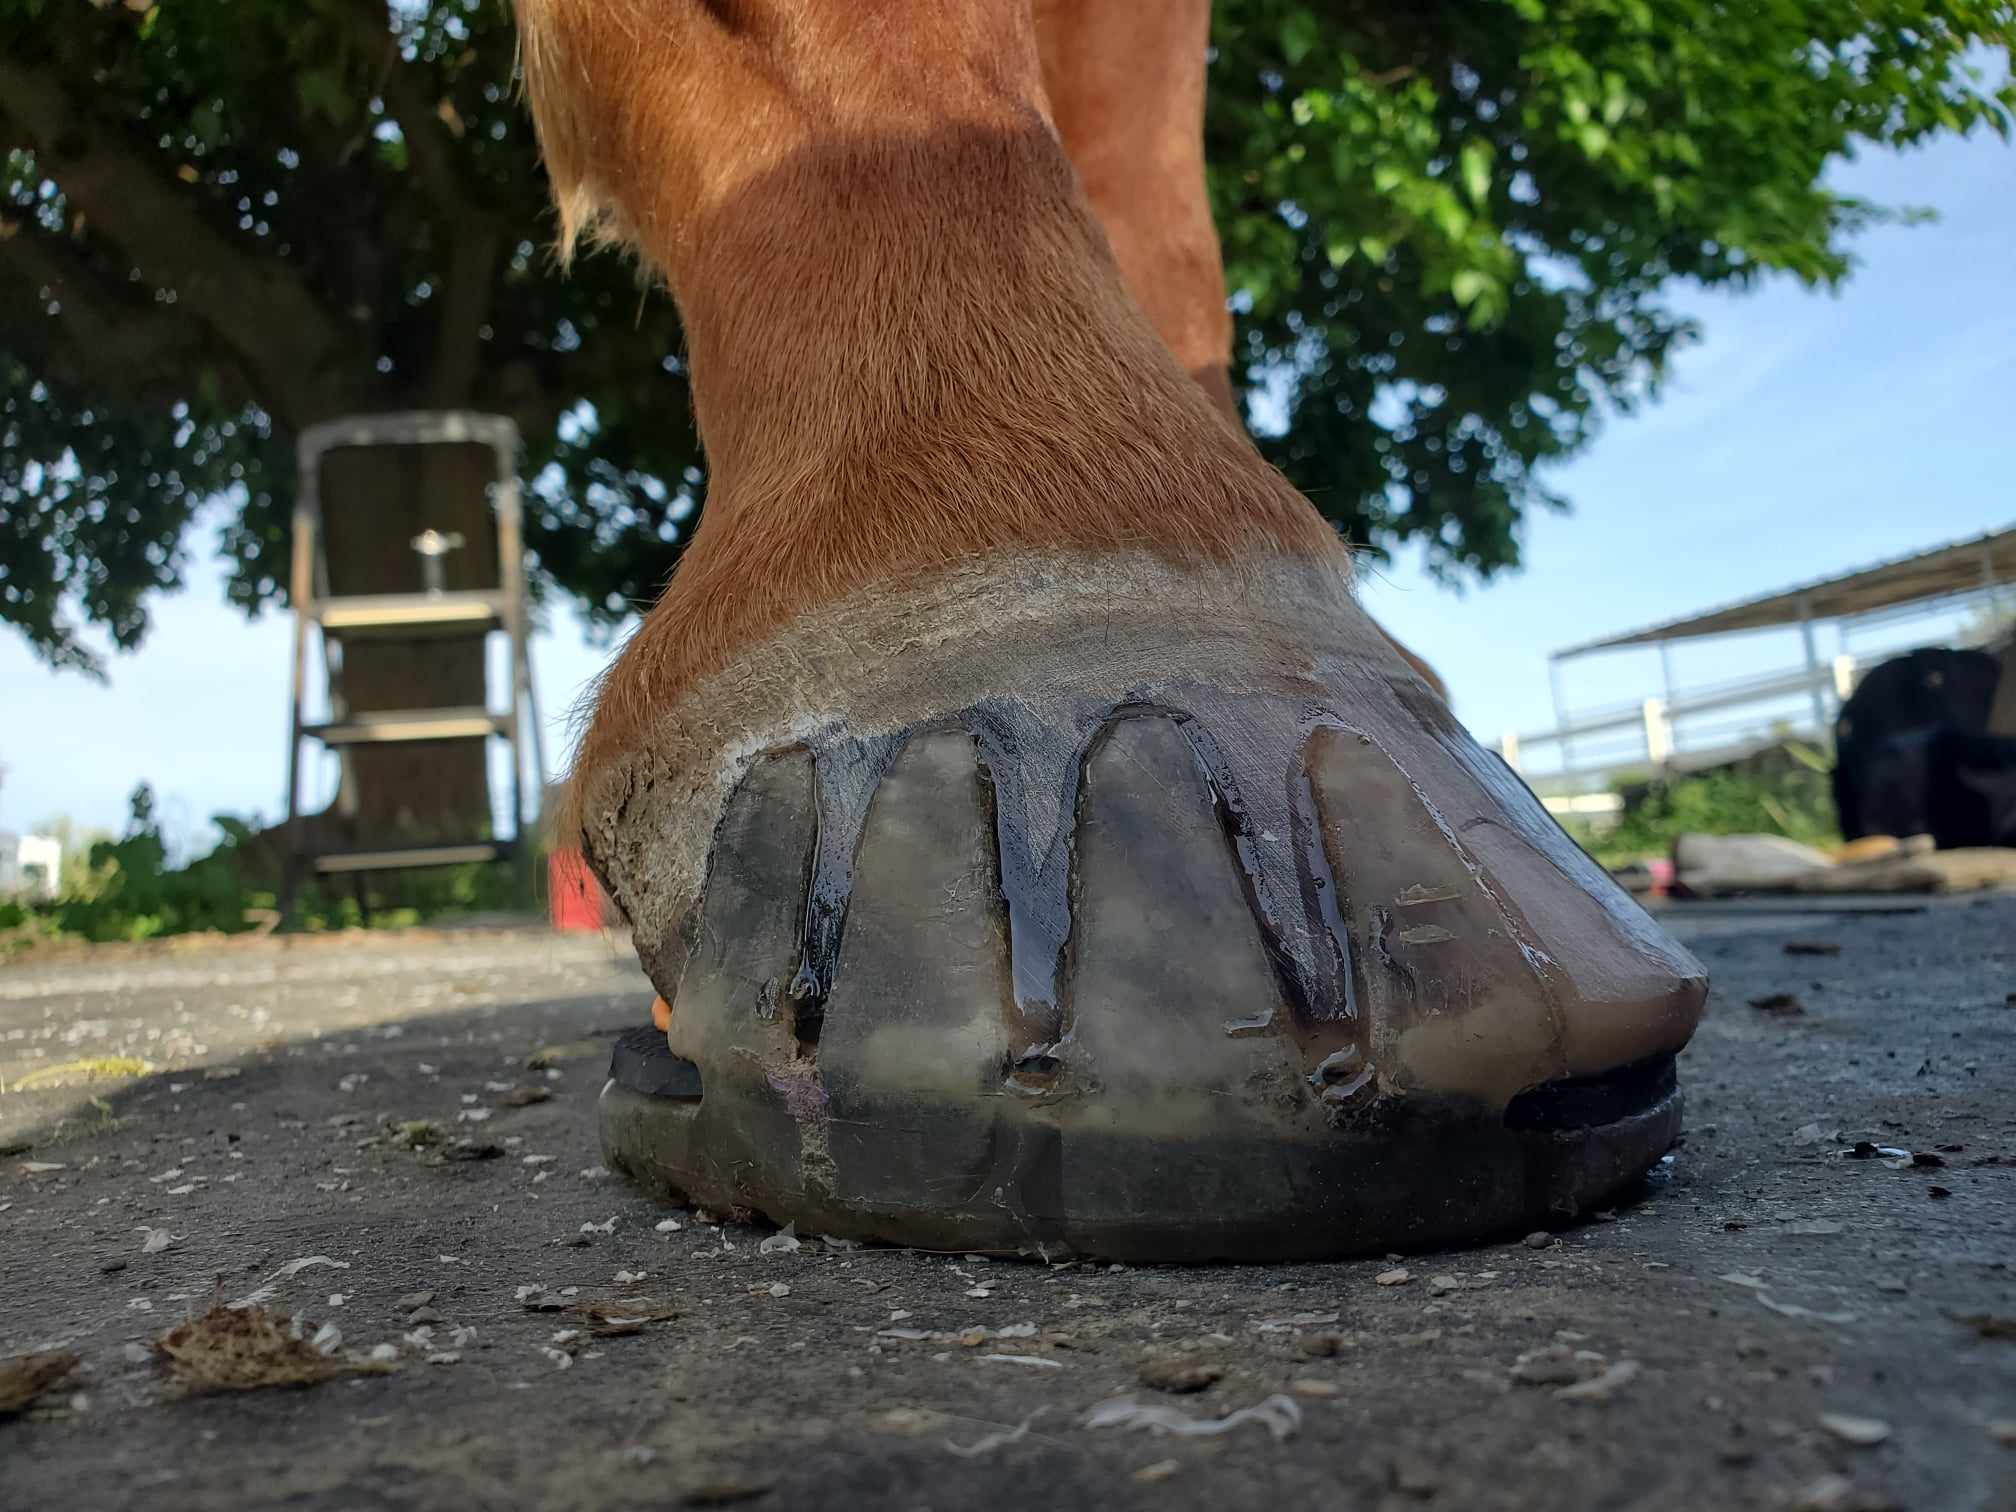
). There were some serious TB hijinks, so I was happy they stayed on through that. Some tabs seem to be on pretty tight, others need a little help. If I can baby this set through the next 2-3 weeks I’ll have another go and hopefully apply some new tricks. In the meantime, I have my gelding to practice on tomorrow.

Most importantly, both mares seem very comfortable. Mare #2 felt great this morning!

3 Likes

Did my gelding today. I am MUCH happier with this glue application. @barnesthenoble your tips were so helpful! Thank you!

I was much more meticulous with the fit, making sure the tabs were flat. He has a bit of a wall distortion on his medial left, but 15/16 tabs were nice and flush. I let them cook much longer in the electrical tape. Excuse the hay and shavings. :upside_down_face: I need to add sweeping before gluing to my order of operations. I did forget to buff his right front with the sandpaper, so it will be interesting to see if that makes a difference in retention.

He is so happy in them! This is my retired guy, so he doesn’t get ridden. But he’s thin soled and this time of year is hard on him, so it’s nice to see him comfortable.

I’m feeling optimistic about this whole experiment!

7 Likes

Agreed. A stable mate uses Versas and is very happy with it.

1 Like

I am very impressed with all of you! I imagine the learning curve will make this easier and easier. If you don’t experiment, you won’t find out new ways to handle old problems.

3 Likes

Super impressed!! Inspired by this post to make the change next cycle for my mare and see if there is any difference. As someone who hauls out 6 hours one way for a decent farrier. I feel for you. Please update us if you get to the point of doing the trims yourself.

1 Like

Woohoo!!! That bond looks much better. :smiley: And no worries–I inevitably end up with a bit of glove/purple electrical tape (my partner bought it in bulk because it was on sale, and I purloined it)/shavings/hoof trimming/skin/what have you when I glue. I do my best to sweep but it’s horses, there’s gonna be a mess, I just live with it.

The buffing helps a lot but I’ve found it’s less critical with the superglue. I’ve also had some rear tabs pop off early on in a cycle and just leave them loose, it hasn’t seemed to hurt retention, so hopefully you have the same luck!!

So glad he’s comfy and your second attempt went well! I’m rooting hard for you and everyone else who decides to try making the leap. It’s scary but SO rewarded.

P.S. Depending on how thin his soles are, some horses find the wide web of the shoe a little bit uncomfy as the cycle grows out. And I usually cut out the debris guard, which you may have done; I haven’t found it helpful and some horses don’t like it. Some folks address this by grinding down the inside around the sole opening of the shoe to reduce the pressure. I just add a rim pad, which you can see in the picture I shared a couple days ago. I have a couple thin soled horses who are happy with just the shoe, and two that prefer a pad. I’ve used leather pads, scoot boot pads, and thinline pads with success for the ones who want a bit more squish and lift.

2 Likes

Yes! Do it! This has been such a fun process and so rewarding. I was shocked at how quickly the process was the third attempt. From rasping/cleaning up the foot to gluing to wrapping, it really only took 15-20 mins. Then I let him chill in his stall while I rode another one and he was good to go by the time I was done.

I’m definitely feeling like I want to go full DIY after my farrier retires for good. He has been very supportive through this whole process and knows my next goal is to learn to trim. Like a lot of horse people, I was born with the “pathologically independent” gene. This little journey feeds riiiight into that.

2 Likes

I love that! I just moved to a new barn and was telling the BO how entirely opposed I was to relying on a farrier (she is having issues with her horse and trying to figure out whether to change farriers).

I think my last post on this thread was my first application of the Versas with Stealth cuffs. The hinds on that application only lasted 10 days, but the fronts made it almost four weeks in wet weather/footing. Since then I’ve been trying out the Sticky Finger tabs, which are easier to apply, but have not been holding as well. Especially on the hinds, they seem susceptible if the foot twists at all. Then one tab goes and the rest fail. So I went back to the Stealth cuffs in back, using heat to help fit them to the hoof. They’re only one week in, but so far I’m really happy with them, and will go back to cuffs on the front as well. The hind shoes were dyed black, and the cuffs are clear, making the shoes almost invisible, so the look is really nice as well. If I’m not starting to consistently get 4-5 weeks, I’ll probably suck it up and switch to an acrylic glue. I’ve been cutting off the debris guards and using a leather pad super glued on with DIM and Vettec mesh inside, just to keep as much junk out as possible.

Once my current sets of shoes wear out, I’ll be really interested to try the new EasyShoe Speeds. They don’t come large enough for my mare’s fronts yet (150mm) but I did hear that they might expand the range in the future.

2 Likes

Following! (Relevant to my interests!)

Although I haven’t (recently) measured my pony’s feet, I’m not unfamiliar with metric measurements and I’m pretty sure 145mm isn’t going to come close, so something other than the easy speed may be required.

I know. DIY here. I am not gluing shoes. I do use boots regularly April —> October. I watch my entire barn sweat at trying to get some farrier out for problems that happen within their regular cycle. If you are training and or showing, that can really mess things up.

I am not sure I could use glue-ons on my horse’s hoof shape (fronts anyway). I even have trouble finding boots that fit her fronts well (Renegades seem to be ‘the’ one).

All you glue-on people…glue-on!

Susan

2 Likes

Not that she needs them :slight_smile: 
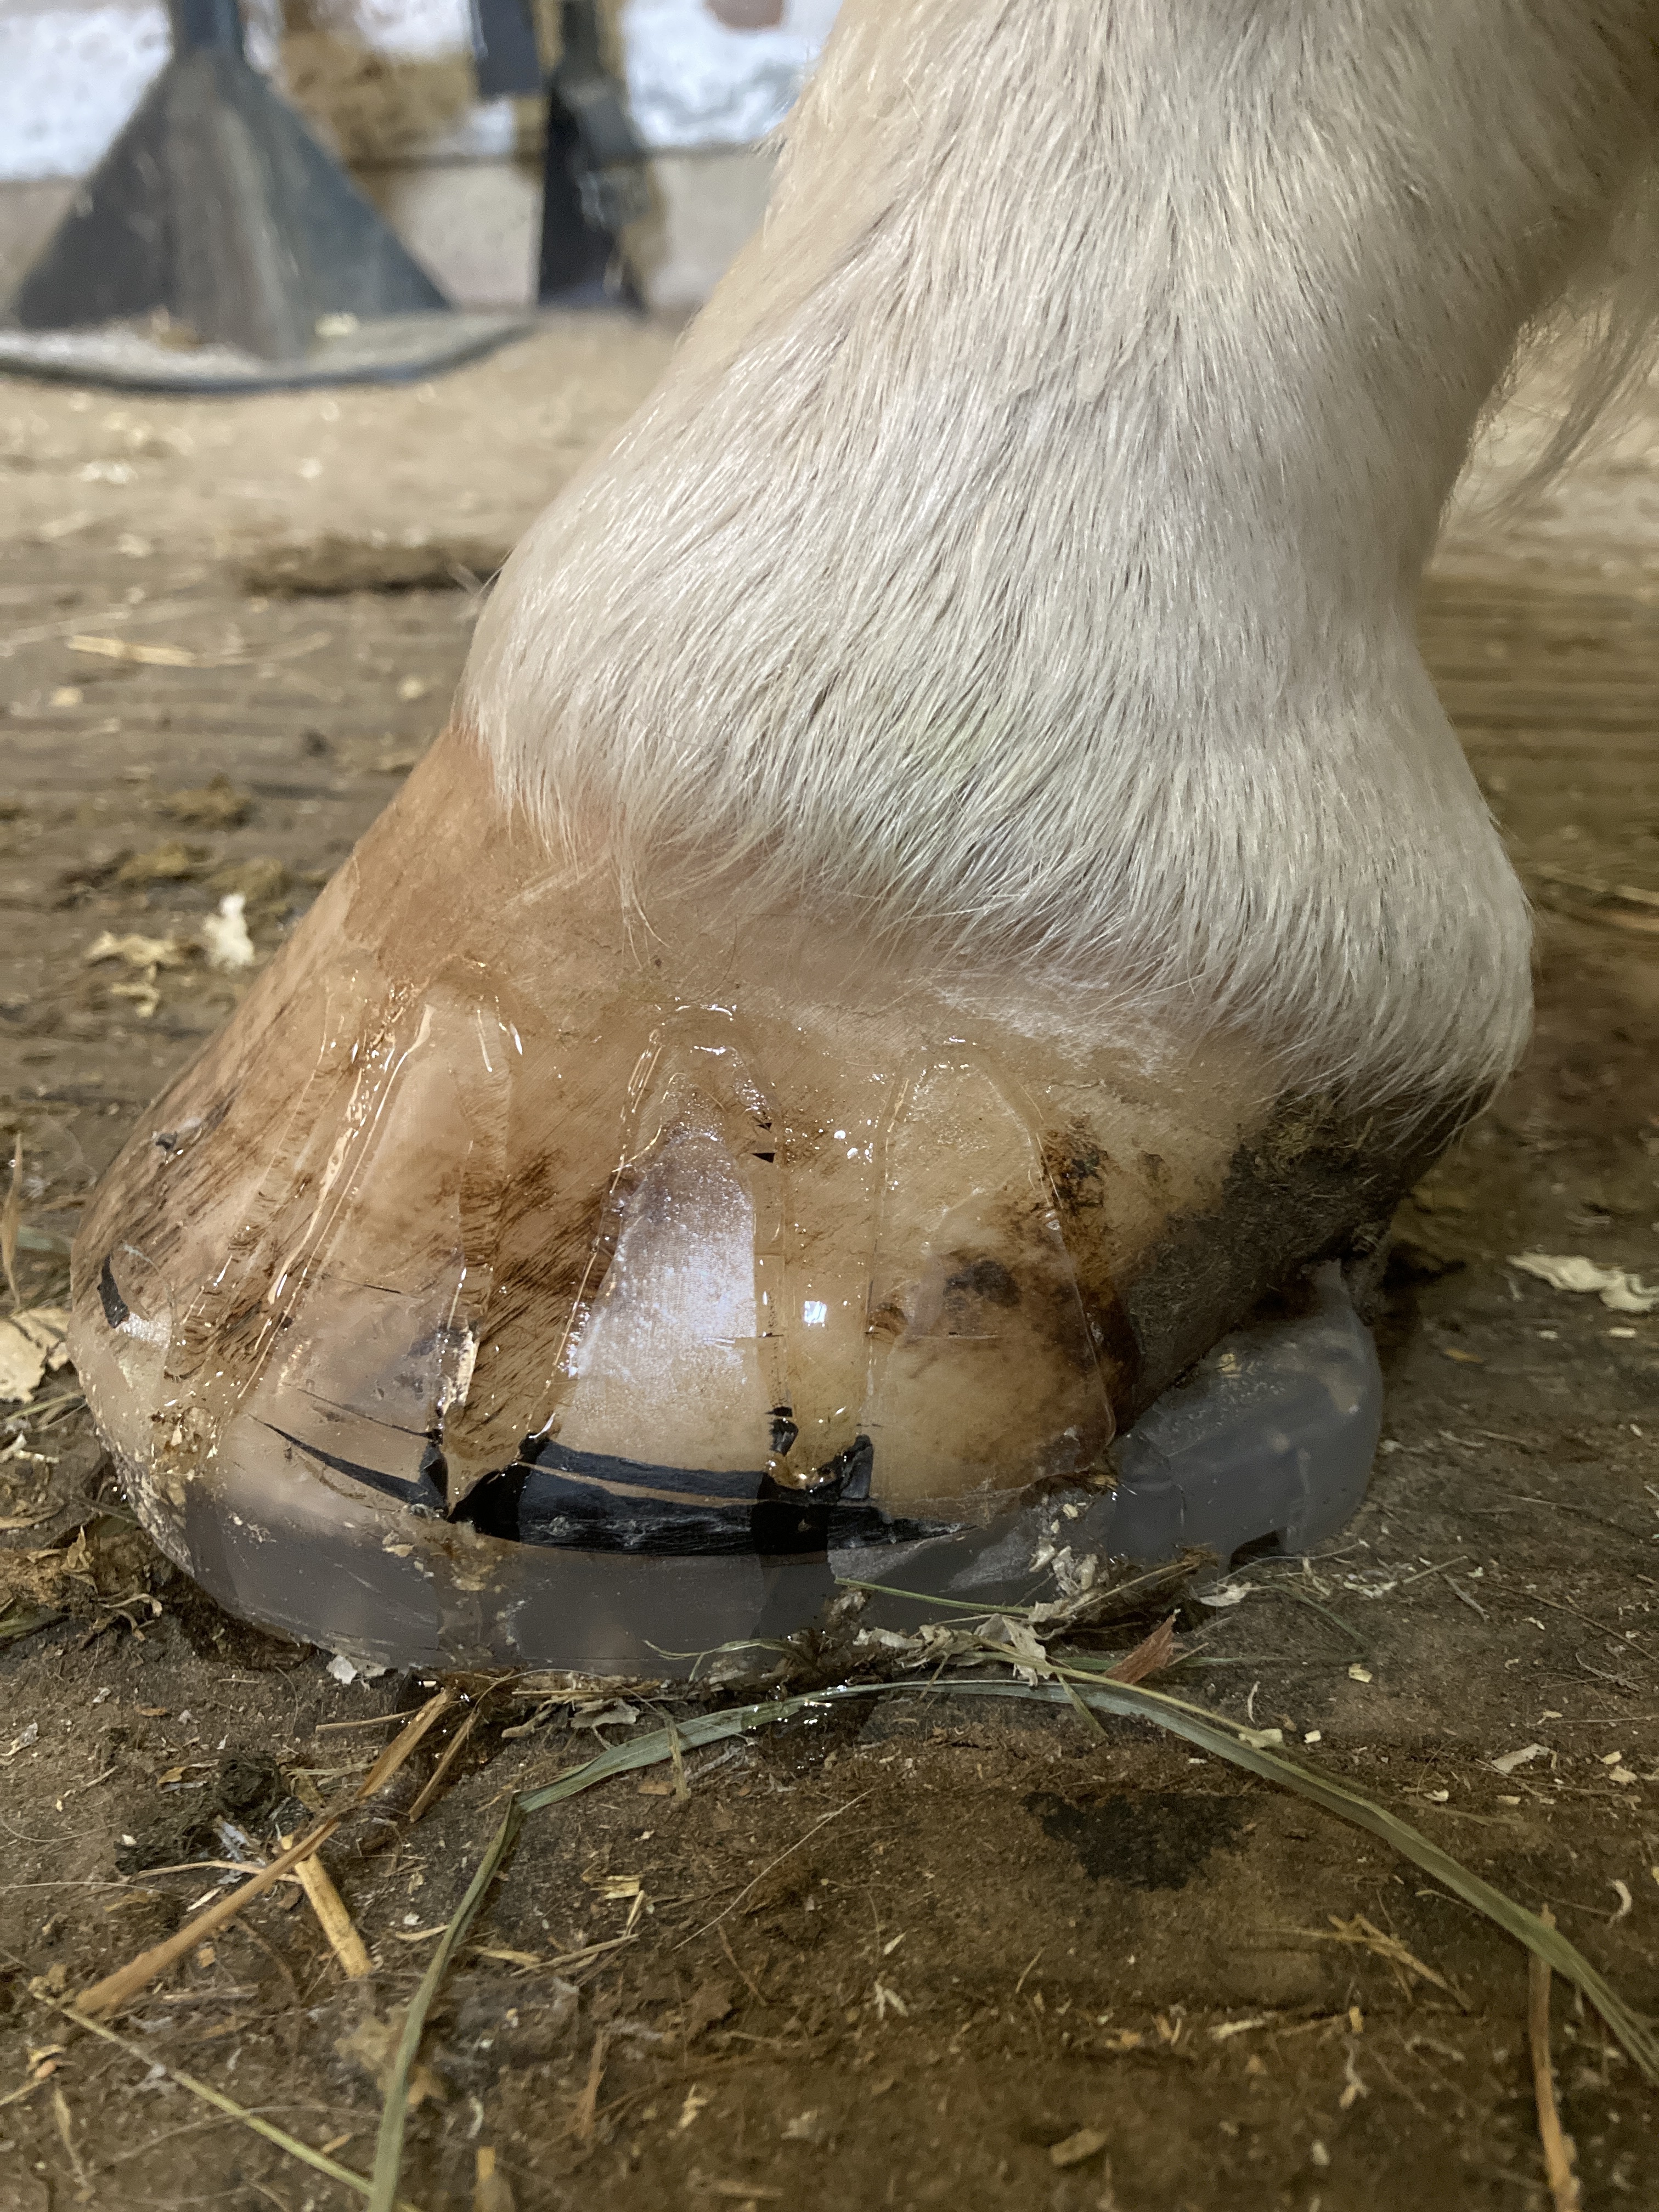
but it’s just a matter of getting shoes without the cuffs/tabs pre-applied. Then the shoe is ground down to fit the hoof, and tabs welded on.

@DMK, the Versa Grip Light goes up to 170mm.

Screen grab from our ride last night. This kind of shows how much the stealth cuffs blend in vs. the tabs on the front feet:

5 Likes

Oops, it was the speed metal trac I was thinking of. He’s fine barefoot, but I’m trying to plan for combined driving venues where studs may be useful. But versa does have a pre drilled option, so that might be where we end up…

2 Likes

I finally had a minute to take Mare #1 for a spin today and she felt so, so good in these. She is a spicy, sensitive soul and today was by far the best ride I’ve had on her all spring. And I haven’t been on her in about 3 weeks because of said foot soreness! Tomorrow is a jump school on Mare #2, which will be the next big test.

I am just so excited about all this. I really do have it good when it comes to farriers; when my horses were in regular shoes I never had to wait more than a couple of days for him to come out for a tossed shoe. But knowing I have the ability to FIX IT MYSELF if a shoe is pulled or comes loose is so dang freeing. And not worrying about them stepping on clips, or nails, or sprung/twisted metal is bonus peace of mind that I never considered.

11 Likes

Oh I just love this for you!!! Yay!!! It’s the small wins!! Knowing you can tack on a lost shoe is just incredible. Curious how she feels after jumping too. I also have a sensitive mare who is her own special spicy. If you can remember after a few weeks would love to know how they wear down, so I know how many to have on hand when I start this journey next month. :partying_face::pray:t2:

2 Likes

I was looking into the versa for hind studs also! Curious how they will hold up.

I started this thread asking for exactly that feedback

1 Like