I made some jumps!

Yes, several poles. I will be very careful putting them away when it gets cold to make sure they don’t get embrittled.

Close up:

[ATTACH=JSON]{“data-align”:“none”,“data-size”:“large”,“data-attachmentid”:10476478}[/ATTACH]

This isn’t very big, I have the gigantic one my phone took if you can’t see it well. Message me and I can send it.

20190816_180540 (Large).jpg

One thing about the PVC sleeves - you would have to be careful to make sure your jump cups will fit around them, as they are wider than a 4x4. Plastic cups that can’t be bent may have an issue. Metal cups can just be bent to accommodate a slightly wider post.

1 Like

Thanks fir all the great info and pics!
How long did you make the “feet”?

Feet were originally going to be 16" overall, but after looking at it I decided on 18" overall. ~4" of that is taken up by the overlap on the 4x4.

Very nice!

Our family made a similar set when our “kids” were still kids. They are grown now and I miss not watching them use the jumps. It was a lot of hard work, but fun too.

Your brick wall is done now, so I wouldn’t change it. the handles are a great idea. Those walls sure are heavy!. For others who might get the construction bug, we made our wall as two 4 foot wide boxes to place side by side. Much lighter to move. Made a coop that way too.

We also made a series of shorter boxes (4 ft wide) that could be stacked to make the wall higher or, with holes drilled in the top, used as flower boxes. Small cleats on top and open bottoms fits them together so they don’t fall or shift easily from a light knock. One side was painted white and then, using a large rectangular sponge, gave it a red brick look. Quick and easy. The other side we painted shades of grey to give a stone wall look (with a fox face peeking out of a painted hole in the wall). Two jumps for the work of one if you set the course to come at it from both directions.

It sure was a satisfying project, but sure was nice to be done too.

1 Like

Very nice!

Our family made a similar set when our “kids” were still kids. They are grown now and I miss not watching them use the jumps. It was a lot of hard work, but fun too. Love your picket and its colorful design. We wimped out with boring old plain white.

Your brick wall is done now, so I wouldn’t change it. the handles are a great idea. Those walls sure are heavy!. For others who might get the construction bug, we made our wall as two 4 foot wide boxes to place side by side. Much lighter to move. Made a coop that way too.

We also made a series of shorter boxes (4 ft wide) that could be stacked to make the wall higher or, with holes drilled in the top, used as flower boxes. Small cleats on top and open bottoms fits them together so they don’t fall or shift easily from a light knock. One side was painted white and then, using a large rectangular sponge, gave it a red brick look. Quick and easy. The other side we painted shades of grey to give a stone wall look (with a fox face peeking out of a painted hole in the wall). Two jumps for the work of one if you set the course to come at it from both directions.

double

1 Like

wow, just wow.

2 Likes

These look fantastic! You’re inspiring me- I have a pile of scrap wood in my garage and a misplaced sense of confidence after rebuilding one of my deck planters last weekend. :wink:

2 Likes

Those are so impressive!!!

Those are beautiful!

Would you mind taking some photos of your home made jump cups and some up close photos of the standards? Thanks

2 Likes

Those look AMAZING! I am going to be building a few jumps here soon for the barn I board at. Certainly not this many, but I’d be happy with 2 or 3 to begin with!
I’m excited to get started but I also wish I were done already too!

Wow, this is very impressive! I am going to a boarding barn where there are no jumps and I need to build my own. I started painting some poles I had, but need to figure out how to build standards. This has been very educational and inspirational!

No problem. It’s pouring here right now, but later today I’ll get the pictures for you!

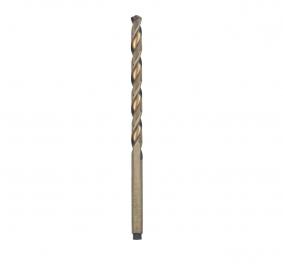
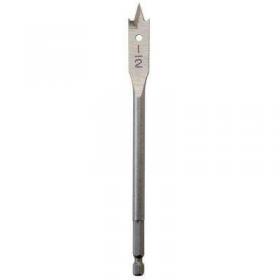
The standards weren’t the cheapest due to the cost of the PVC sleeve, but I didn’t trust myself to drill a true hole all the way through a 4x4 without a press. If you do elect to go the all-wood route, I suggest getting a 1/2" spade bit (specifically for wood). They chew up wood for dinner, instead of the other kind which you need to back the drill out out all the time to clear the flutes. You might use the “normal” kind to clean up the hole after it’s in, because the wood bits can leave a rough edge.

NOT like this:

[ATTACH=JSON]{“data-align”:“none”,“data-size”:“small”,“data-attachmentid”:10476963}[/ATTACH]

YES like this:

[ATTACH=JSON]{“data-align”:“none”,“data-size”:“small”,“data-attachmentid”:10476964}[/ATTACH]

no.jpg

yes.jpg

1 Like

I am so impressed. These are beautiful!

1 Like

Thanks everyone for the compliments! I really did bust my behind on these.

Another recommendation:

Don’t ask your family to design a jump.

The hideous purple/yellow/green oxer? My mom. Including the stripe pattern. Can’t wait to chip that one up so I have an excuse to repaint…

The ridiculous feather fillers? My sister. Who has no idea how this works and was mortally offended I wasn’t willing to put clips on the poles to hang them there. Also currently has not finished them, and I bet it will be 2021 before she does.

Have you ever asked a question, got the answer, and immediately realize you shouldn’t have asked? :lol::lol::lol:

Ok, so I have the close up pictures, but I don’t think they post big enough to really see how to make them. Below is a link to a Google Drive folder with all the pictures, with the closeups of the standards and the “cups.” Not a virus, pinky swear.

https://drive.google.com/open?id=1bup0aRo7MXWkc3-DJAJfzvLXZsATA5uM

I painted them by using an almost-out can of white primer, adding water, dunking the cubes and setting them on a washer pan I had for a cowboy shower. About halfway through drying, I flipped them over so that they didn’t dry stuck to the pan.

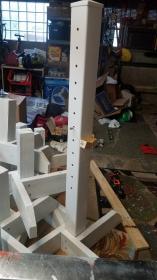
I’ve built all mine too. Through necessity. Standards, poles, coop, barrels (I didn’t make these, just collected them!) and “natural rails” (cut out of the bush on our farm- big ones), skinny planks. My favourates are my flower brush boxes. They are just 2’ high, and just under 10 feet wide, they fit under my 10 foot poles. They are a “brush box” frame, but have some chicken wire attached between the slats, and holes drilled in the floor of the box. Instead of brush, there are flowers, actually some quite nice “fake” flowers, tulips, daffodils, etc. I got all the flowers for FREE, people just didn’t want them any more. I got so many of them, that I had to make TWO of these flower brush boxes. Most of them still had the price tags attached to the flowers, they are worth $5 to $10 EACH, and I got several hundred dollars worth of them, to make up the TWO jumps. Sorry, I can’t post pictures here. But they are beauties. The chicken wire half way up the brush box supports them, and the bottoms of the stems are glued into the holes in the base. The worst thing about them is that they are so colourful that the deer that spend the hot summer days sheltering IN my riding arena, try to eat the flowers, pull them out, tear them apart. Because deer are like unicorns, they eat flowers. Keep an eye out always for give aways like these flowers, thrift stores, garage sales, household auctions etc, they are there sometimes. And make great jumps.
1 Like

These are awesome! What a great job you did!!!

1 Like