More plywood questions

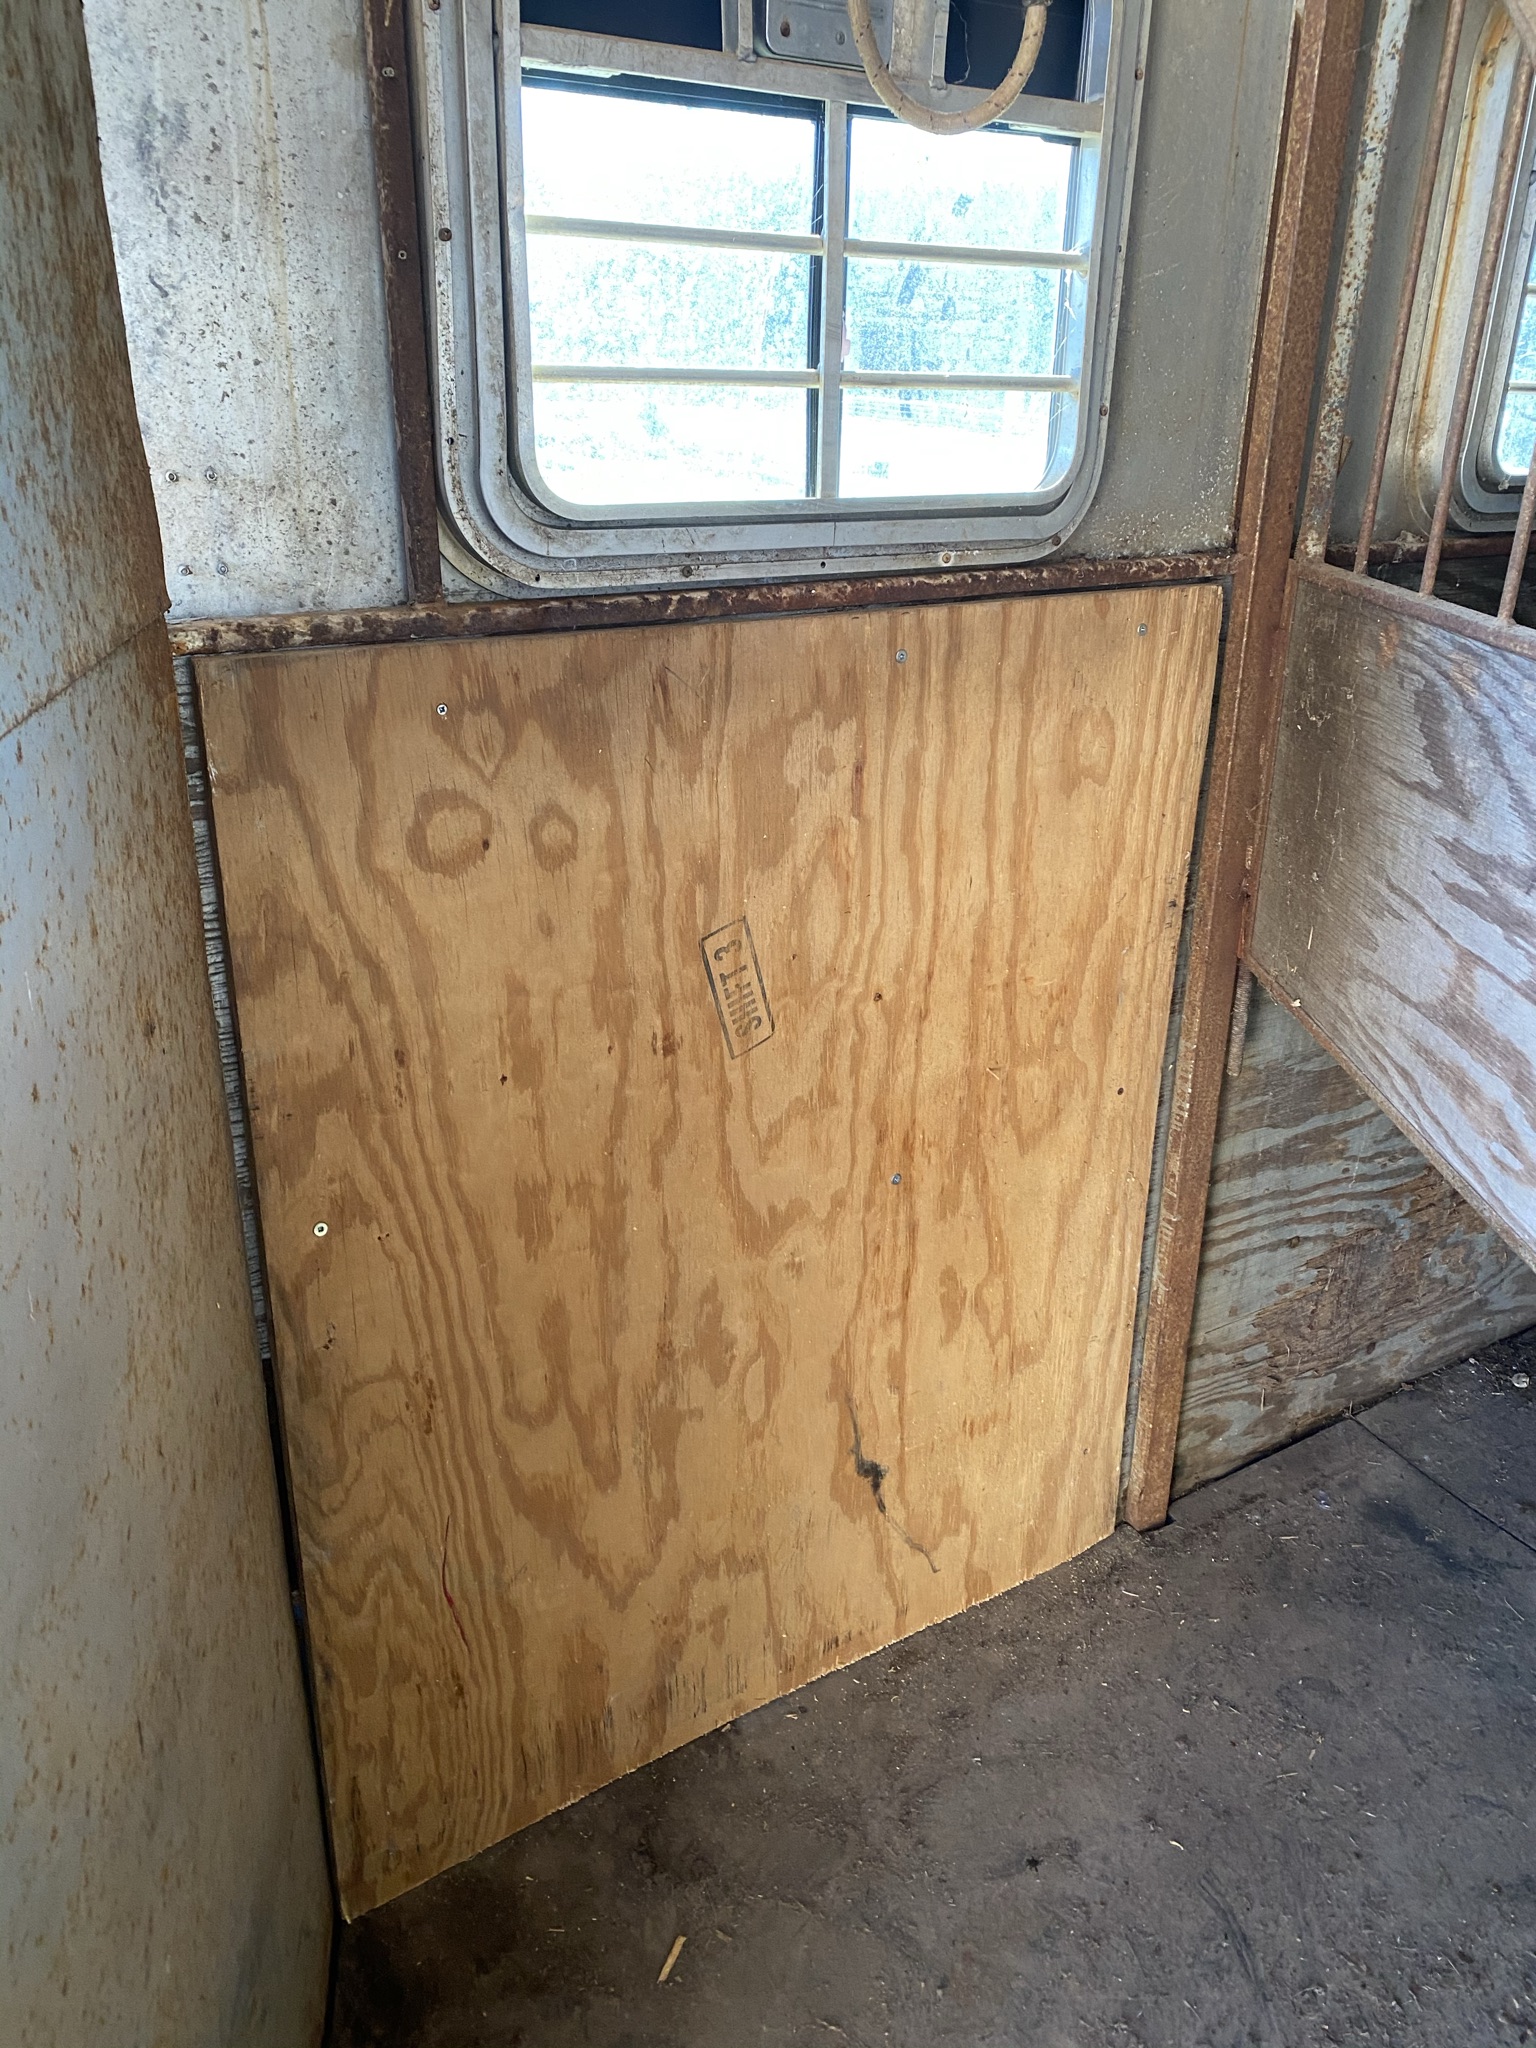
Since everyone was so helpful with the stall repair, here is another one:
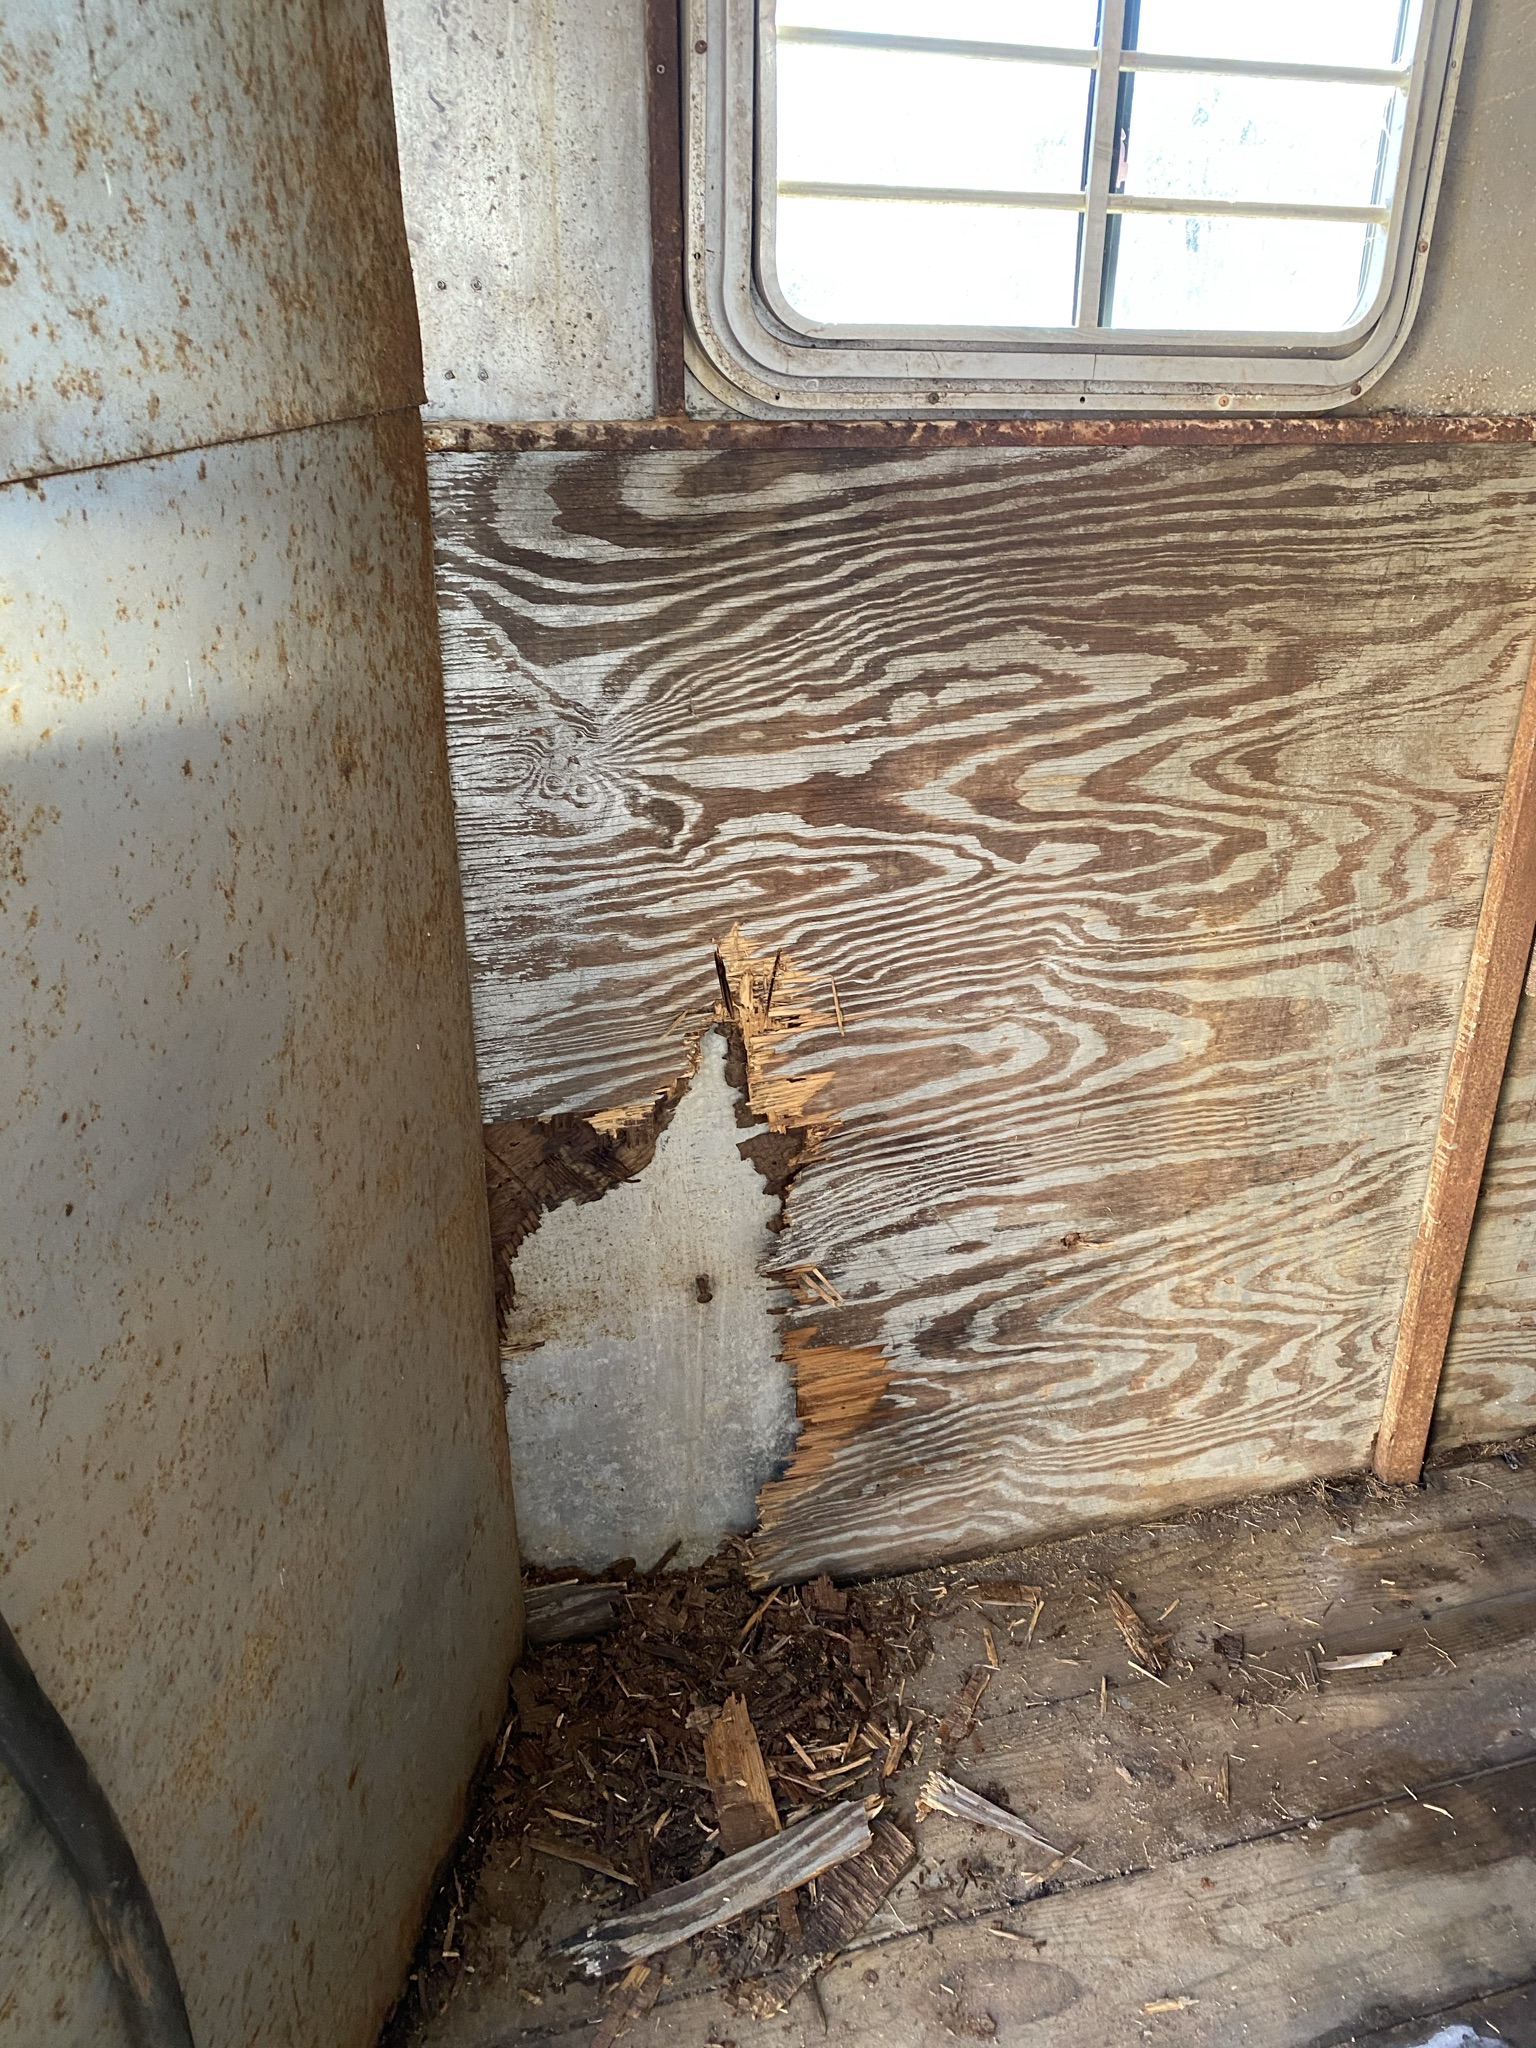
Barn friend has an old trailer that needs work to sell it. At some point a hole was kicked in the plywood on the wall at the bottom. We looked at it and figured that if we could somehow cut out a square and cut a piece of plywood the same size as the hole, it could be fastened with to the outside wall with bolts (same way the current wood is fastened).

What could we use to cut out an even sized hole (instead of the jagged hole) without having to remove the entire piece of plywood.

Bonus points if we can manage without loss of fingers.

Just remove the plywood and use a jigsaw

But if you’re dead set against that, then I vote for a dremel if you have one. Or a utility knife with very sharp blades, then a chisel to remove the chunks you’re freeing. Or just a super sharp chisel, with careful hammer blows, like you’re mortising hinges on a door.

For glue, Powergrab Ultimate is incredible stuff.

1 Like

I would think if want to take out the plywood it would just be easier to just put in a new plywood panel.

I would use a Sawzall, with a shortblade. Of course I am really comfortable with mine. Dremel is not a bad idea either or you could cut the hole square with a small hand saw, insert the patch panel and seal with Liquid Nails in an applicator gun or Powergrab.

Frankly a patch is never as good as a whole panel, it you can get that plywood panel out, just measure it, get it cut at your local Lowes or HD ( they will cut it for you) and pop in the new panel. Good as new.

3 Likes

A small skill saw you can set to cut just the width of your plywood, that should be maybe 3/4"?

Here is a small one running on batteries, there are all kinds of those out there.

Small and light https://www.homedepot.com/p/DEWALT-ATOMIC-20-Volt-MAX-Cordless-Brushless-4-1-2-in-Circular-Saw-Tool-Only-DCS571B/308961100?source=shoppingads&locale=en-US&mtc=Shopping-VF-F_D25T-G-D25T-25_9_PORTABLE_POWER-Multi-NA-Feed-LIA-NA-NA-PortablePower_LIA_HolidayPlusUp&cm_mmc=Shopping-VF-F_D25T-G-D25T-25_9_PORTABLE_POWER-Multi-NA-Feed-LIA-NA-NA-PortablePower_LIA_HolidayPlusUp-71700000076461288-58700006510571568-92700058858128571&gclid=EAIaIQobChMIzcy9t7Hg7QIViLzACh0WEwkvEAQYCSABEgKHMfD_BwE&gclsrc=aw.ds

I actually have a dremmel. The box says it has a “saws all” in it, but it all looks so tiny. What attachment should I try with the dremmel (and it is actually a Harbor Freight fake dremmel).

@Puddin_Pie

Not familiar with that particular tool but I would find a piece of scrap plywood and do some experiments to see which attachment would work best. Then draw a nice square using a ruler around the broken plywood and cut it out. My advice is practice first on scrap. If you can do a square cut on a scrap board, you will do better on the trailer board.

Any tool is going to run the risk of going through the trailer wall, especially an old trailer. I’d just replace the whole panel.

2 Likes

I’d do the wheel attachment. https://www.amazon.com/Dremel-EZ544-Lock-Cutting-Wheel/dp/B000WMK8FI

maybe look at using a router? The depth of cut is adjustable and controlled. There are small hand held and larger routers.

here is an inexpensive one ($33) from the Chinese (would need to add the bit)


Here was the hole and the finished project. We attempted to cut out the entire piece of wood to replace it properly. Lacking the correct tools (and Clanter had some great ideas and links), we finally opted for measure the space, cut the plywood to size and screw it into the existing board.

Note to measure with the mat in place. We had pulled the mat and measured to the floor (oops) and had to pull it off and cut off another inch. Then we put the mat back in place and secured the new wood. This is certainly stronger than what is still underneath.

2 Likes

one thing that has not been added to the discussion is the grade of plywood used.

here is an explanation

A-grade plywood: This is the highest-quality plywood and therefore typically the most expensive, since the veneers will be flawless. A-grade plywood is smooth and can be easily painted.
B-grade plywood: B-grade plywood is slightly less smooth than A-grade plywood and has a solid foundation. It usually has minor flaws and can be subject to repairs.
C-grade plywood: This type of plywood has a few knots in its sheets that are up to 1.5 inches in diameter.
D-grade plywood: The cheapest type of plywood veneers, these sheets typically haven’t been repaired. The flaws can be slightly larger and the knots in this type of plywood can be up to 2.5 inches in diameter.

in addition… plywood does have various Plys…common is three ply but the increase in the number of plys increases the stability of the final product (five and seven ply are usually available)

In true “get it done” fashion, we used the available plywood found around the barn!

1 Like

Thank you, that was very interesting!

I had some fuzzy ideas about all that, but the explanations made the real information clear.

me to, but some day a more professional person would search this thread LOL

I just sorted an odd lot of lumber yesterday after cleaning up where my daughter had been working on her next training project for Socrates…his cart is nearly completed.

Got to have that extra lumber and plywood available for the “special” projects (emergency for whatever the family recuses …which has ranged form goats to owls and beyond)

@clanter, a “professional person”, I resemble that remark. I will have you know that I have an online certificate from the “Duct tape, bailing twine and zip tie” society that completely qualifies me to make barn repairs, with or without power tools!

Seriously though, thank you for all the wonderful suggestions and advice of my two projects!There was much less cursing involved than there could have been, thanks to some ingenious hardware. The only incident was a splinter in my finger.