For sure! My OG plan was to have a “feed box” in the open area of the barn but now I’m thinking I might need to carry more feed than is reasonable to fit in that so might should have a wee feed room.
My BO has a very small feed… closet? where I board now. It can’t be more than 5’x8’. Row of cans down the wall, shelves over for supplements, and girths hang on the wall behind you (we don’t put anything sweaty or stinky in the main tack room).
Got tied up with other stuff for the last couple days, so no true progress. I did get the horizontal posts out where they need to be for the H braces - the rest of that “kit” can be transported on a wagon so the upcoming rain shouldn’t slow me down too much.
Our feed room is long and skinny, I think 8’ x 15’, added to the tack room and has lots of room for feed and barn odds and ends. the water heather lives there also and there are hook-ups for washer-drier.
When we remodeled the ranch house, the old washer-drier went there.
Sure helps to wash the stinkiest stuff in there, barn coats too.
We feed a pelleted complete feed based on alfalfa our vet formulated for the local mill.
Many competitors feed it as is easier to take to shows than bales of hay and horses thrive on it.
He prefers any sack feed be keep it in the original sacks, so if there is any problem caused by feed it can be traced to the source right away.
We just line up the post, I’m usually in the “tractor” (we have a unimog with a bucket). DH is out with the post, lines it up and I carefully drop the flat side of the bucket on the post until he says stop. They go in the ground. After having to do jackleg fences or digging b/c of hard/rocky ground it’s ridiculously easy. Fun even. lol
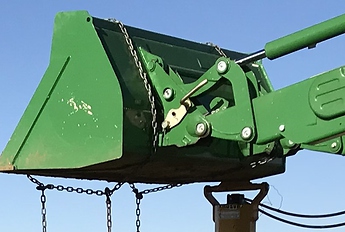
Right below the gold handle that pulls out to drop the bucket and change for pallet points, that one joint at the end of the FEL arms, there is a steadier place than the bottom of the bucket itself, a hinge point where you can push T-posts without them slipping.
You have to go easy so they don’t bend if you hit something hard.
It takes longer, but if you put the manual post pounder on the post, then they won’t be as apt to bend on hard or rocky ground.
I had the hydraulic auger there, was setting 2 7/8" pipe posts, but you can get an idea where that point is to push down:
Much better advice than I offered! Our bucket is different but good advice on putting the pounder on the post.
You must have had some bend too and they won’t straighten, even heated, they break!
That is why we made a long pipe just for pushing T-posts in that bolts to the tractor, but it has to swivel to get the posts in there, is too high for most smaller tractors to get high enough to stick a post in there to push in the ground.
We finally bought a hydraulic post pounder for small posts, made our lives so, so much easier.
I would say we have built/re-built miles worth with that little gadget, is magic, put-put-put-put and post is in the ground.
My BIL has been a professional fencer for 30 years in ranch country. He LOVES his hydraulic post pounder and also the tamper. The pipe is a good idea and our bucket does go high enough for that.
Being able to jam them in with the unimog on our little place now is pure luxury for my husband after so many years of doing it manually.
Wow. Mine is 8’ wide and 12’ deep and I couldn’t imagine. I have two feed cans, a 4’ table, and a short shelf on the wall that shares the door and the rest is open for hay as needed. I’ve squeezed three tons in there before but hated it, so now hay has its own place and I bring in 2-6 bales at a time, depending on how I feel when I start moving it  Currently my hay is sharing space with my friend’s hay and bag of grain and tub of wraps and bandages as she is keeping her stall-bound yearling at my barn for the time being, and it’s still roomy.
Oh! Hers doesn’t have any hay in it at all, that’s the big difference. Hay is somewhere else entirely.
Oh gotcha! I still prefer a roomier room 
I keep checking back for new photos  lol
lol
You’re giving me a serious itch to get to looking at farms! One month… just one month…
I’m sorryy!! It’s been more landscaping for the last few days! Tonight I’ll be tied up, maybe I’ll try to get one H brace up, just for you.  haha
haha
bahahaha no no, I’m just getting antsy, I’ll just keep checking!
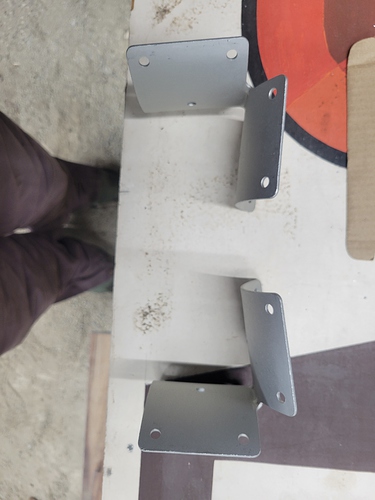
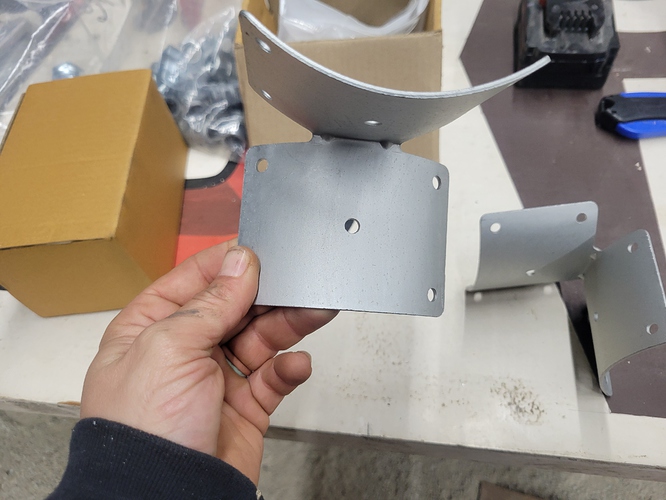
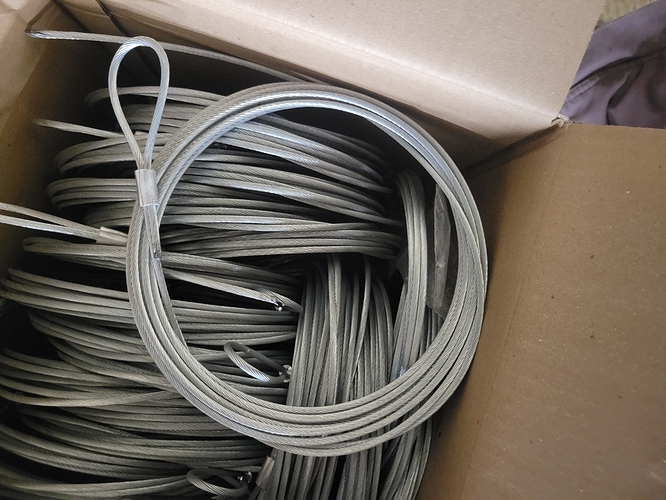
It is waaayyy too nasty to be doing work, so I’ll show the hardware I’ll be using for the h-braces. Everything is from Kencove.
Instead of drilling holes and putting pins in, I’m using brackets. This will allow me to put the braces at the same height and not need to stagger them.
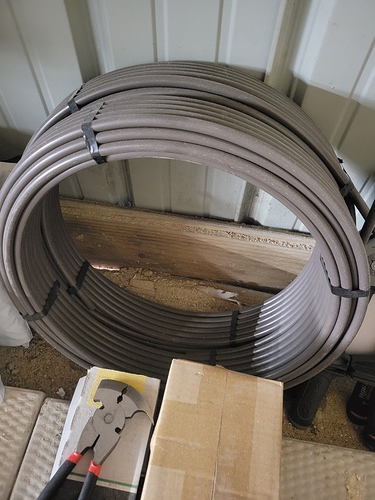
For the brace wire, I will be using these “quick brace” choker cables with a gripple. That should all but eliminate the V that makes brace wire dangerous (all but one area will be an inside pull, so nothing exposed anyways, but just in case). I’ll slip some of the brown cable tubing over the diagonal part of the brace cable so it looks nice, and adds another layer of protection from injury.
Ooh those brackets look clever, thanks for the idea! I didn’t put up any of the wood fencing on the farm I had, but it was quite annoying when the H braces would fall down (old fence and wet Florida) and leave a huge pin sticking out.
I have a stupid question. Which way does the brace wire go on gate hinge posts? Do you do two in an X? I tried googling but it’s every which way.
I prefer an X brace but I think it’s supposed to be from hinge side upper corner to free edge lower. Don’t quote me on that though please.
At the top of the post to the ground. The purpose is to counter act the force of the gate pulling on the post. From the bottom of the post up isn’t doing anything.

