
I need to put up a piece of plywood to cover a hole in a stall divider. Since it is a shared wall, I can’t just run screws thru it to secure properly, because if the screw is long enough to hold, it will poke thru. The current wall (temporary stall) goes into metal slots and has what looks like a rivets holding it in place. So there is not an upright I could fasten into.
Any suggestions on what to use for this temporary fix?
Photos might help?
But if you need something that is smooth on both sides, try a small bolt (machine screw) with a t-nut
A T nut. I had never heard of them, but they might just work! Thanks so much for the link.
Picture a half wall with a big kick hole at the top. I am trying to cover the kicked spot with a separate piece of plywood to make it safer until a new wall can be built.
can you use Chicago screws? they are commonly used on tack, but their are various sizes
I see Home Depot calls them “Binding Post with Flat-Head Slotted Drive Screw”
Depending on whether you need the plywood to come off easily, you might want to pair the hardware with some construction adhesive (check the labels and get one that is meant for wood). Liquid Nails and Gorilla are a couple of brands.
1 Like
Clanter: also a good idea. It helps to know the right words of these hardware pieces to go searching for them.
Liquid nails should be strong enough to hold it itself for a temporary fix.
Or add a 2x4 where you want to put screws to take up the screw length.
2 Likes
Put a piece of plywood on bothText sides of the hole, both pieces bigger than the hole itself.
Drill a bolt size hole through both pieces, lined up. Select a bolt just about 1/2 inch longer than the distance from hole to hole. put the bolt through both holes and use a washer and nut. Tighten and this will clamp the plywood sandwich over the hole.
if you use this method, use an acorn nut
2 Likes
See, this is why I love this board. Replies with actual names (bs that thingy that covers the pointy out thingy bolt thing, which is what I come up with). When you go to Lowe’s with the picture of the T nut you are looking for, they can direct you to the proper drawer.
I have measured the boards and gotten (I hope) the proper length bolt and t nut to make a flush ,ousted repair. Armed with my drill and drill bits, I will head to the barn today and see if I can make this work. I will take some before (and hopefully after) pictures and post.
Thanks everyone!
Lordy, yall are fancy!
We would have definitely used the 2x4 scrap on the other side to take the slack, or just drive a nail in and beat the bejeebus out of it on the other side so it embeds into the wood and doesn’t have a pointy bit.
Or just grab the angle grinder and cut the screw flush where it sticks out.
So many ways to skin this cat!
2 Likes
I just assumed the OP did not have an angle grinder. I don’t keep a supply of acorn nuts around the shop, but I do have a large assortment of bolts of various diameters and lengths, so I’d pick out a bolt that was the correct length so no threads extended beyond the nut.
I would personally just not want to risk COVID exposure to pick up an acorn nut. If I really wanted one I suppose I could order it from Amazon.
Haven’t been off the farm in 10 months. I’m in hermit mode due to age and medical status. Boxed, powdered eggs, and food from cans have become my new normal. The horses get hay and feed delivered in Chewy boxes.
Well, being a hermit for 10 months seems over the top to me personally, but I would have used the hammer and nail (with the other side beaten into submission) already. Put a piece of duct tape on the end if you think your horse is going to be dumb enough to get hung on it.
If we’re going out to get fancy nuts and bolts for a temporary repair, it’s no wonder so many people think farms will cripple you financially lol.
1 Like
Also, OP, you can toe in a screw so it doesn’t go straight in.
Think redneck Kregging.
Drill hole, use a regular bolt and nut. Then hacksaw off any bolt beyond the nut, pretty easy to do. You can still remove it when the time comes.
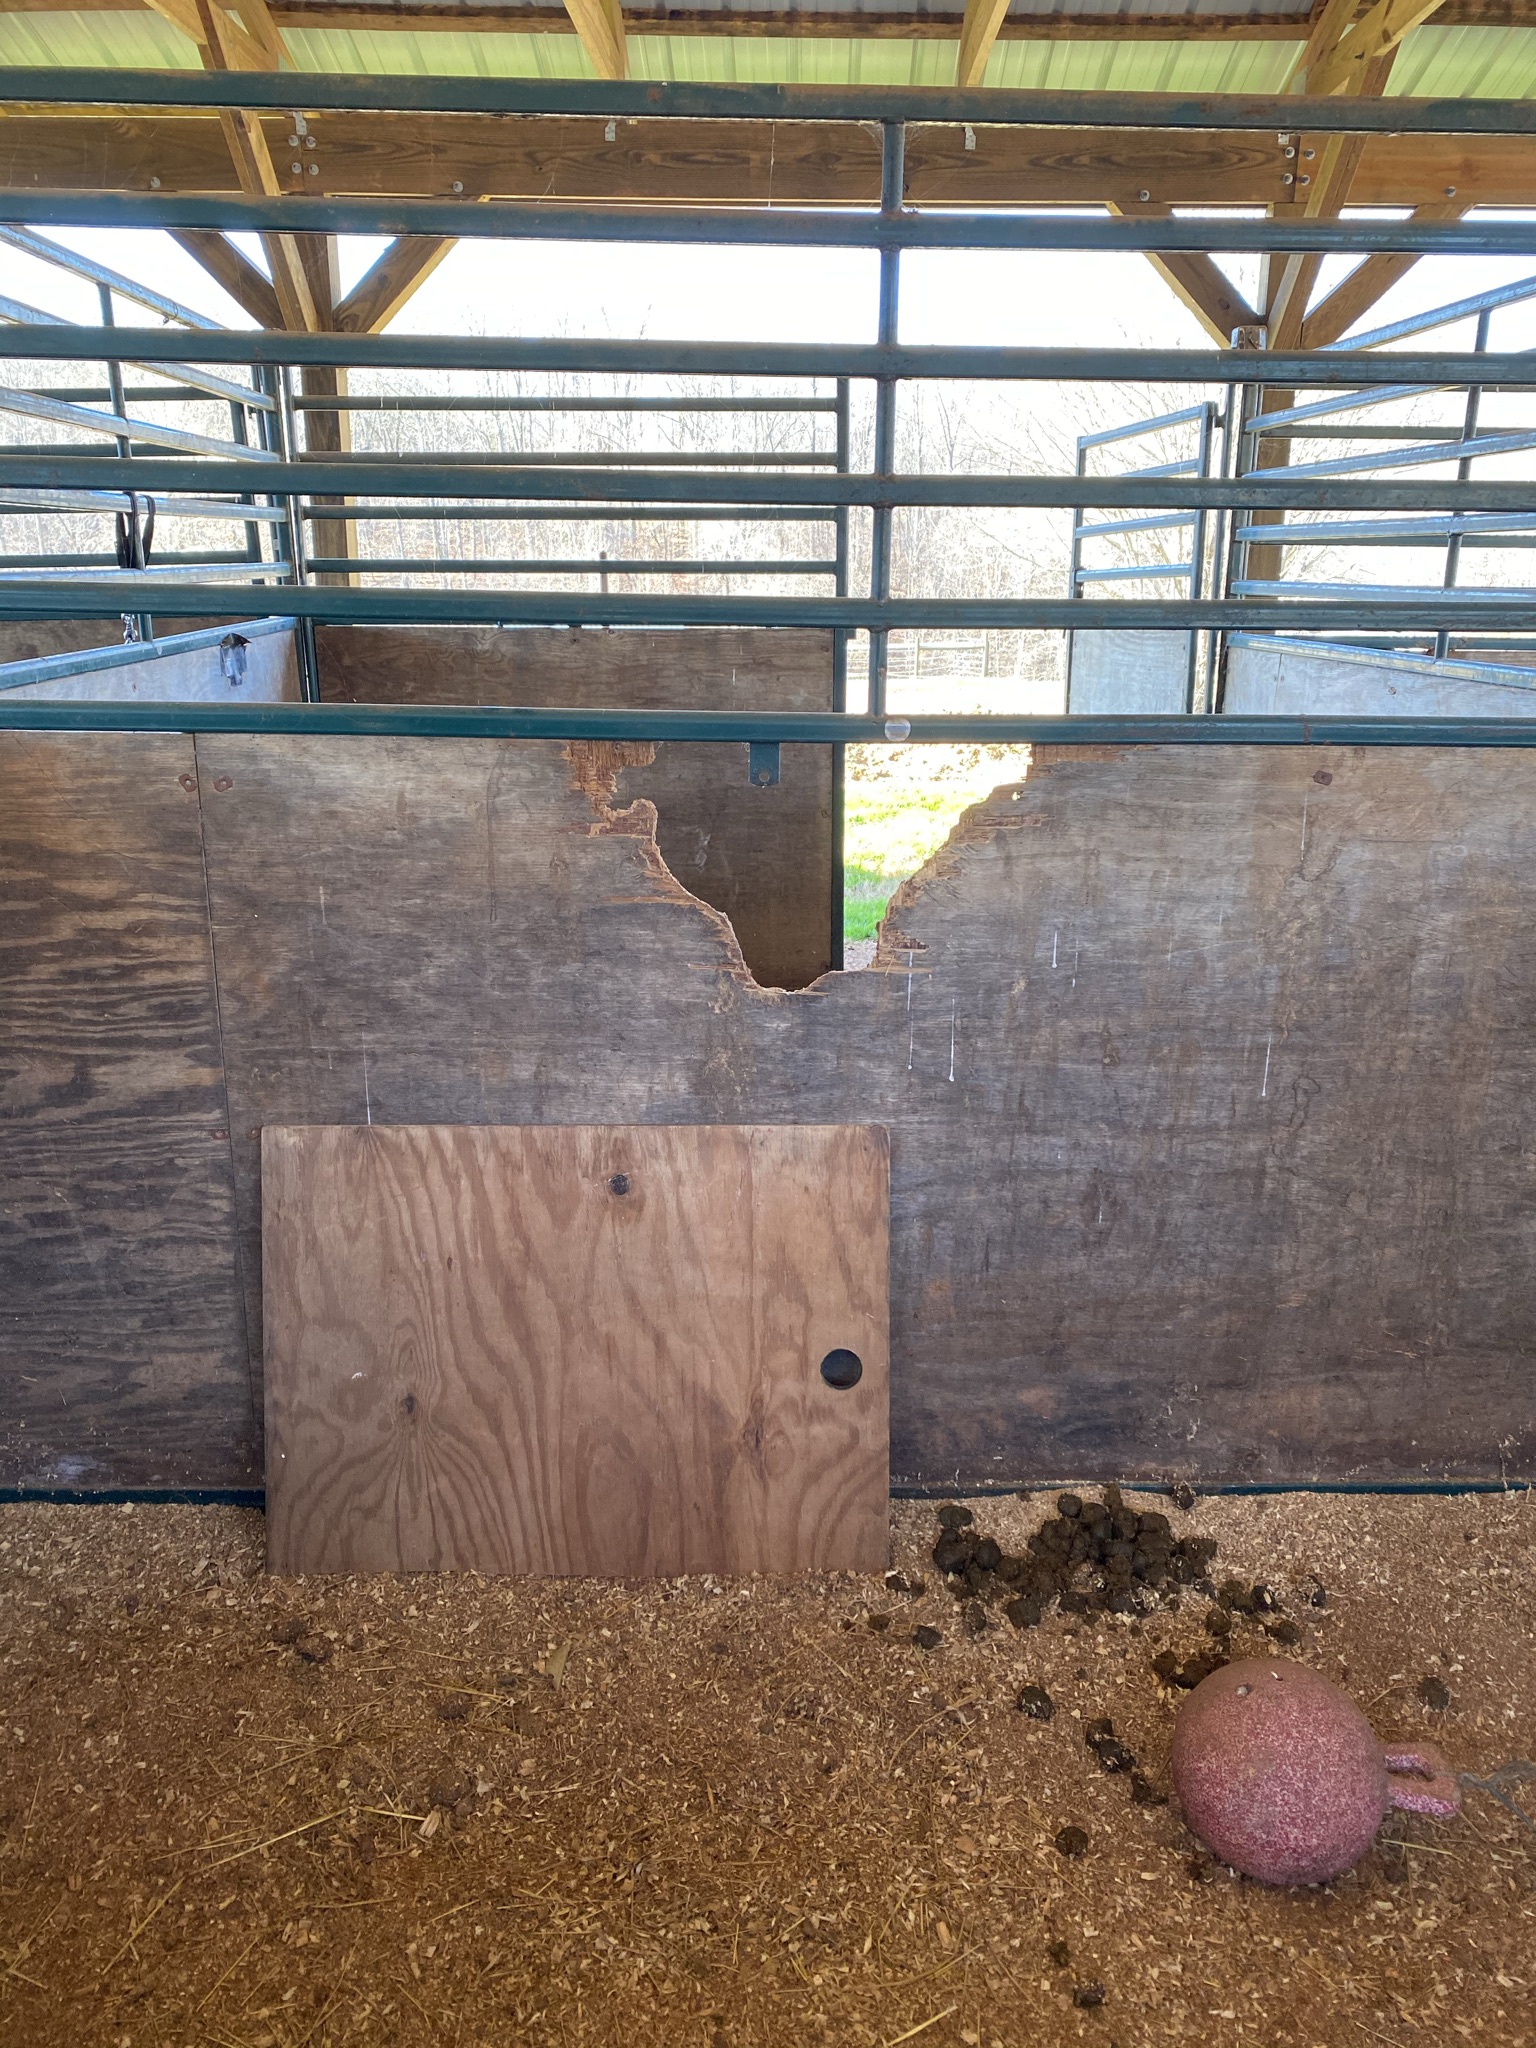

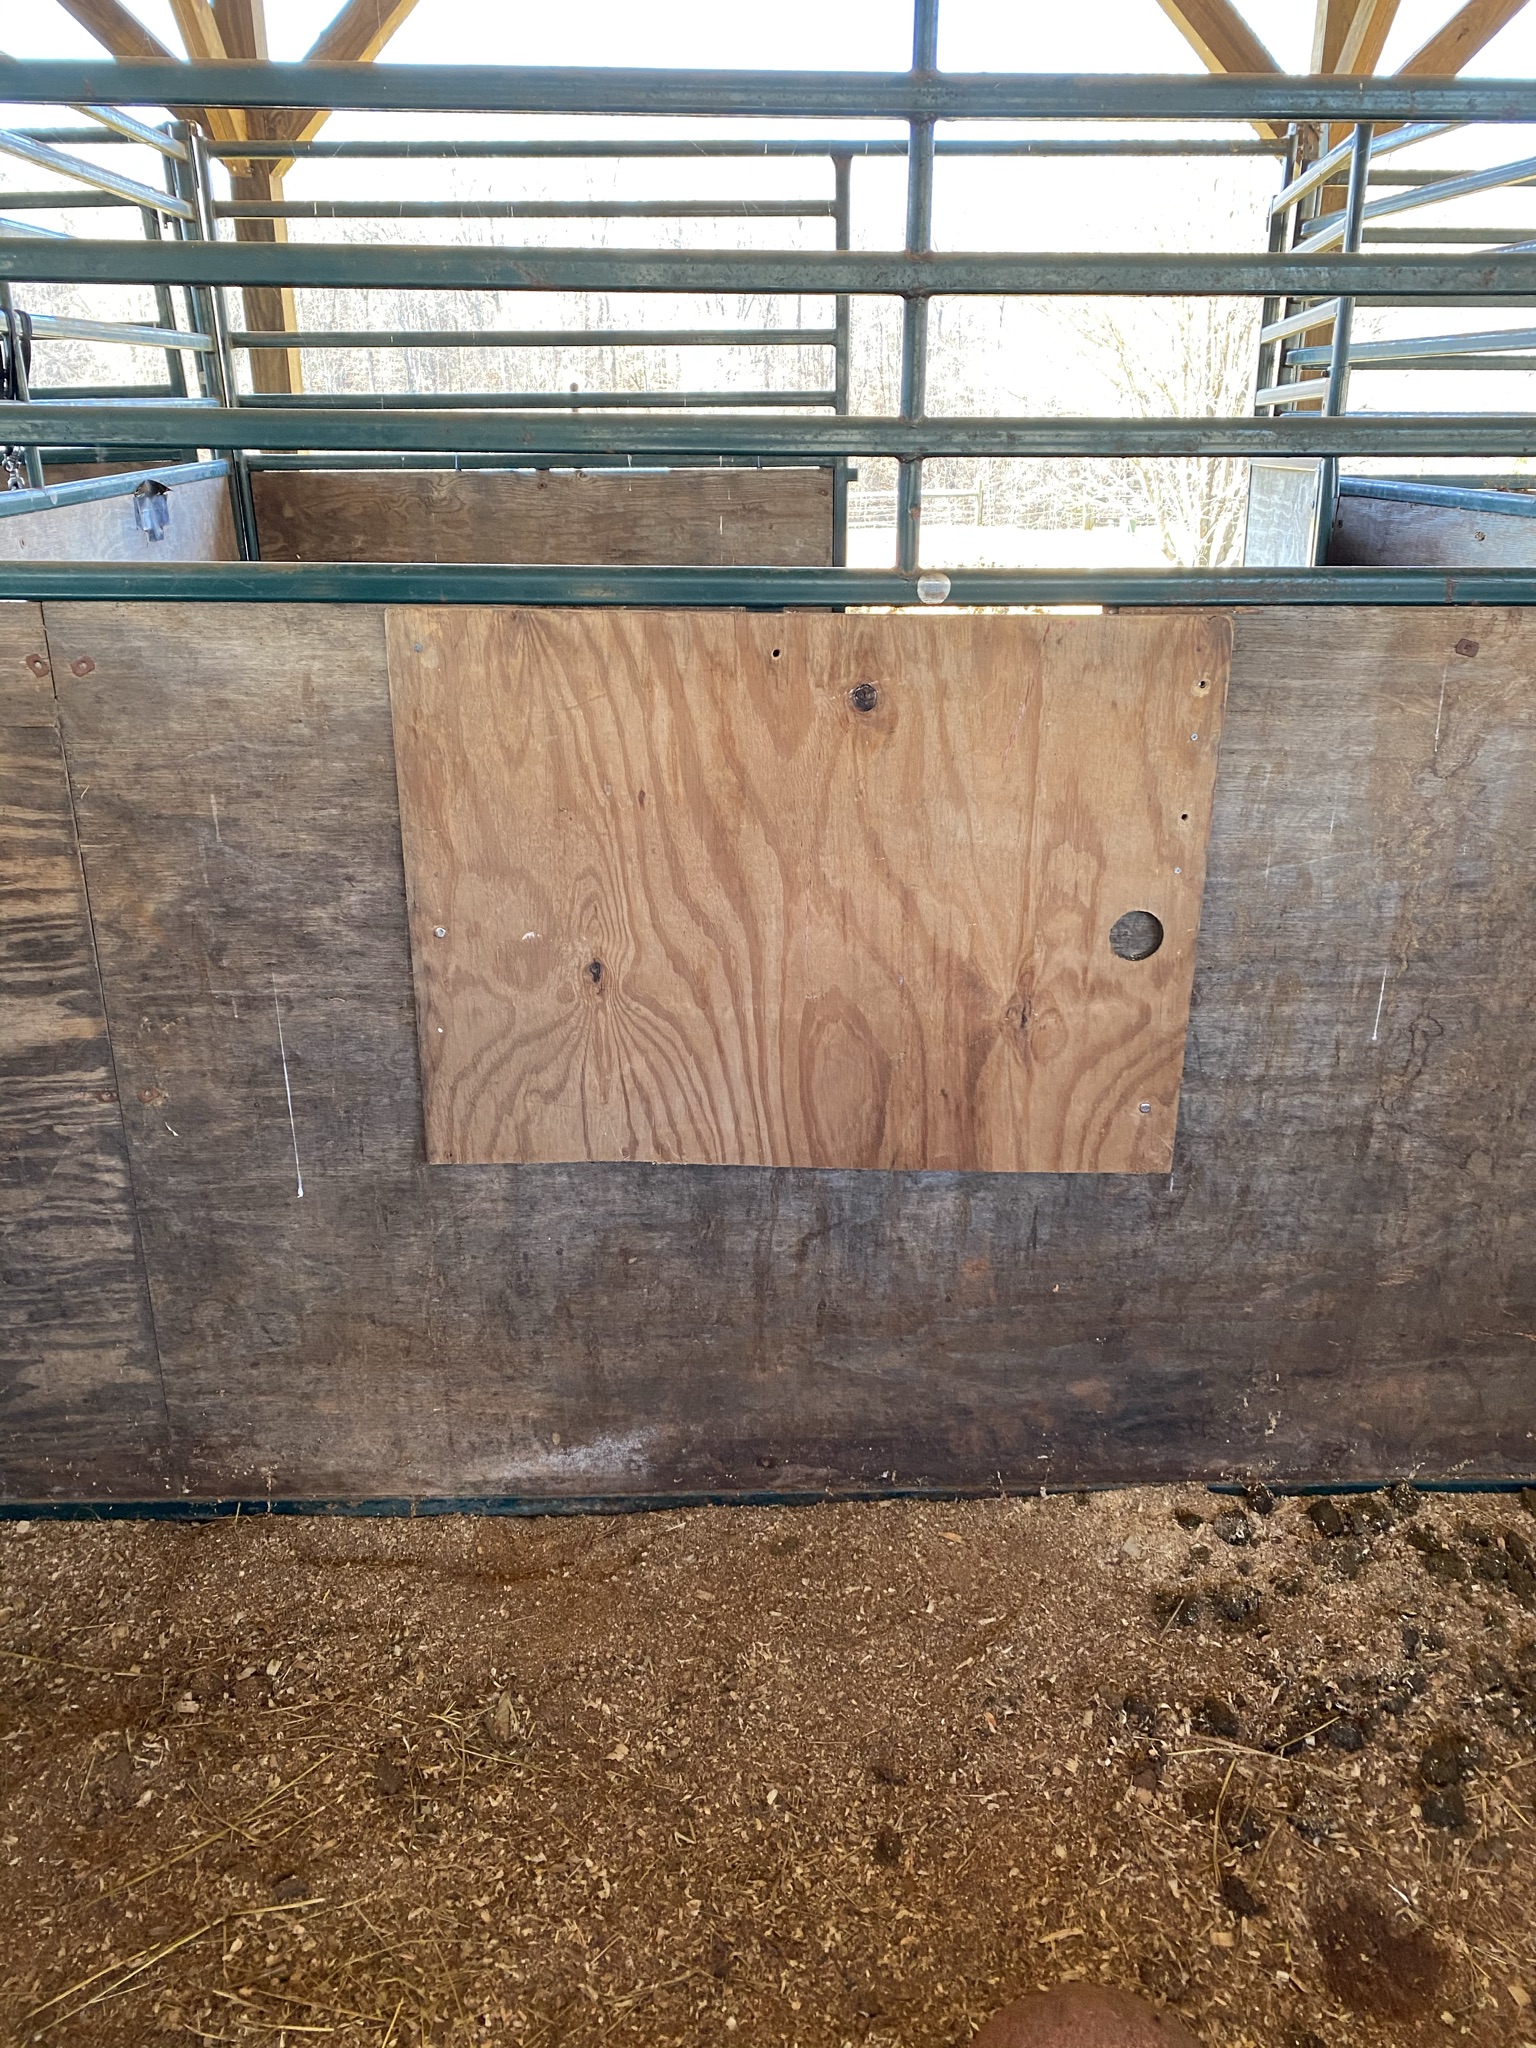
So, thanks to everyone for their advice. First picture is the wall in question. Second picture is the T nut and appropriate bolt (which worked in 2 spots). Third is the finished repair.
The bolts I bought were exactly the right length, which means for the spot that was so,warped, they were not long enough. I drilled the holes, hammered in the T nuts which were flush on the other side and screwed the bolts into the T nuts, using my vice grips.
One corner got a nail and I hammered the snot out of it on the other side so it was flush and one side got 2 wood screws, that I also hammered flush.
There was initially a clever use of a zip tie to attempt to stabilize the board, since I didn’t have any help to hold it in place. But then the zip tie broke, so the nail (the only friggin nail I could find in the barn tool box!) had to make an appearance.
1 Like
Nice work!
Looks perfect! Great job!
1 Like