Unlimited access >

Stall front construction advice

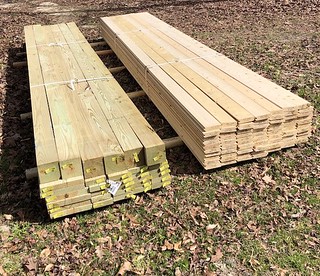
We’re about to start construction of ARC stall fronts. The instructions include this photo:

Those of you who have stalls built like this from components (rather than one-piece fronts that just get bolted or pinned in place) … does the post to the left of the door have to go all the way up to the rafters? It would still be cemented in place, just cut at 7’ or however tall the board that supports the hanging door rail is.

I am definitely setting the corner post and tying it into the rafters. That one also supports the divider wall between two stalls.

I am guilty of over-building absolutely everything, so if all three posts need to be full height, that’s fine. I just want to make sure there is a structural reason. And also because have you seen the price of a pressure treated 6x6 lately?? :grimacing:

1 Like

I had to think about our built in place stalls (we have two) … the post to left at least for us does not go to the rafter. Stalls have been in place for over 30 years without an problem

one thing I would do if this has enclosed track is cut a hole in the side of the door track that would provide access to the roller assembly to allow lubrication of the rollers …and adjustment of the top trolley nut that is inside the rail.

1 Like

My posts in that spot do go to the ceiling, and I would be hesitant to remove those as it does add significant stability to the sliding door. It’s also a prime place for butt rubbing.

3 Likes

We just installed similar fronts a few months ago and debated the same thing. We did end up securing each post to the rafters as well and I’m glad we did as that post in particular tends to be a favorite neck scratching post for them with their heads sticking out the front. I’ve seen barns build with that post only attaching to the header, but like you, I’d rather over-build than under-build!

And yes. Yikes. I’m glad I built my stalls when I did, lumber has since doubled!!

my barn has a clear span roof so even if the post was extended to the rafter it would not be load bearing. The header plate runs from end of stall to end of stall, the center post is concreted in place and attached to the header plate. Nothing has moved on over 30 years, even with Bonnie banging on the door for food

The post could run to roof rafters if desired, is it necessary? No.

Well that was unexpected. They were out of the tongue and groove and had to order it so I thought it would be a few days. Behold, allllll of my money converted into lumber!

210305_8082 by Wendy, on Flickr

I will start a new thread once we get started, since I can’t seem to get around to fixing up my blog to chronicle this project.

1 Like

yeah, apparently I don’t mean for the post to go all the way “to the rafters” I mean to the joist, the horizontal board at ceiling level.

We will do all of them, all the way up! After we dig some holes and go buy a bunch of concrete.

1 Like

I’m late to this thread, but yes, that center post is very important to the structure so it should be tied in.

We have ARC stalls, and love them. Fair warning – installing the dowels in the railings takes patience! What we found worked best:
Have your bottom rail installed, and the top rail attached at the back of the stall with just one nail–you want it to stay attached to the wall, but have enough flexibility that you can lift it a little up and down vertically. One person is the dowel-setter. The other person “operates” the top rail based on the dowel setter’s instructions. Start at the back at the stall, and set the 1st dowel in the hole on your base rail. Your partner lifts the top rail enough for you to get the top of the dowel into the top hole, and lower the rail again to “capture” it. Repeat this process for each dowel in sequence. Your partner should only lift the top rail juuuuuuust enough for you to slide the top of the new dowel into that hole. Like, I’m talking maybe 1/32nd of an inch. If they lift the rail too much, all the other dowels will fall out of their holes like dominos, and you have to start over. Once you get the hang of it, it’ll go quickly, but it’s a good test of a marriage, for sure.

Once you get all the dowels in, secure the front of the top rail to your post, than go back and lock in the other end of the top rail with more nails. Helps to have one of you holding that top rail with downward pressure when nailing it in, to make sure none of the dowels pop out.

1 Like

First set of bars installed. It did take some patience! I pushed up from the bottom while DH held the top rail and only let it go up juuuuuust far enough for the bar to slip into the hole. I wish it were a full length solid rail instead of two pieces. It feels like the whole thing could be sturdier. But there is a brace for the back of the wall that will hopefully help some.

210506_8453 by Wendy, on Flickr

1 Like