
I love how you put not just a chestnut, but a chestnut GELDING, in pink. 
2 Likes
Haha I SWORE I was a black/white/hunter/navy girlie. But he’s just too darn cute in pink  . He has pink fly boots too, which started the whole thing.
Somehow, my almost identical chestnut gelding could never pull it off. I swear it’s a personality thing!
3 Likes
One of the things I test for to see how it’s curing is whether I can make an indent with my fingernail. If so, it’s still curing OR it’s cured incompletely (difference being whether I can make a dent after 10 minutes vs being able to make a dent 24 hrs later. One is slow, the other means an inadequate mix). And it should be smooth to the touch when fully dry, not tacky.
You’ll get there! So proud of you for taking the leap, and thrilled that it’s helping your boy! I love me a big red TB. Mine is currently happily tromping around in Octos up front and Speeds behind. (Shhh, I know he’s fat 
 )
)
3 Likes
Alright y’all - we lost another shoe. This one a hind I expected it, but here we are!
I realized that he’s ripping the toe side of the cuffs a bit when these come off, and none of the glue is staying on the foot. The common denominator appears to be rain - the pasture gets muddy and is essentially a slope.
I joined the composite Facebook group and very quickly learned I have NOT been prepping the foot properly! This would explain the glue not sticking to the foot. I watched Daisy Bicking’s video on how she applies EasyShoes with Equilox - I definitely haven’t been scuffing and buffing the foot enough for the glue to stick lol. More than that, the glue dries so fast compared to her video in the winter - and I’ve been glueing with the foot on the ground. I think that is fine, the prep is likely my biggest issue.
Lastly, I think it’s time for a trim. Especially the hinds. There’s a lot of foot there that can come off at the toe IF the shoes stay on.
Anyway, it’s been a lot of information to absorb. If I can get the retention issue fixed, I think the rest will easily fall into place.
5 Likes
I’ve been lurking on this thread with so much interest. Currently, I’m working with imho a really amazing glue on expert to fix some angles that went really wonky. Having seen the ease with which he works has been humbling. I’d love to do glue ons on my own one day as he is a referral only provider who probably isn’t a permanent option for me. I’m thankful for all of the highs and lows shared on here for the collective learning of the group. It definitely reinforced that this is a combination of art and science with a lot of practice.
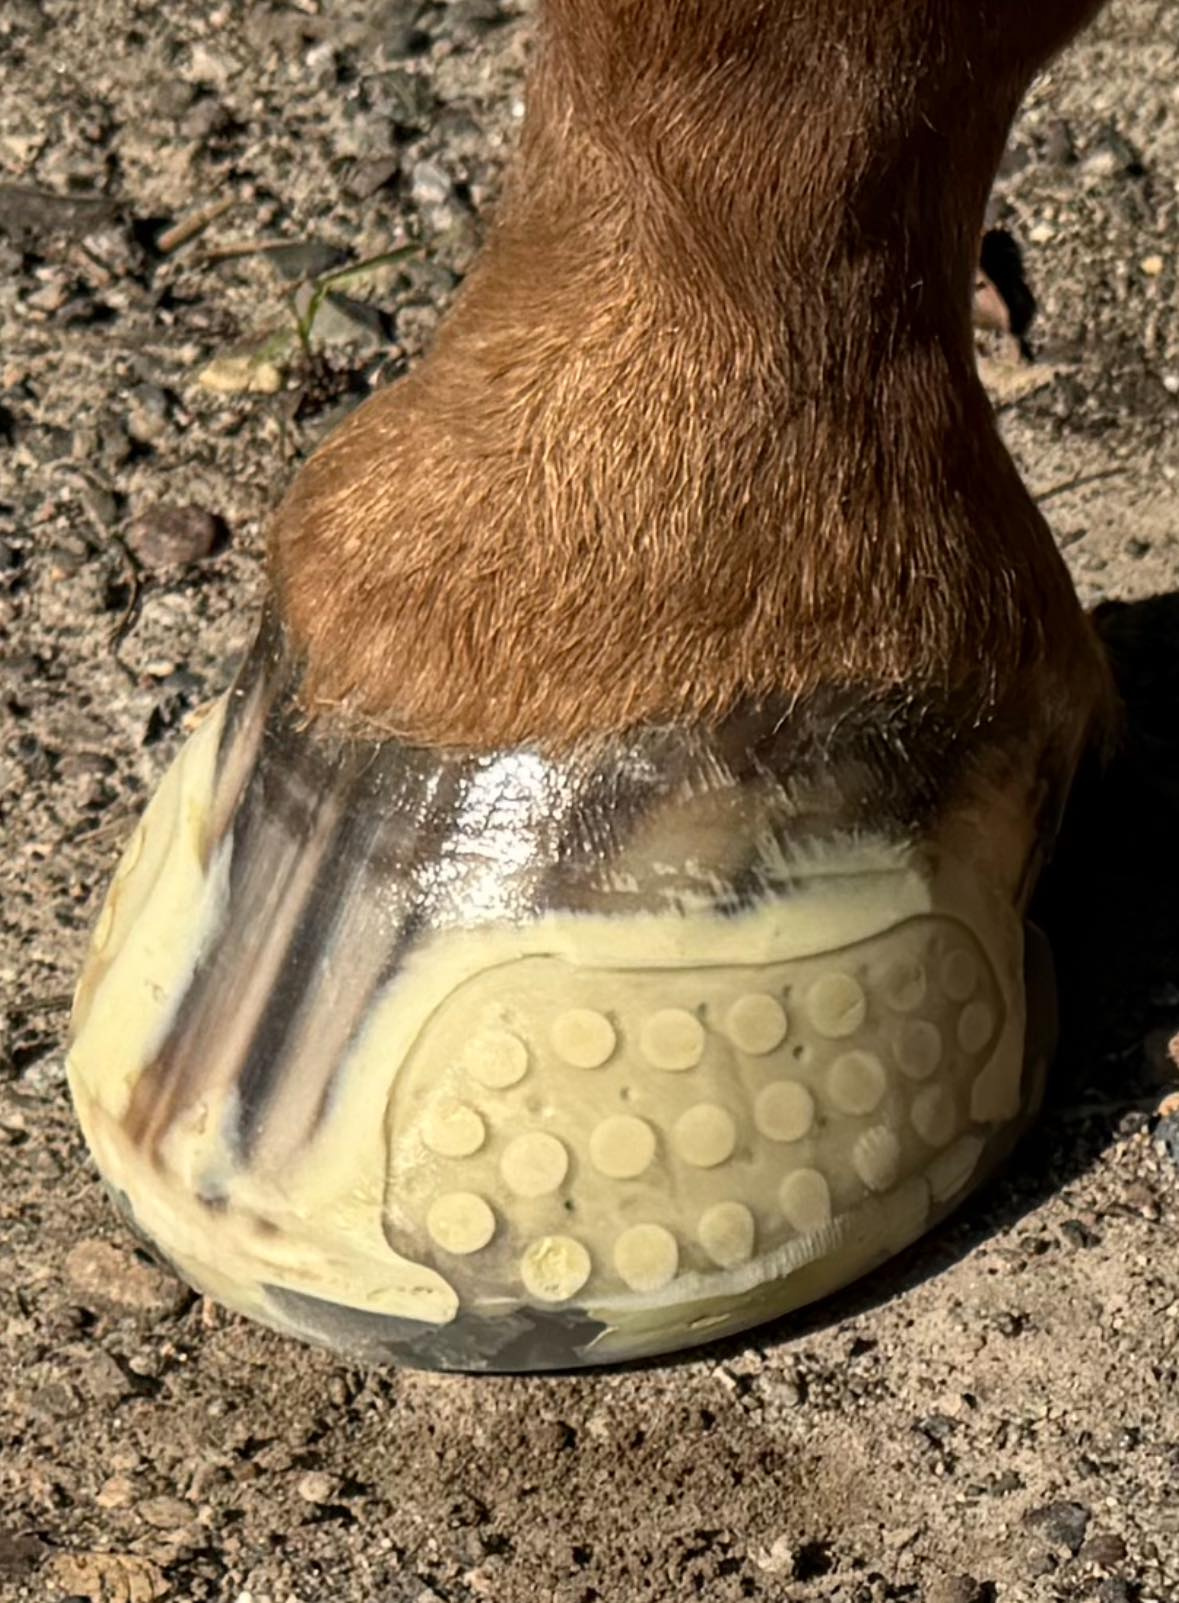
I don’t have any photos of my own attempts but here’s a photo from yesterday after her appointment. I think it is a really cool visual on how quickly glue ons and angle correction can impact new growth. She’s only 6 weeks into glue ons and I feel like the new heel is dramatically better in terms of angle and placement.
3 Likes
Oh yeah it’s ~90% in the prep. What I’ve been doing, which seems to work, is lots of buffing the hoof wall with 60 grit sand paper, wire brush (repeat a handful of times), then sweep up all the dirt and dust, let it settle, then a quick douse with isopropyl alcohol (I think I have ~90%? Something strong so it evaporates quickly). Let it dry, then start gluing.
This seems to give it some texture so the glue has more surface area to grab on to, and the alcohol removes the dust and dessicates. The trick is to not get more dust on the hoof wall before you glue.
I used to do the wire brush & torch method (3x) but I think the buffy and alcohol is better (and easier).
Anothing thing you can try is using casting as an extra security layer. Just be careful over the heel bulbs if you don’t get the flexible kind - the traditional casting is VERY stiff, and can be extremely uncomfortable. You should still add glue to the foot, then cast over the glue, but it’s a nice extra layer of security. I’m about to start doing a lot of traveling so am going to add some casting over the shoe for extra security. Between that and bell boots on all four, we should be good until I get back.
You’re doing amazingly, though, and it will get easier very quickly
3 Likes
Yeah I’ve been doing the wire brush + torch method, and a quick go over with sandpaper. I definitely haven’t been scuffing the surface much and can almost guarantee that the foot isn’t clean/dry enough! I’ll go grab a spray bottle and some alcohol and try that next.
2 Likes
Ah yes, the prep is a HUGE part!
I would really recommend investing in a hoof buffy if you plan to stick with this. The $100ish investment between buffy + sleeves (I use the 80 grit for everything, and one pack of 10 sleeves has lasted me…a year? and I still have 5 left lol) + a hand pump if you don’t have one already will pay for itself in no time (assuming you have a drill with a 3/8" chuck). Makes it so much easier to clean old glue off, too. I have a wire brush I use for cleaning muck off the foot (my “dirty” wire brush"), then I buffy, then I have a “clean” wire brush I use just for brushing off the hoof wall after I’ve buffed it. Normally I then just go straight to gluing. If I’m concerned about moisture, I’ll dirty brush, torch, buffy, clean wire brush, torch once more, clean wire brush once more. Also, if using Artimud and/or DIM, make sure NOT to touch the hoof wall at all while applying those products. The oils from the products will affect your prep and harm glue bond.
Here’s some pics of before/after buffying for an example of what you want:
Before:

After:

I’ve heard mixed reviews about using alcohol; some folks insist it’s necessary, other folks swear it results in glue failures. I’ve never needed to use it, but I’ll be curious to hear your experience!
The foot on the ground bit is just because of the type of glue on (direct, which is mostly what Daisy does, vs indirect like we’re doing). If anything the indirect glue ons are much easier to apply and less fussy once you get it down pat.
You’re doing an amazing job!
3 Likes
Thanks for the encouragement!
Also, yep, definitely not prepping the walls enough .
I haven’t bought a buffy yet because I have to haul EVERYTHING back and forth from my house. It’s on the list, and I’m seeing the value. At the moment I’m making it work since this has been an expensive start (which I knew it was going to be - still less than hauling to the farrier and resetting a nail shoe every 3 days).
I also realized I need to shape the heels more and likely have enough foot to really take the toes back and optimize the breakover. Both should help with the shoe loss, if I can get the glue to work! If only the Equilox wasn’t so expensive! I’m definitely sticking with it for now as I learn though.
Also, something must be working. I saw my horse go galloping across the pasture for the first time EVER today!
3 Likes
My farrier started doing glue-ons last year (he tends to use Versa Grip Glue).
We had a very wet spring/summer and his experience is that the glue-ons have stayed on better than traditional shoes because they aren’t as impacted by the swell/shrink cycle.
My new guy needed shoes so I decided to give them a try - had them put on today. I wasn’t able to watch the prep process but my friend said it’s very interesting and is the part that takes the most time (other than the curing).
Can’t wait to see how they work!
4 Likes
Wow, those are pretty! I’m almost ashamed to post attempt 2 in comparison
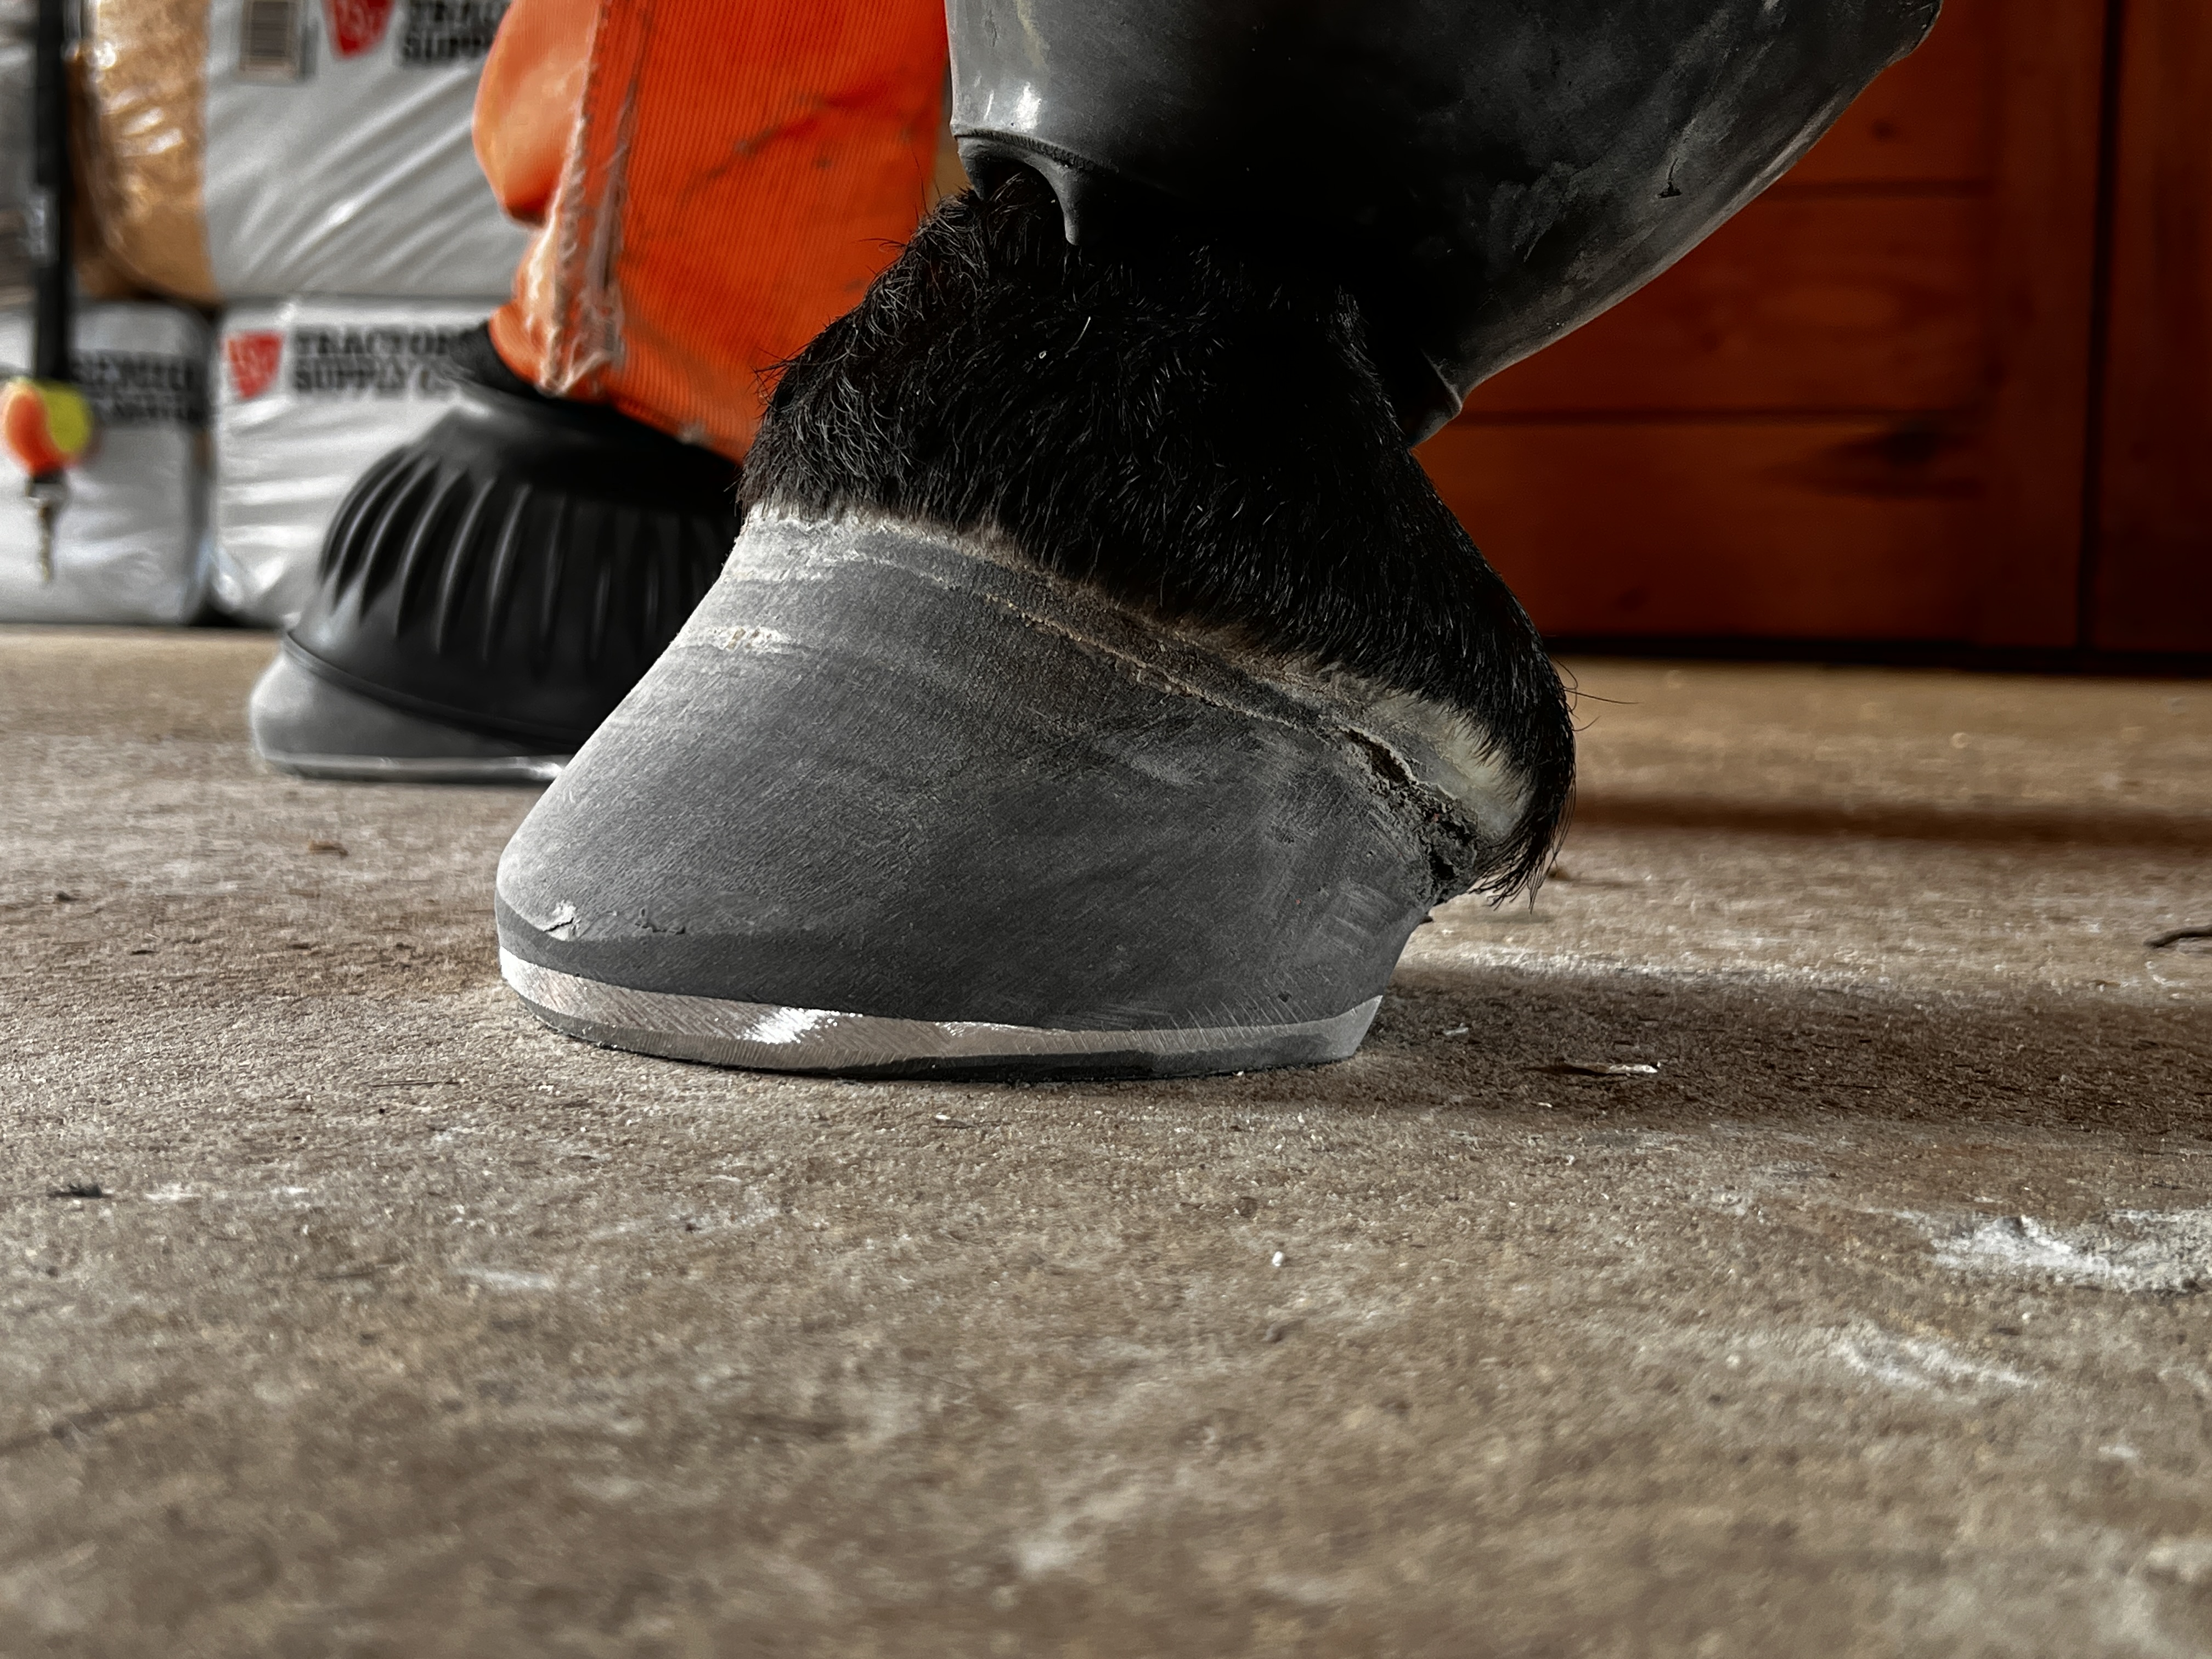
Anyway, here’s one foot of Attempt 2, Electric Bugaloo:
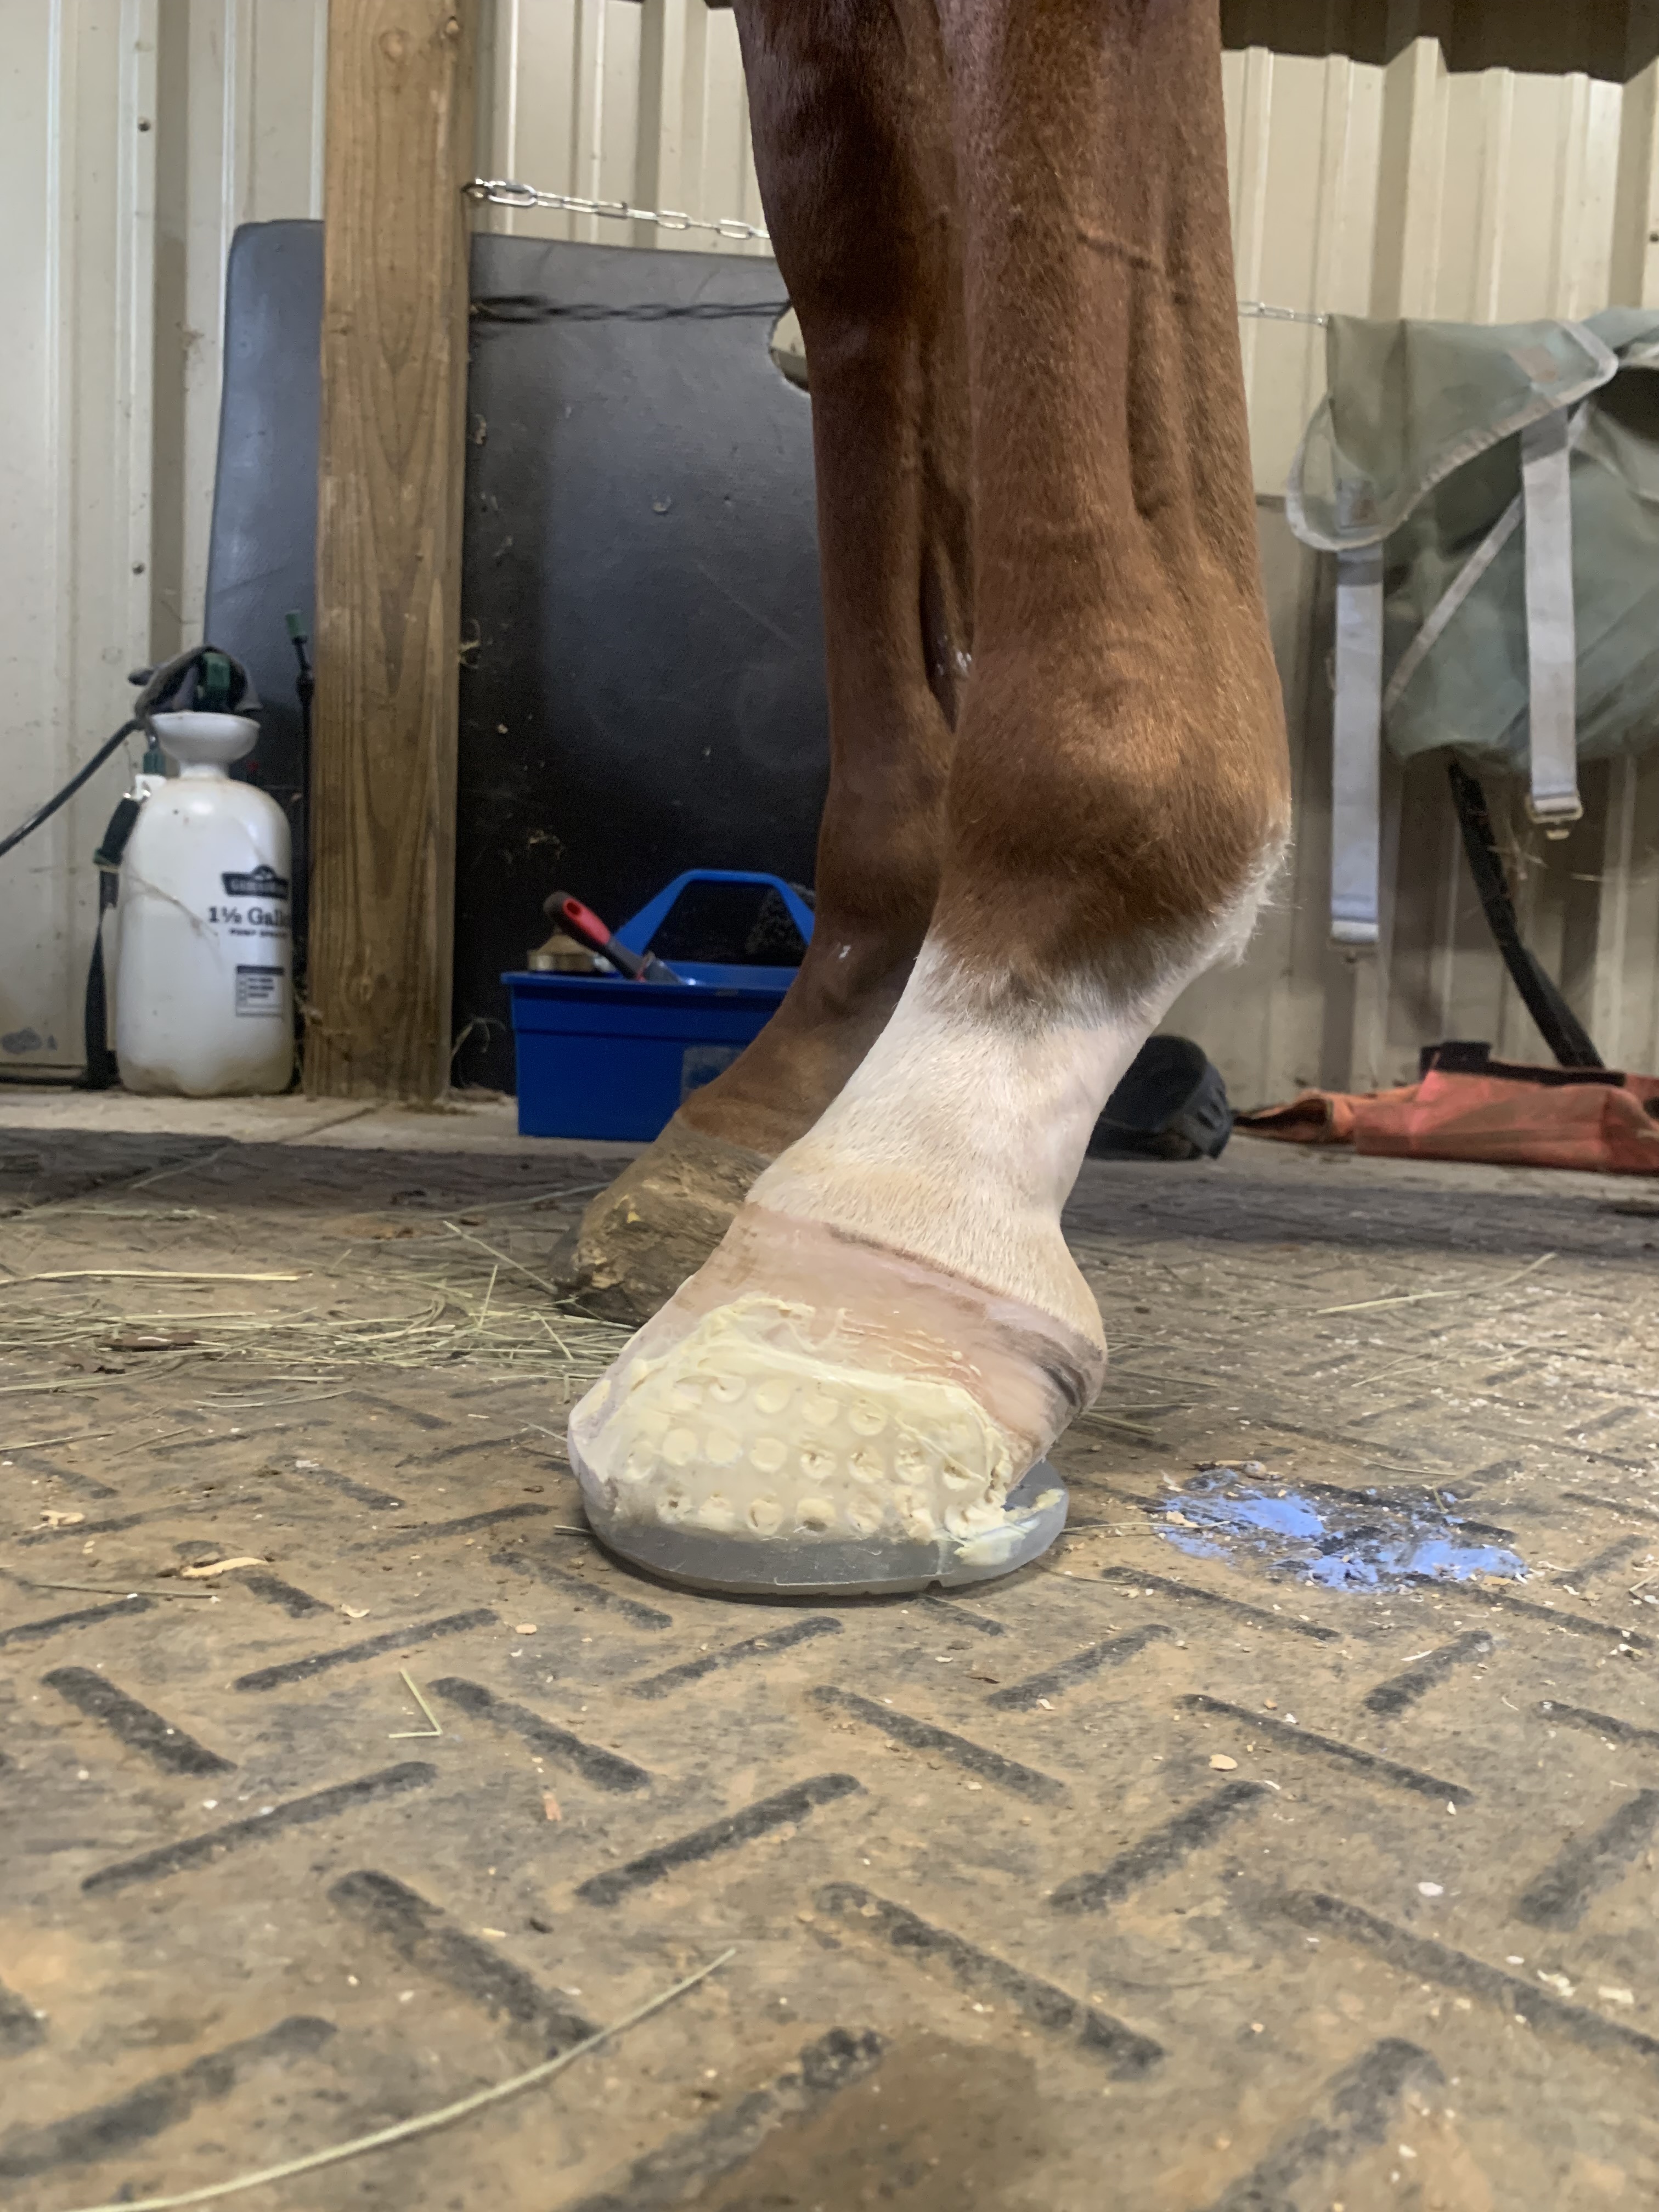
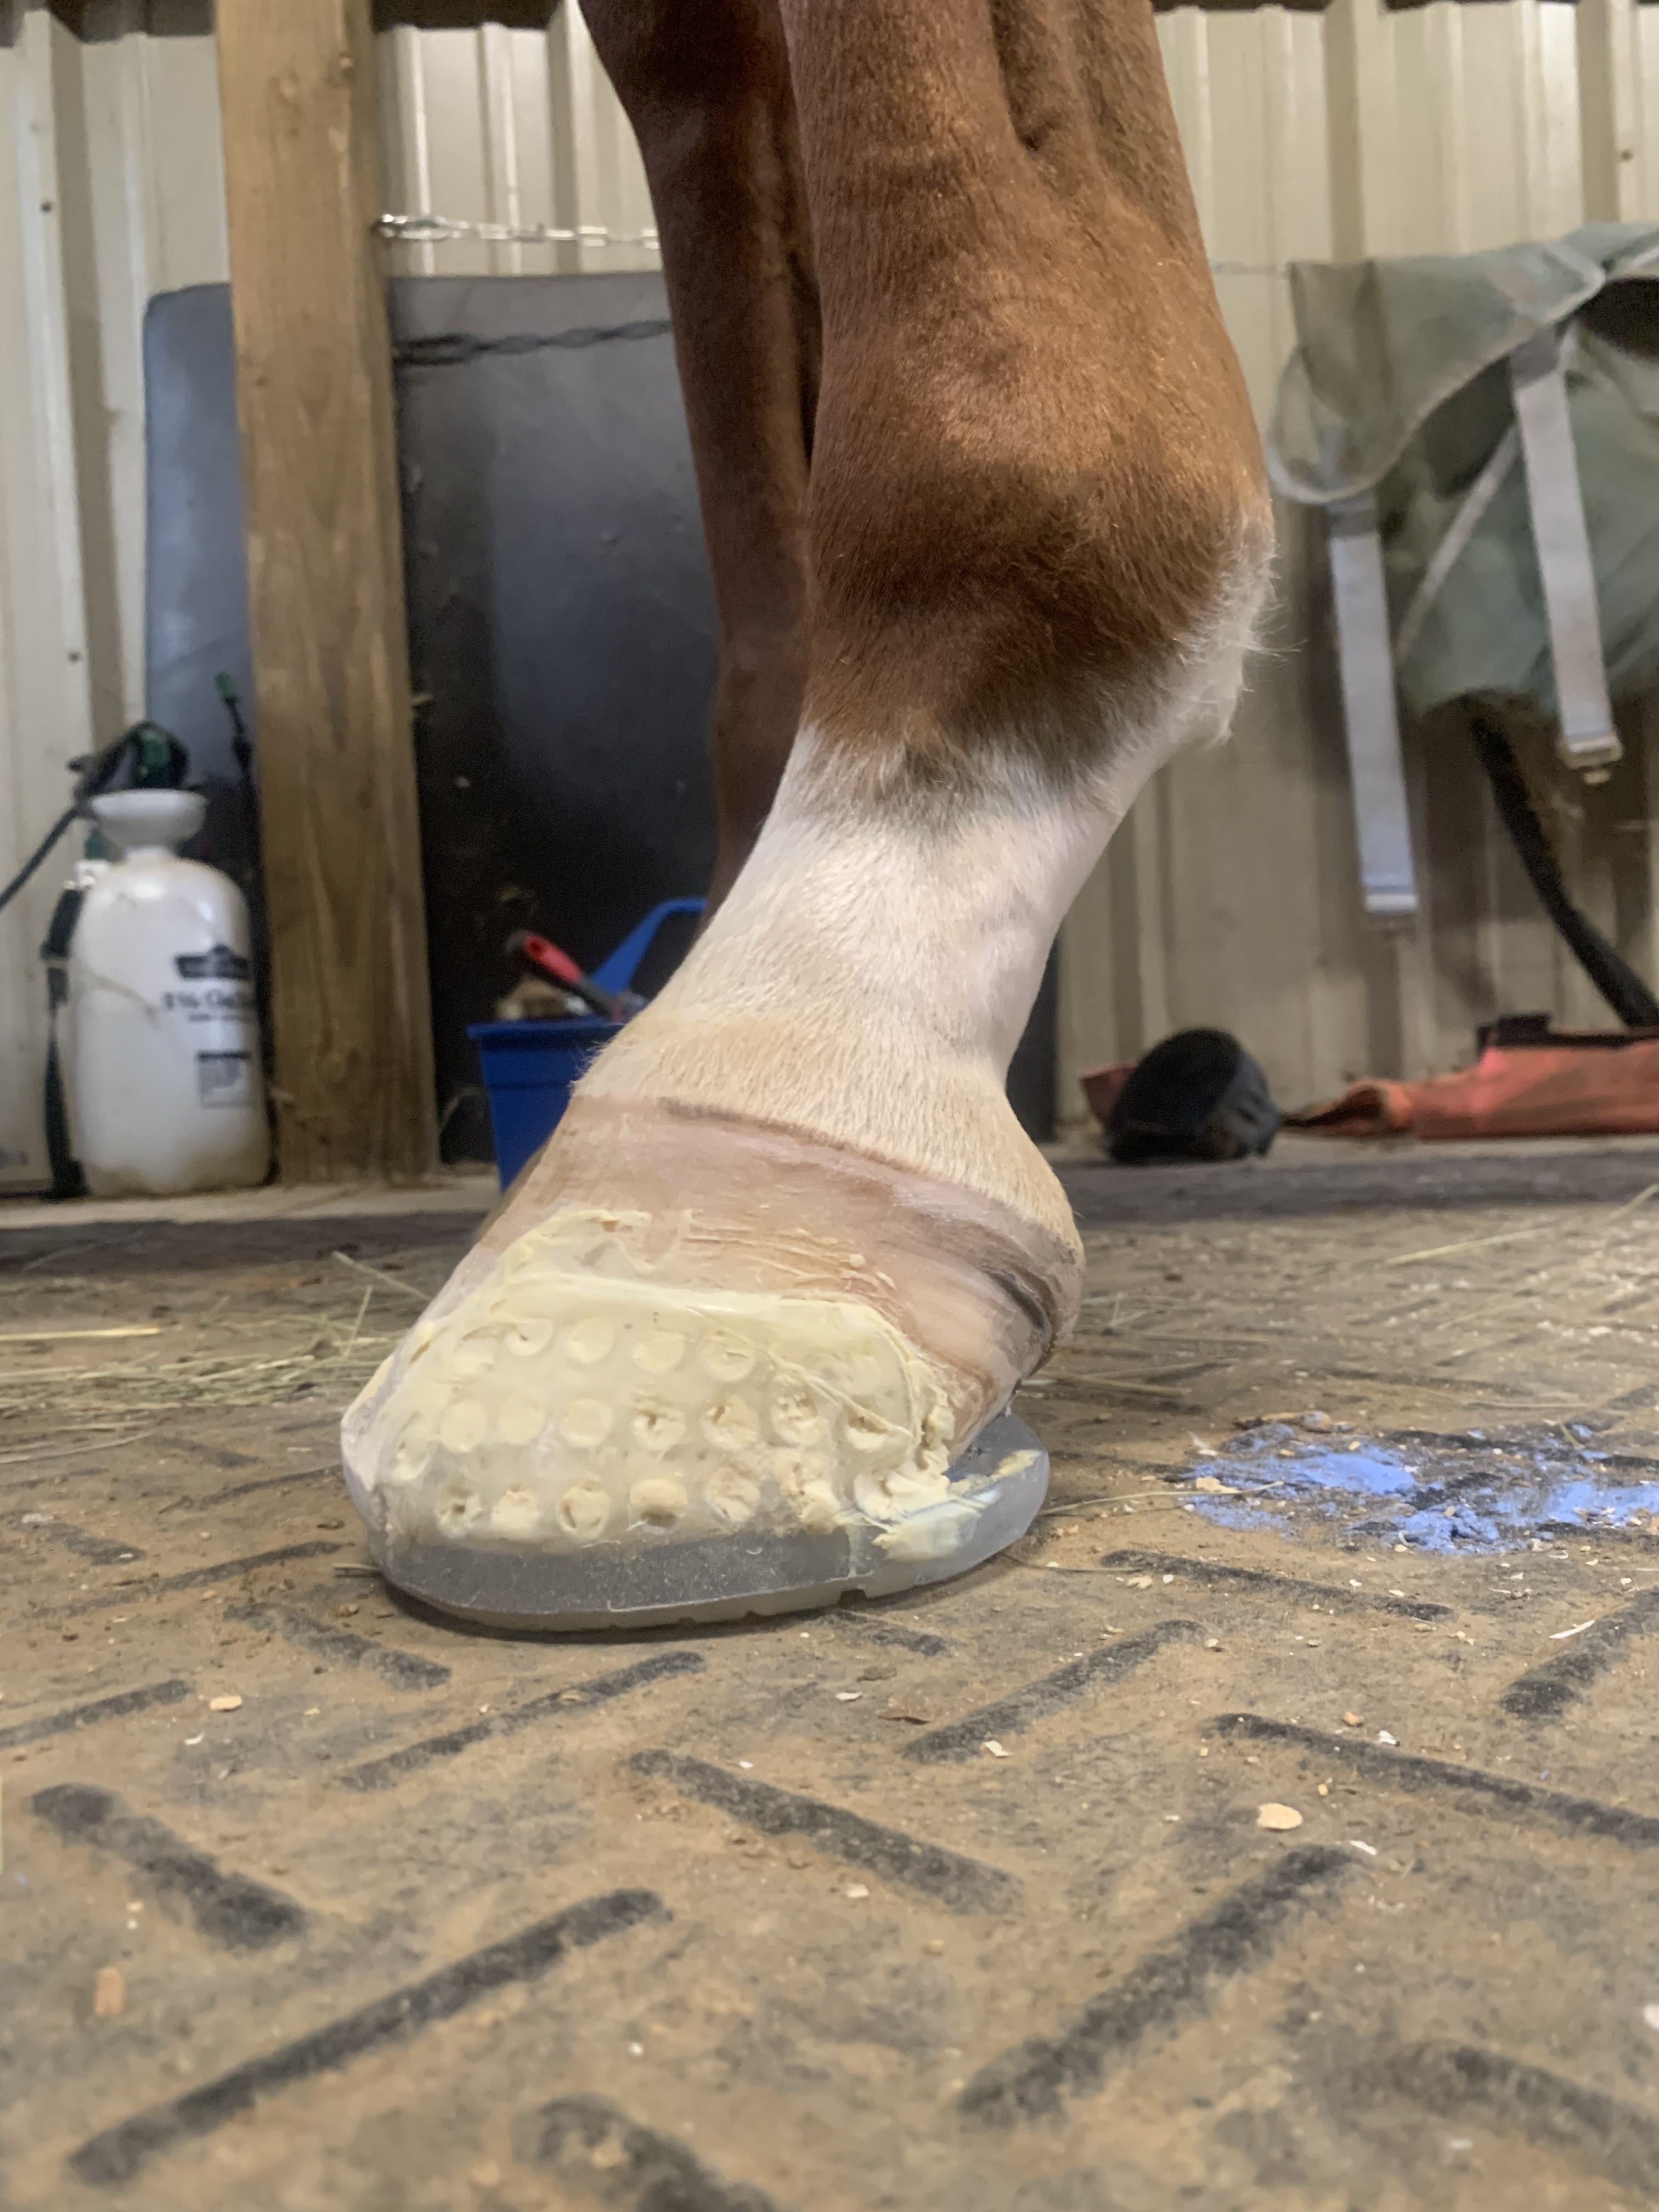
Mind, they’re quickly snapped pics from imperfect angles. I also did zero aesthetic cleaning up
I kept the glue cool (in a cooler but not packed in a ton of ice), sanded the living daylights out of his foot, and ground down (edit: rounded off) the heels of the shoe a lot. I also learned he will let me use the grinder ON his foot, which I did to clean up the toe after applying the shoe. I may go back and increase the breakover tomorrow, as well. Since he’s such a good boy.
I still have a lot to learn, but I’m happier with this application as far as geometry. I think. We will see how retention goes.
Side note, do any of the cuff shoes from Easy Care have LESS tread grip than the Versas? I’ve been told some of the issues with his hinds could be due to him twisting through the hocks and the shoe pulling away - an issue we have dealt with since day one. The twisting is less than it has been, but he’s still wringing a bit. I’m hoping good work and maybe some Adequan will lessen it even more, but in the meantime: shoe with less grip? Or can I just… grind down the versas?
5 Likes
That looks pretty purdy to me (my bar is low, I don’t have time to make them look as nice as the picture shared above, which is definitely a gorgeous application  )! Well done!! Much better placement, too, IMO.
I think you’re having the same issue to the one I’ve had with my twisty guy, where he twists out of the shoe and shreds the cuff. I have some shoes that look identical to a post I saw in the glue on group today where the cuff is just…destroyed lol. I’ve actually historically had better luck with Octos on his hind feet for this reason; I’m not sure why. Maybe slightly more flex across different attachment points? Idk. I also grind a pretty significant omnidirectional roll into the hind shoes, which seems to help. He’s currently in Speeds, which are the first cuff shoes I’ve tried on him in 18 months or so. They’ve been on a week and so far so good, but I also haven’t seen him get up to any real nonsense yet, so we’ll see.
I’d probably try just grinding down the versas for now. The 3Ds have less traction, but are harder to get the fit right IMO; there’s the new EasyShoe Roller, which looks interesting but the all-urethane option isn’t out yet and I hesitate to put metal on hinds in group turnout.
1 Like
Thank you so much for the feedback! I thought the placement was better, but I think I’m going to put a bit more roll to the front.
Also, yes he used to twist off his hind nail shoes to the point the lateral branch was on his sole. He’s doing some damage to the cuffs that makes me think he’s trying to twist these too. I’ll likely grind them down, but I’ll check out the Speeds - I don’t really want to learn a different glue method for the octos quite yet
2 Likes
Well, I solved my retention issue. To the point that now I want to get the shoes off and CAN’T I ended up cutting the shoes away from the cuffs and grinding down the glue. I’d ultimately like to reuse shoes, but that was not happening and I really tweaked my back in the process! I ended up putting him in boots overnight to let his feet dry out a bit and going back the next day to reset.
Now my issues have changed:
- How to balance enough DIM to keep dirt from getting trapped under the shoes for 4 weeks vs too much DIM and an ouchy horse. I’m tossing around trying the shoes without plugs and just putting DIM under the “frog support” part of the shoe. I need to find out if that is a bad idea, but it would allow me to pick out the foot.
- He did not make as much heel progress as I’d hoped behind. I realize this is a slow thing, and I’m going to reevaluate the trim. I’m wondering if he may need to go in wedges for a couple cycles… which is a whole can of worms I was hoping not to open.
- How tf do you sharpen a loop knife
Anyway, it’s a journey. I’m scouring FB for a used hoof jack but it may be a splurge. I’m also trying to learn as much as I can about trimming because I’m seeing the writing on the wall that I may need to take over entirely for a bit until/unless I can find someone to come out to the barn. I have realized that I cannot haul my horses during the week, one horse can’t haul at all, and I am running low on options! So fun!
1 Like
I have the High Country Plastics one (which, weirdly, is metal–not plastic). It’s around $100 instead of $200-250, and it has met my amateur trimming needs well. FWIW, my farrier does like to say jokingly that cheap, crappy farrier tools help keep her in business. People wanting to DIY will buy a cheap rasp or nippers, struggle tremendously, then decide to keep paying the farrier. She is awesome and has taught me some trimming basics plus passed some of her almost-worn-out tools along to me so I can have used but quality instead of new but crap.
Thank you for sharing your journey! I am reasonably comfortable trimming but would love to branch out to DIY composite glue-ons. It’s intimidating, but all this info helps.
3 Likes
If you’re ambitious and have a heat gun you can buy new tabs for $15/pair and “weld” them on to reuse the shoe. 
If you don’t need the cradle or the adjustability, I have been using the $80 Yoder Aluminum Hoof Stand from Wellshod for a couple years now and it works great. Even with 5 horses to trim I still can’t really justify the cost of a Hoofjack.
The stand I linked is adjustable and it’s only $89.95 from Valley Vet.
1 Like